

Let me settle something right now: garlic parmesan wings are superior to buffalo wings. I said what I said.
Don’t get me wrong—I love a good buffalo wing. But there’s something about that buttery, garlicky, cheesy coating that just hits different. The problem? Ordering them constantly gets expensive, and honestly, most restaurants don’t make them crispy enough for my taste.
So I started making them at home, and after perfecting my technique, I’m not even exaggerating when I say these are better than what you’d get at Wingstop or Buffalo Wild Wings. The wings are ridiculously crispy (without a deep fryer!), and that garlic parm sauce? It’s the real deal—rich, garlicky, and properly cheesy. My friends now request these for every game day gathering. That’s how you know you’ve won. 🙂
Why You’ll Love This Recipe
Extra Crispy Without Deep Frying The secret weapon here is baking powder mixed with the seasoning. It raises the pH of the chicken skin, which helps it crisp up beautifully in the oven. You get that perfect crunch without dealing with a pot of hot oil.
That Addictive Garlic Parmesan Sauce This isn’t some weak, barely-there sauce. It’s a proper buttery, garlicky, cheesy coating that clings to every wing. One batch is never enough—people always want more.
Works in Oven, Air Fryer, or Grill I’m giving you instructions for all three methods because everyone’s got their preferred cooking style. All three produce excellent results, so use whatever works for your setup.
Way Cheaper Than Ordering Out A pound of chicken wings at a restaurant costs around $15-20. You can buy 3 pounds of wings for that same price and make a huge batch at home. The math makes sense.
Perfect for Game Day, Parties, or Snacking These are the ultimate crowd-pleaser. Set out a platter of these wings and watch them disappear in minutes. They’re also dangerous for solo snacking—you’ll eat way more than you planned.
Better Than Restaurant Wings (Seriously!) I’m not just saying this—these legitimately taste better than what you’d get at most wing places. You control the crispiness, the amount of sauce, and the quality of ingredients. Once you nail these, you’ll rarely order wings out again.
Ingredients
For the Wings:
- 3 lbs chicken wings (drumettes and flats separated, tips removed)
- 1½ tablespoons baking powder (aluminum-free)
- 1 teaspoon salt
- 1 teaspoon garlic powder
- ½ teaspoon onion powder
- ½ teaspoon black pepper
- ½ teaspoon paprika
For the Garlic Parmesan Sauce:
- 6 tablespoons unsalted butter
- 6 cloves fresh garlic, minced
- 1 cup freshly grated parmesan cheese
- 2 tablespoons heavy cream (optional, for extra creaminess)
- 1 teaspoon Italian seasoning
- ½ teaspoon garlic powder
- ¼ teaspoon salt
- ¼ teaspoon black pepper
- Pinch of red pepper flakes (optional)
For Garnish:
- Fresh parsley, chopped
- Extra grated parmesan cheese
- Lemon wedges
Key Ingredient Notes:
Wing Prep Matters: Buy whole wings and separate them yourself, or buy them already separated into drumettes and flats. Discard (or save for stock) the wing tips—they don’t have enough meat. Pat the wings completely dry before seasoning. Moisture is the enemy of crispy skin.
Baking Powder (Not Baking Soda!): This is crucial—you need aluminum-free baking powder, not baking soda. Baking powder helps the skin dry out and crisp up in the oven. It doesn’t affect the taste at all, just the texture. Don’t skip this ingredient.
Fresh Garlic is Essential: Just like with the BWW recipe, fresh garlic is non-negotiable. The sauce is garlic-forward, so using jarred minced garlic will give you an inferior result. Fresh garlic takes 2 minutes to mince and makes all the difference.
Real Parmesan Cheese: Buy a block of Parmigiano-Reggiano and grate it yourself. The pre-grated stuff doesn’t melt as smoothly, and the powdered stuff from a can isn’t even in the same category. This sauce deserves real cheese.
Butter Quality: Since butter is the base of the sauce, use good quality unsalted butter. You want that rich, creamy flavor that makes the sauce irresistible.
Step-by-Step Instructions
Step 1: Prep and Dry the Wings (This Step is Critical!)
Pat your chicken wings completely dry with paper towels. I mean really dry—this is the most important step for crispy skin. Any moisture on the wings will steam them instead of crisping them.
Place the dried wings in a large bowl. In a small bowl, mix together the baking powder, salt, garlic powder, onion powder, black pepper, and paprika. Sprinkle this mixture over the wings and toss until every wing is evenly coated.
Here’s the game-changer: if you have time, place the seasoned wings on a wire rack set over a baking sheet and refrigerate them uncovered for 30 minutes to 2 hours. This extra drying time makes them even crispier. If you’re in a hurry, you can skip this, but the results are noticeably better if you do it.
Step 2: Cook the Wings (Choose Your Method)
Oven Method (Most Reliable): Preheat your oven to 425°F. Line a baking sheet with aluminum foil and place a wire rack on top. Spray the rack with cooking spray. Arrange the wings on the rack in a single layer, not touching. Make sure there’s space between them for air circulation.
Bake for 45-50 minutes, flipping halfway through, until the wings are golden brown and crispy. The internal temperature should reach 165°F, but honestly, the visual test is more important—you want them deeply golden and crispy.
Air Fryer Method (Fastest): Preheat your air fryer to 380°F. Working in batches (don’t crowd them!), arrange wings in a single layer in the basket. Cook for 22-25 minutes, shaking the basket every 7-8 minutes to ensure even cooking. The wings should be golden and crispy.
Grill Method (Best Flavor): Preheat your grill to medium-high heat (about 400°F). Oil the grates well. Grill the wings for 20-25 minutes, turning every 5-7 minutes, until they’re charred in spots and cooked through. Watch for flare-ups from the dripping fat.
Step 3: Make the Garlic Parmesan Sauce
While the wings are cooking (or right after they’re done), make the sauce. In a large skillet or saucepan, melt the butter over medium heat. Once melted, add the minced garlic and cook for 1-2 minutes, stirring constantly, until fragrant and lightly golden. Don’t let it burn!
Add the Italian seasoning, garlic powder, salt, pepper, and red pepper flakes. Stir for about 30 seconds. If you’re using heavy cream, add it now and stir to combine.
Remove from heat and stir in the grated parmesan cheese. Stir until the cheese is completely melted and the sauce is smooth and glossy. If it’s too thick, add a tablespoon of milk or cream. If it’s too thin, add more cheese.
Step 4: Toss and Coat
This is where the magic happens. Transfer your hot, crispy wings to a large bowl. Pour about three-quarters of the garlic parm sauce over the wings and toss immediately, making sure every wing gets coated. The heat from the wings will help the sauce cling beautifully.
You want the wings well-coated but not swimming in sauce. Reserve some sauce for drizzling or for people who want extra.
Step 5: Serve Immediately
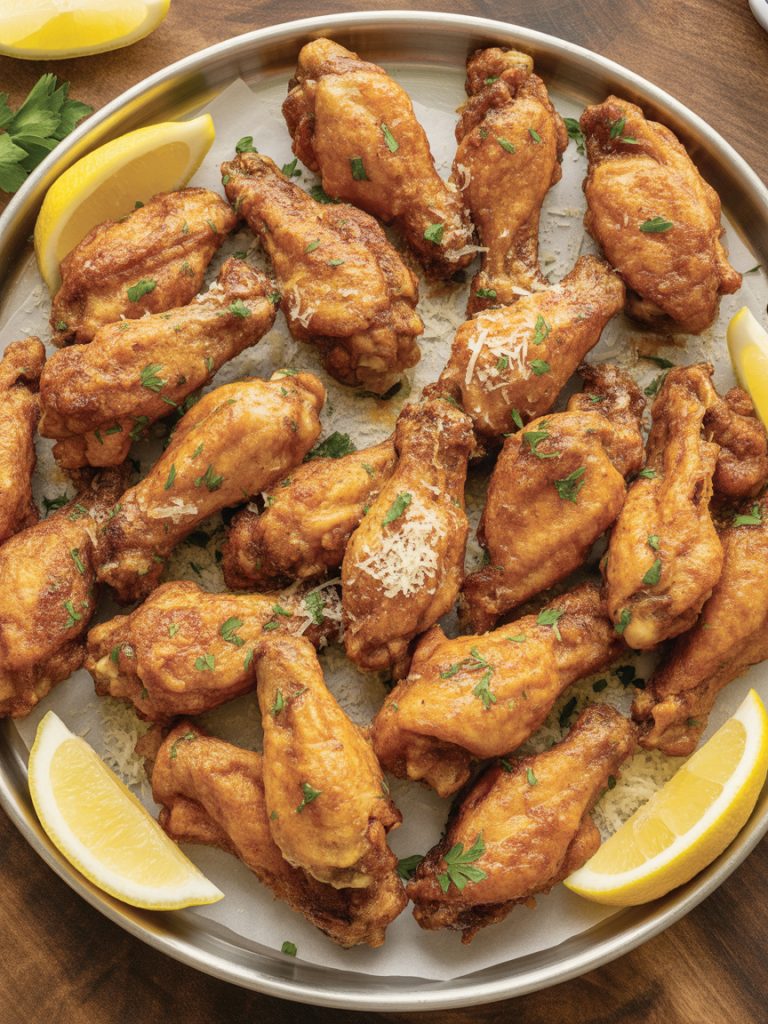
Transfer the sauced wings to a serving platter. Drizzle with any remaining sauce, garnish with chopped fresh parsley and extra grated parmesan. Serve hot while they’re still crispy and the sauce is glossy.
Add some lemon wedges on the side—a squeeze of fresh lemon over garlic parm wings is chef’s kiss.
Serving Suggestions
Classic Wing Accompaniments Serve with celery sticks, carrot sticks, and a side of ranch or blue cheese dressing. This is the traditional wing experience and for good reason—the cool, crisp vegetables balance the rich, buttery wings perfectly.
Extra Dipping Sauces Even though these wings are already sauced, some people love extra dipping options. Offer ranch, blue cheese, marinara sauce, or even extra garlic parm sauce on the side.
Side Dishes for a Complete Meal Pair these with French fries (or sweet potato fries), coleslaw, potato salad, or a simple green salad. If you want to keep the Italian vibe going, serve with garlic bread or Caesar salad.
Game Day Presentation Arrange the wings on a large platter lined with parchment paper. Surround them with veggie sticks, dipping sauces in small bowls, and plenty of napkins. This is finger food at its finest.
Make it a Wing Bar If you’re feeding a crowd, make multiple flavors—garlic parm, buffalo, BBQ, lemon pepper. Let people sample different varieties. Garlic parm will always be the first to disappear though.
Beverage Pairing These wings pair perfectly with beer (light lagers or IPAs work great), but they’re also excellent with iced tea, lemonade, or even a crisp white wine if you’re feeling fancy.
Storage Tips
Refrigeration
Store leftover wings (sauced or unsauced) in an airtight container in the fridge for up to 3 days. The sauce will make them lose some crispiness over time, but they’ll still taste great.
Reheating Without Losing Crispiness
Here’s the trick: reheat wings in the oven or air fryer, not the microwave. Preheat your oven to 375°F, place wings on a wire rack over a baking sheet, and heat for 10-15 minutes until hot and crispy again. Air fryer works even faster—just 5-7 minutes at 350°F.
If the wings seem dry after reheating, toss them with a bit of extra garlic parm sauce.
Freezing
You can freeze cooked wings (before saucing) for up to 2 months. Let them cool completely, then freeze in a single layer on a baking sheet. Once frozen solid, transfer to a freezer bag. Reheat from frozen in the oven at 375°F for 20-25 minutes, then toss with fresh sauce.
Don’t freeze wings that are already sauced—the texture gets weird when thawed.
Make-Ahead Strategy
You can prep the wings with the seasoning and refrigerate them (uncovered on a rack) up to 24 hours before cooking. Make the sauce up to 3 days ahead and store it in the fridge. Reheat the sauce gently on the stovetop, then toss with freshly cooked wings.
Final Thoughts
Here’s the truth: once you master homemade garlic parm wings, you’ll rarely order them from restaurants again. Not because you’re trying to save money (though you will), but because yours will legitimately taste better.
There’s something incredibly satisfying about pulling a tray of perfectly crispy wings out of the oven, tossing them in that glossy garlic parm sauce, and watching them disappear in minutes. It’s one of those recipes that makes you feel like you’ve unlocked a secret that restaurants don’t want you to know.
The best part? You can make these as often as you want without spending a fortune. Game day, movie night, random Tuesday when you’re craving wings—they’re always within reach.
Give these a try and let me know what you think! Tag me on Instagram or Pinterest with your wing creations. And if you come up with your own sauce variations or cooking tweaks, share them in the comments. We’re all in this delicious wing journey together.
Now go make some restaurant-quality magic happen in your kitchen. Your taste buds are about to thank you.
Happy cooking!
— Kip
Garlic Parm Chicken Wings (Crispy & Restaurant-Quality!)
Description
These Garlic Parm Chicken Wings deliver restaurant-quality results at home with extra crispy skin and that iconic buttery garlic parmesan sauce. The secret? A simple baking powder trick that creates incredibly crispy wings without deep frying, then tossing them in a rich sauce made with real butter, fresh garlic, and freshly grated parmesan. Perfect for game day, parties, or anytime you're craving wings that rival Wingstop or Buffalo Wild Wings.
Ingredients
For the Wings:
For the Garlic Parmesan Sauce:
For Garnish:
Instructions
-
Pat wings completely dry with paper towels. In a large bowl, toss wings with baking powder, salt, garlic powder, onion powder, black pepper, and paprika until evenly coated.
-
Optional but recommended: Place seasoned wings on a wire rack over a baking sheet and refrigerate uncovered for 30 minutes to 2 hours for extra crispiness.
-
To Bake: Preheat oven to 425°F. Arrange wings on a wire rack over a foil-lined baking sheet in a single layer. Bake 45-50 minutes, flipping halfway, until golden and crispy (165°F internal temp).
-
To Air Fry: Preheat air fryer to 380°F. Cook wings in batches for 22-25 minutes, shaking basket every 7-8 minutes.
-
To Grill: Preheat grill to 400°F. Grill wings 20-25 minutes, turning every 5-7 minutes, until charred and cooked through.
-
While wings cook, make sauce: Melt butter in a skillet over medium heat. Add minced garlic and cook 1-2 minutes until fragrant. Add Italian seasoning, garlic powder, salt, pepper, red pepper flakes, and heavy cream (if using). Cook 30 seconds.
-
Remove from heat and stir in grated parmesan until melted and smooth.
-
Transfer hot wings to a large bowl. Pour ¾ of the sauce over wings and toss to coat completely.
-
Transfer to serving platter, drizzle with remaining sauce, garnish with parsley, extra parmesan, and lemon wedges. Serve immediately.
