

There’s something about split pea soup that just feels like home. Maybe it’s the thick, creamy texture, or the way the smoky ham flavors everything, or just the fact that it’s been comfort food for generations. Whatever it is, this soup hits different.
I used to think split pea soup was boring—something you only made because you had a leftover ham bone. Then I actually tried making it properly, with good ingredients and the right technique, and I completely changed my mind. This isn’t bland, mushy baby food. This is rich, flavorful, satisfying soup that’s actually worth making on purpose.
The best part? It’s ridiculously cheap to make, freezes beautifully, and gets even better the next day. This is the kind of soup you make on Sunday and eat all week, feeling smug about how healthy and budget-friendly you’re being while actually enjoying every spoonful.
Why You’ll Love This Split Pea Soup
Classic Comfort Food: This is old-school, no-nonsense comfort. Thick, hearty, warming soup that tastes like something your grandmother would make—in the best possible way. Pure nostalgia in a bowl.
Ridiculously Affordable: Split peas are dirt cheap, and if you’re using leftover ham, this soup costs practically nothing. You can feed a family of four for under $10. Budget-friendly comfort food at its finest.
Packed with Protein and Fiber: Split peas are nutritional powerhouses—high in protein, loaded with fiber, and full of vitamins. Add ham for extra protein, and you’ve got a legitimately healthy meal that keeps you full for hours.
Gets Better with Time: This is one of those magical soups that actually improves as it sits. The flavors deepen, the texture gets creamier, and day-three soup is somehow even better than day-one soup. That rarely happens.
Freezer-Friendly Champion: Make a huge batch and freeze portions. You’ll have homemade soup ready to go whenever you need it. It’s like having a cozy hug waiting in your freezer.
One-Pot Simplicity: Everything cooks in one pot. Minimal dishes, maximum flavor. The soup basically makes itself while you go do other things. That’s my kind of cooking.
Ingredients You’ll Need
For the Soup:
- 1 lb dried split peas (green or yellow)
- 2 tablespoons olive oil or butter
- 1 large onion, diced
- 3 carrots, peeled and diced
- 3 celery stalks, diced
- 4 cloves garlic, minced
- 8 cups ham broth or chicken broth
- 2 cups diced ham (about 1 lb)
- 1 ham bone (optional but adds incredible flavor)
- 2 bay leaves
- 1 teaspoon dried thyme
- 1/2 teaspoon dried marjoram (optional)
- 1/2 teaspoon smoked paprika
- Salt and black pepper to taste
- Fresh parsley for garnish
Key Notes:
Split Peas: Green split peas are traditional and have a slightly earthier flavor. Yellow split peas are a bit milder and sweeter. Both work perfectly—use what you can find. No need to soak them overnight like other dried beans!
Ham Options: Leftover baked ham is ideal—just dice it up. A ham bone adds incredible depth (simmer it in the soup, then remove and shred any meat off it). Ham steak works great too. In a pinch, diced Canadian bacon or even bacon will do.
Broth Choice: If you have a ham bone, make ham broth by simmering it in water with onions and carrots for an hour. Otherwise, use good chicken broth. The broth is the foundation, so don’t use watery store-brand stuff.
The Mirepoix: Onions, carrots, and celery are the holy trinity of soup-making. They create the flavor base. Don’t skip them—they’re essential.
Texture Control: This soup naturally thickens as the split peas break down. If you like it chunkier, don’t cook it as long. For super smooth and creamy, use an immersion blender to partially or fully blend it.
Step-by-Step Instructions
Step 1: Prep Your Ingredients
Rinse the split peas in a colander under cold water, picking out any stones or debris. Split peas don’t need soaking—they cook relatively quickly compared to other dried legumes.
Dice your onion, carrots, and celery into small, uniform pieces. The smaller you dice them, the better they’ll incorporate into the soup.
Step 2: Sauté the Vegetables
Heat the olive oil or butter in a large pot or Dutch oven over medium heat. Add the diced onion, carrots, and celery.
Cook for 5-7 minutes, stirring occasionally, until the vegetables soften and the onions become translucent. This builds the flavor foundation. Add the minced garlic and cook for another minute until fragrant.
Step 3: Add Split Peas and Broth
Add the rinsed split peas to the pot, stirring to coat them with the vegetables and oil. Pour in the ham broth (or chicken broth).
Add the bay leaves, thyme, marjoram if using, and smoked paprika. If you have a ham bone, nestle it into the liquid—it’ll add so much flavor as it simmers.
Step 4: Simmer Until Tender
Bring the soup to a boil, then reduce the heat to low. Cover partially and simmer for 60-90 minutes, stirring occasionally to prevent sticking.
The split peas should break down and become tender, naturally thickening the soup. If it gets too thick, add more broth or water. If it’s too thin, simmer uncovered to reduce it.
Step 5: Add the Ham
If you used a ham bone, remove it from the pot. Let it cool slightly, then shred any meat off the bone and add it back to the soup. Discard the bone.
Stir in your diced ham. Let it heat through for about 5 minutes. The ham doesn’t need to cook—you’re just warming it up and letting its flavor infuse the soup.
Step 6: Adjust Texture and Season
Remove the bay leaves. At this point, decide on your texture. Want it smooth? Use an immersion blender to partially blend it. Leave it chunky? Just mash a few spoonfuls against the side of the pot to thicken it naturally.
Taste and adjust seasoning. Depending on how salty your ham and broth are, you might not need much extra salt. Add black pepper to taste. Sometimes a splash of vinegar or lemon juice brightens everything up.
Step 7: Serve Hot
Ladle the soup into bowls while it’s piping hot. Garnish with fresh chopped parsley for color and freshness.
Serve with crusty bread, crackers, or cornbread. Watch as the soup disappears faster than you expected. That’s always a good sign.
Serving Suggestions
Split pea soup is hearty enough to stand alone, but here’s how to make it even better:
Bread is Essential: Serve with crusty sourdough, rye bread, or warm dinner rolls. The bread is perfect for soaking up the thick, creamy soup. Cornbread works great too for a slightly sweet contrast.
Classic Toppings: A dollop of sour cream adds richness and tang. Crispy croutons provide textural contrast. Crumbled bacon on top never hurts. Fresh parsley brightens everything up.
Make it a Meal: Pair with a simple green salad or coleslaw for crunch and freshness. Grilled cheese sandwiches are the ultimate split pea soup companion—dunk them right in!
Add More Vegetables: Stir in some diced potatoes in the last 30 minutes for extra heartiness. Spinach or kale added at the end adds nutrition and color.
Smoky Variations: Add a spoonful of liquid smoke for extra smokiness. Diced smoked sausage instead of ham changes the flavor profile completely. Bacon fat instead of oil amps up the smoky factor.
Leftovers Get Better: This soup thickens dramatically as it sits. Add broth or water when reheating to get it back to the right consistency. The flavor deepens overnight, making leftovers even more delicious.
Crunch Factor: Top with crispy fried onions, homemade croutons, or even crushed crackers for textural contrast to the creamy soup.
Storage Tips
Refrigerator: Store in an airtight container for up to 5 days. The soup will continue to thicken—split peas absorb liquid like crazy. Add broth or water when reheating until you get the consistency you want.
Reheating: Reheat gently on the stovetop over medium-low heat, stirring frequently and adding liquid as needed. You can microwave individual portions, but stovetop gives better results and lets you control the thickness.
Freezing: This soup freezes beautifully for up to 3 months. Let it cool completely, then portion into freezer-safe containers, leaving some room at the top for expansion. Thaw overnight in the fridge and reheat on the stovetop.
Texture After Freezing: The soup might separate slightly after freezing—just whisk it while reheating and it’ll come back together. You’ll definitely need to add liquid when reheating frozen soup.
Make-Ahead Strategy: This is perfect for meal prep. Make a huge batch on Sunday and portion it out for lunches all week. The flavors improve every day, so you’re actually getting better soup as the week goes on.
Portion Control: Freeze in individual portions so you can pull out exactly what you need. Mason jars work great for this—just leave an inch of headspace and don’t seal them until they’re completely frozen.
Pro Tip: If you’re planning to freeze this, slightly undercook the vegetables. They’ll finish cooking when you reheat, and you won’t end up with mushy carrots and celery.
Final Thoughts
I’ll be honest—split pea soup doesn’t sound exciting. It’s not trendy, it’s not Instagram-worthy, and it definitely doesn’t have the sex appeal of, say, a creamy Tuscan soup with sun-dried tomatoes. But you know what? It’s legitimately good.
This is the kind of soup that makes you feel taken care of. It’s warm, filling, nourishing, and comforting in a way that fancy soups just aren’t. There’s a reason this recipe has been around for generations—it works. It’s simple, affordable, and satisfying.
My favorite thing about this soup is how it gets better every day. Day one is good. Day two is great. Day three? Chef’s kiss. The flavors deepen, the texture gets even creamier, and somehow it just keeps improving. That’s rare in cooking.
Make a big batch this weekend. Freeze half for later. You’ll thank yourself when you have homemade soup ready to go on a busy weeknight.
Thanks for cooking with me. Now go make some old-school comfort!
With gratitude,
Kip
The Best Split Pea Soup with Ham (Classic Comfort!)
Description
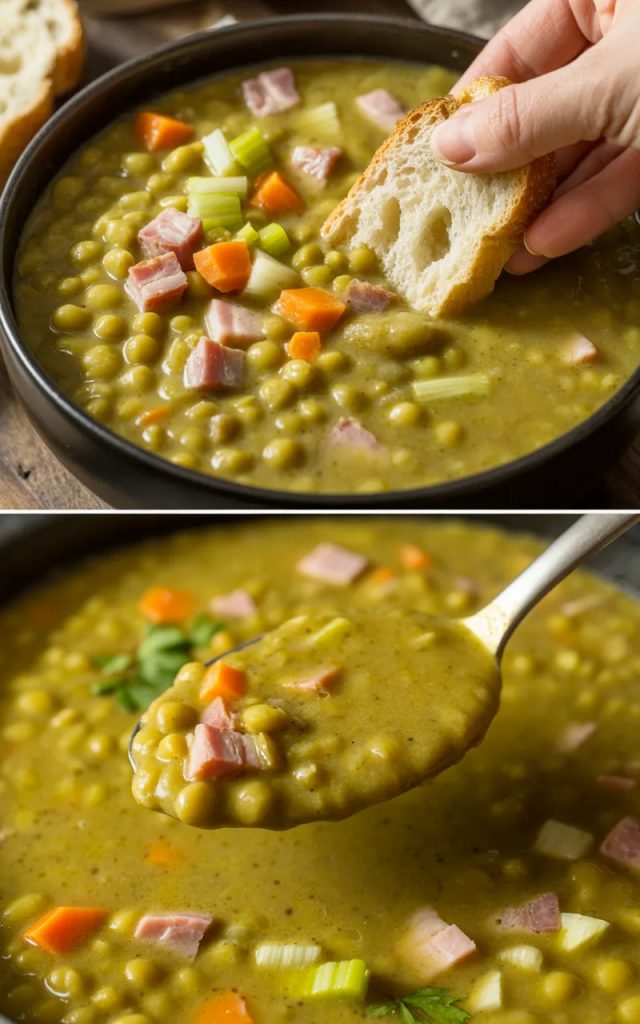
This split pea soup with ham is thick, creamy, and packed with flavor. Made with tender split peas, smoky ham, carrots, celery, and herbs for the ultimate comfort food!
Ingredients
Main Components:
Instructions
-
Prep split peas: Rinse split peas in colander, picking out any debris. No soaking needed.
-
Sauté vegetables: Heat oil or butter in large pot over medium heat. Add onion, carrots, and celery. Cook 5-7 minutes until softened. Add garlic, cook 1 minute.
-
Add peas and broth: Add split peas to pot, stir to coat. Pour in broth. Add bay leaves, thyme, marjoram, smoked paprika, and ham bone if using.
-
Simmer: Bring to boil, reduce heat to low, cover partially. Simmer 60-90 minutes, stirring occasionally, until split peas are tender and breaking down. Add liquid if too thick.
-
Add ham: Remove ham bone if used, shred any meat off bone and return to pot. Stir in diced ham, heat through 5 minutes.
-
Adjust texture: Remove bay leaves. Use immersion blender to partially blend for smooth texture, or mash some soup against pot sides. Taste and adjust seasoning.
-
Serve: Ladle into bowls, garnish with fresh parsley. Serve hot with crusty bread!
