
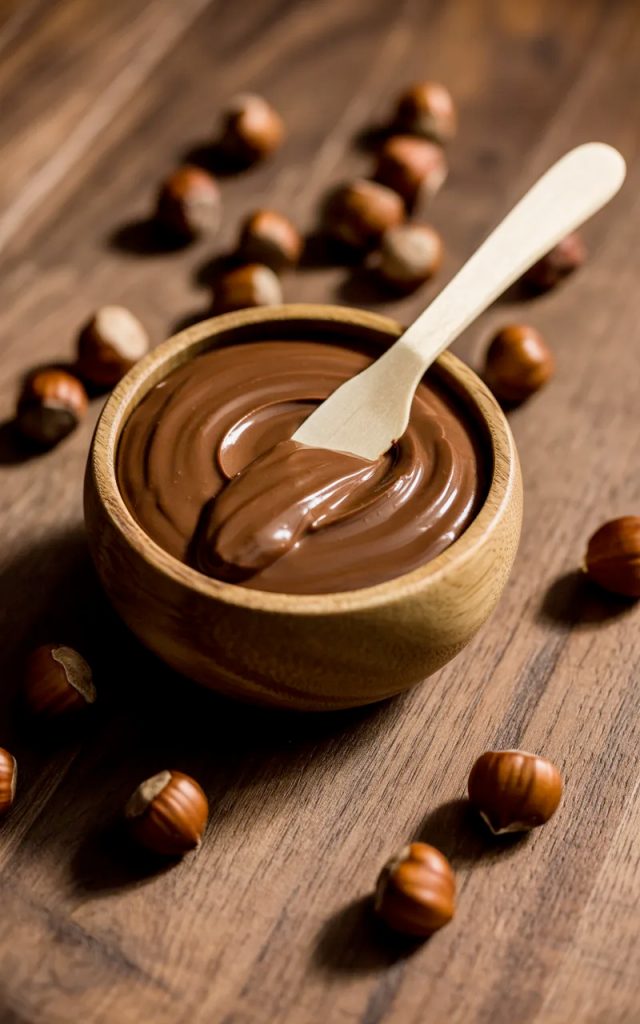

Let’s be honest — Homemade Nutella is one of those things that’s very hard to say no to. Chocolate, hazelnuts, smooth and spreadable — it’s basically dessert pretending to be a breakfast condiment, and we’ve all fallen for it at some point.
The problem is the store-bought version is loaded with sugar, palm oil, and enough additives to make you squint at the label. The good news? You can make your own version at home with real, clean ingredients, and it tastes even better than the original. Oh, and did I mention it has roughly half the calories? Yeah, this recipe is the one.
All you need is a handful of hazelnuts, some good quality cocoa, and a food processor. Twenty minutes later you’ve got a jar of homemade chocolate hazelnut spread that will completely ruin store-bought Nutella for you — in the best possible way. Let’s make it.
Why you’ll love this recipe
- Half the calories. The store-bought version packs around 200 calories per two tablespoons. This homemade version comes in at roughly 120 calories for the same amount. That’s a win you can taste guilt-free.
- Clean ingredients only. No palm oil, no artificial flavors, no preservatives. Just real food you can actually pronounce.
- Incredibly easy to make. If you own a food processor, you’re already halfway there. The whole process takes about 20 minutes from start to finish.
- Naturally gluten free. Every single ingredient in this recipe is naturally gluten free, making it a great option for anyone avoiding gluten.
- Easily made vegan. Swap regular milk for any plant-based milk and you’ve got a fully vegan chocolate hazelnut spread that’s just as good.
- Kids absolutely love it. Spread it on toast, waffles, or fruit and watch it disappear in seconds. IMO this is one of the best ways to get kids excited about eating something that’s actually made from real food.
Ingredients with key notes
- 2 cups raw hazelnuts — this is the star of the show. Raw hazelnuts work best because you’re going to roast them yourself, which brings out a much deeper, nuttier flavor than pre-roasted ones. Don’t skip the roasting step.
- 3 tablespoons unsweetened cocoa powder — use good quality cocoa here. The better the cocoa, the richer and more chocolatey your spread will taste. Dutch-processed cocoa gives a slightly smoother, less bitter flavor if you prefer that.
- 3 tablespoons powdered sugar — powdered sugar dissolves much better than granulated sugar in this recipe, giving you a smoother final texture. Adjust the amount to your preferred sweetness level.
- 2 tablespoons coconut oil, melted — this helps give the spread its smooth, spreadable consistency. Refined coconut oil works best here as it has a neutral flavor that won’t overpower the chocolate and hazelnut.
- 1/4 cup milk of choice — regular whole milk makes it extra creamy, but any plant-based milk like oat, almond, or coconut milk works perfectly for a dairy-free version.
- 1 teaspoon pure vanilla extract — adds warmth and depth to the overall flavor. Use pure vanilla extract, not the artificial stuff.
- 1/4 teaspoon salt — a small pinch of salt does a surprisingly big job here. It enhances the chocolate flavor and balances the sweetness beautifully. Don’t skip it.
Step-by-step instructions
Step 1: Roast the hazelnuts
Preheat your oven to 350°F / 175°C. Spread the raw hazelnuts in a single layer on a rimmed baking sheet. Roast for 10-12 minutes, shaking the pan halfway through, until the skins are cracked and the hazelnuts are golden brown and fragrant. Keep a close eye on them after the 8-minute mark — they go from perfectly roasted to burnt faster than you’d expect.
Step 2: Remove the skins
Transfer the hot roasted hazelnuts onto a clean kitchen towel. Fold the towel over the hazelnuts and rub them together vigorously for about a minute. This loosens and removes most of the bitter outer skins. Don’t stress about getting every last bit of skin off — some stubborn bits are totally fine and won’t affect the final flavor.
Step 3: Blend the hazelnuts
Add the warm, peeled hazelnuts to your food processor. Blend on high for 4-5 minutes, stopping to scrape down the sides every minute or so. The hazelnuts will go through several stages — first a coarse crumble, then a thick paste, then eventually a smooth, creamy hazelnut butter. Be patient here. This step is where the magic happens. Ever wondered why homemade nut butters taste so much better than store-bought? This is exactly why.
Step 4: Add the remaining ingredients
Once the hazelnuts have reached a smooth, creamy butter consistency, add the cocoa powder, powdered sugar, melted coconut oil, milk, vanilla extract, and salt. Blend again for another 2-3 minutes until everything is fully combined and the spread is completely smooth and glossy.
Step 5: Taste and adjust
Give it a taste. Want it sweeter? Add a little more powdered sugar. Want it more chocolatey? Add another teaspoon of cocoa. Want it thinner? Add a splash more milk. This is your spread — make it exactly how you like it.
Step 6: Transfer and store
Pour the finished spread into a clean glass jar and let it cool to room temperature before sealing. It will thicken slightly as it cools, which is completely normal.
Serving suggestions
The real question here is — what can’t you put this on? But here are a few favorites:
- On toast — the classic. A thick spread of homemade Nutella on warm toasted sourdough or brioche is honestly one of life’s simple pleasures.
- On waffles or pancakes — drizzle it over a stack of fluffy pancakes or waffles with sliced bananas and a dusting of powdered sugar for the most indulgent breakfast of your week.
- As a fruit dip — fresh strawberries, banana slices, or apple wedges dipped into this spread is a snack that feels like dessert but is actually not that bad for you. Win-win.
- Swirled into oatmeal — stir a tablespoon into your morning oatmeal for a chocolatey, nutty twist that makes oatmeal feel genuinely exciting.
- As a crepe filling — spread it generously inside warm crepes with sliced hazelnuts and a drizzle of honey. Restaurant quality breakfast right at home.
- Straight from the jar with a spoon — look, no judgment here. We’ve all been there. 🙂
Storage tips
Room temperature: This homemade Nutella keeps well at room temperature in a sealed glass jar for up to 2 weeks. Store it in a cool, dry spot away from direct sunlight.
Refrigerator: You can refrigerate it for up to 1 month. Just be aware that it will firm up considerably in the fridge. Let it sit at room temperature for 10-15 minutes before using, or give the jar a gentle warm water bath to soften it back up.
Freezer: This spread can be frozen for up to 3 months in a freezer-safe container. Thaw in the fridge overnight and stir well before using.
Note: Because this recipe uses no preservatives, it won’t last as long as the store-bought version. Make smaller batches if you don’t plan on going through it quickly — though honestly, finishing a jar of this in under two weeks has never been a problem for anyone who’s tried it.
Brief closing
And just like that, you’ve got a jar of homemade chocolate hazelnut spread that blows the store-bought version completely out of the water. Cleaner ingredients, half the calories, and a flavor that’s honestly in a different league altogether.
Make a batch this weekend, spread it on everything in sight, and try not to eat it straight from the jar — though again, absolutely no judgment if you do. Drop a comment below and let me know how yours turned out. I’d love to hear what you ended up putting it on first!
Homemade Nutella with Half the Calories — Better Than the Real Thing
Description
This homemade Nutella is everything you love about the store-bought version — rich, silky, deeply chocolatey — but made with clean ingredients and roughly half the calories. No palm oil, no preservatives, no mystery additives. Just roasted hazelnuts, real cocoa, and a few simple pantry staples blended together into the most delicious chocolate hazelnut spread you've ever tasted.
Ingredients
Instructions
-
Preheat oven to 350°F / 175°C. Spread hazelnuts on a baking sheet and roast for 10-12 minutes until golden and fragrant, shaking the pan halfway through.
-
Transfer hot hazelnuts to a clean kitchen towel and rub vigorously to remove the skins.
-
Add peeled hazelnuts to a food processor and blend for 4-5 minutes until a smooth, creamy butter forms, scraping down the sides as needed.
-
Add cocoa powder, powdered sugar, melted coconut oil, milk, vanilla extract, and salt. Blend for another 2-3 minutes until completely smooth and glossy.
-
Taste and adjust sweetness or cocoa level to your preference.
-
Transfer to a clean glass jar and allow to cool to room temperature before sealing.
Note
The hazelnuts need to be blended long enough to fully release their natural oils — this is what gives the spread its creamy texture. Don't rush this step.
A high-powered food processor gives the smoothest results.
If the spread seems too thick, add milk one teaspoon at a time until you reach your desired consistency.
