

Let’s be honest. Chicken breast has a reputation problem. Dry, bland, and uninspiring are words that come to mind way too often. But what if the secret to the most flavorful, juicy, incredibly crispy chicken you have ever made was sitting in a jar in your fridge right now?
That is exactly what dill pickle brine does to chicken — it tenderizes it from the inside out and infuses it with a tangy, savory flavor that you simply cannot get any other way.
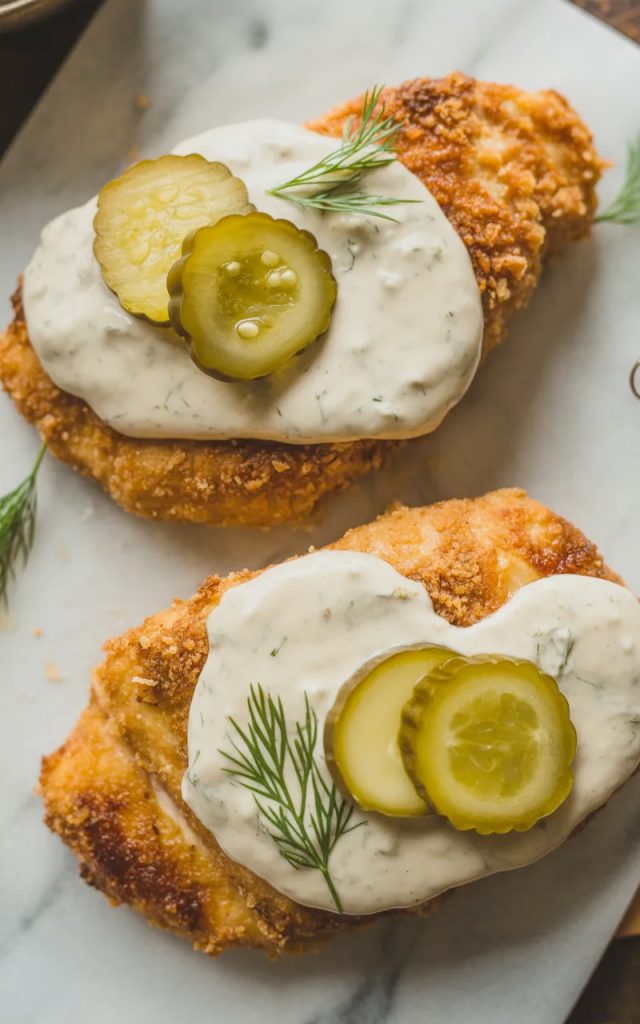
Coat that brined chicken in a crunchy parmesan and breadcrumb crust, pan fry it to golden perfection, and then spoon a creamy dill pickle sauce over the top — and you have a chicken dinner that people will genuinely talk about. I made this for the first time on a whim when I had a nearly empty jar of pickles in the fridge and did not want to waste the brine. Best impulse decision I have made in the kitchen in a long time.
If you think you have had great chicken before, this recipe is about to raise the bar significantly. Let’s get into it.
Why you’ll love this recipe
- The pickle brine marinade is a game changer. Soaking the chicken in pickle brine before cooking tenderizes the meat and seasons it all the way through. The result is the juiciest, most flavorful chicken you have probably ever made at home.
- That parmesan crust is outrageously crispy. The combination of panko breadcrumbs and freshly grated parmesan creates a crust that shatters when you cut into it. It is everything a crispy crust should be.
- The creamy dill pickle sauce ties everything together. Cool, tangy, herb-flecked, and drizzled generously over the hot crispy chicken — this sauce is the finishing touch that makes every single bite complete.
- Ready in under 40 minutes. Including the marinade time, this dinner comes together surprisingly fast. The active cooking time is minimal and the results are spectacular.
- High protein and genuinely satisfying. This is the kind of meal that fills you up properly without feeling heavy. Lean chicken breast, a crispy baked crust, and a light creamy sauce — it hits every note.
- Kid friendly with serious adult appeal. The pickle flavor is present but not overwhelming which means kids enjoy it and adults absolutely love it. IMO that is the definition of a perfect family dinner recipe.
Ingredients with key notes
For the pickle brine marinade:
- 2 large chicken breasts, halved horizontally into cutlets — Slicing the chicken breasts horizontally into thinner cutlets is important. Thinner pieces cook faster and more evenly, giving you a juicier result with a better crust-to-chicken ratio. If your chicken breasts are particularly thick, you can also pound them to an even thickness after slicing.
- 1 cup dill pickle brine — This is the liquid from your jar of dill pickles. Do not throw it away. It is the secret weapon of this entire recipe. The brine seasons and tenderizes the chicken simultaneously in a way that a regular salt brine simply cannot replicate.
- 1/2 cup buttermilk — Combined with the pickle brine for the marinade. Buttermilk adds extra tenderness and helps the breading adhere to the chicken during cooking. If you do not have buttermilk, add a tablespoon of white vinegar or lemon juice to regular milk and let it sit for 5 minutes.
For the parmesan crust:
- 1 cup panko breadcrumbs — Panko is non-negotiable here. Regular breadcrumbs will not give you the same shatteringly crispy crust. Panko is lighter, coarser, and creates dramatically more texture and crunch than regular breadcrumbs.
- 1/2 cup freshly grated parmesan cheese — Freshly grated parmesan melts into the crust during cooking and creates pockets of savory, nutty flavor throughout. Pre-grated parmesan from a canister is too dry and fine to give you the same result — use the real thing here.
- 1 tsp garlic powder
- 1 tsp onion powder
- 1 tsp dried dill — Reinforces the dill pickle flavor theme throughout the crust and adds a subtle herby aroma.
- 1/2 tsp smoked paprika — Adds color and a subtle smokiness to the crust.
- Salt and black pepper to taste
- 2 large eggs — For the egg wash that helps the breadcrumb and parmesan mixture adhere to the marinated chicken.
- 3 tbsp olive oil or neutral oil — For pan frying the chicken to golden perfection.
For the creamy dill pickle sauce:
- 1/2 cup mayonnaise — The creamy base of the sauce.
- 1/4 cup sour cream — Adds a slight tang and lightens the sauce slightly compared to using mayo alone.
- 2 tbsp dill pickle brine — Yes, more pickle brine. It gives the sauce that signature tangy punch that makes it so addictive.
- 2 tbsp finely chopped dill pickles — For texture and an extra hit of pickle flavor throughout the sauce.
- 1 tbsp fresh dill, chopped — Fresh dill is essential in the sauce. Dried dill works in a pinch but fresh gives you a brightness that dried simply cannot match.
- 1 tsp garlic powder
- Salt and black pepper to taste
- Sliced dill pickles and fresh dill sprigs for garnish
Step-by-step instructions
Step 1 — Marinate the chicken
Place the chicken cutlets in a shallow dish or zip-lock bag. Pour the dill pickle brine and buttermilk over the chicken, making sure every piece is fully submerged. Cover and refrigerate for at least 30 minutes — or up to 4 hours for maximum flavor and tenderness. The longer you marinate, the more pronounced the pickle flavor and the more tender the chicken will be. Do not marinate for longer than 4 hours as the acid in the brine can start to break down the texture of the chicken too much.
Step 2 — Make the creamy dill pickle sauce
While the chicken marinates, make the sauce. In a small bowl, combine the mayonnaise, sour cream, dill pickle brine, finely chopped dill pickles, fresh dill, and garlic powder. Whisk everything together until smooth and well combined. Taste and season with salt and black pepper. Cover and refrigerate until ready to serve — the sauce gets better as it sits and the flavors meld together.
Step 3 — Set up the breading station
When you are ready to cook, set up your breading station. In a shallow bowl, whisk together the two eggs until smooth. In a separate shallow bowl, combine the panko breadcrumbs, freshly grated parmesan, garlic powder, onion powder, dried dill, smoked paprika, salt, and black pepper. Mix the breadcrumb mixture well so the parmesan and spices are evenly distributed throughout.
Step 4 — Bread the chicken
Remove the chicken cutlets from the marinade and let the excess liquid drip off — but do not pat them completely dry. A slightly wet surface helps the egg wash adhere. Dip each chicken cutlet into the egg wash, letting the excess drip off, then press it firmly into the parmesan breadcrumb mixture, coating both sides thoroughly. Press the breadcrumbs firmly onto the chicken with your hands to ensure they adhere well and create a thick, even crust. Place the breaded cutlets on a clean plate and let them rest for 5 minutes — this helps the breading set and stick better during cooking.
Step 5 — Pan fry the chicken
Heat olive oil in a large skillet over medium heat until shimmering. Working in batches if necessary to avoid overcrowding, add the breaded chicken cutlets to the skillet. Cook for 4-5 minutes on the first side without moving them — you want a deep golden brown crust to develop undisturbed. Flip carefully and cook for another 3-4 minutes on the second side until equally golden and the internal temperature reaches 165°F. Transfer to a wire rack rather than a paper towel lined plate — the wire rack allows air to circulate under the chicken which keeps the crust crispier for longer.
Step 6 — Finish in the oven if needed
If your chicken cutlets are on the thicker side and the crust is getting too dark before the center is cooked through, transfer the skillet to a preheated 375°F oven for 5-8 minutes to finish cooking through. This is a great technique for ensuring perfectly cooked chicken without burning the crust.
Step 7 — Sauce and serve
Transfer the crispy parmesan chicken cutlets to a serving plate. Spoon the creamy dill pickle sauce generously over each piece — do not be shy with it. Top with sliced dill pickles and fresh dill sprigs for garnish. Serve immediately while the crust is still at its crispiest.
Serving suggestions
This crispy dill pickle parmesan chicken pairs beautifully with a range of sides:
- With a simple cucumber salad — Thinly sliced cucumbers in a light vinegar dressing echo the pickle theme and add a cool, fresh contrast to the crispy chicken.
- Alongside roasted baby potatoes — Crispy roasted potatoes with herbs are the perfect hearty side for this already impressive chicken.
- Over a simple green salad — Slice the chicken and lay it over a fresh romaine or arugula salad with a light lemon vinaigrette for a complete and satisfying meal.
- With steamed or roasted broccoli — Simple, nutritious, and lets the chicken stay the undisputed star of the plate.
- In a sandwich or wrap — Slice the crispy chicken and layer it in a brioche bun or wrap with lettuce, tomato, and extra dill pickle sauce for one of the best chicken sandwiches you have ever had.
- With creamy coleslaw — The cool, creamy crunch of coleslaw alongside this crispy tangy chicken is a combination that just makes complete sense.
Storage tips
Leftovers: Store leftover crispy dill pickle parmesan chicken in an airtight container in the fridge for up to 3 days. Store the dill pickle sauce separately in a covered jar or container for up to 5 days.
Reheating: The best way to reheat this chicken and preserve the crispy crust is in the oven or an air fryer. Place on a wire rack over a baking sheet and reheat at 375°F for 10-12 minutes until heated through and the crust is crispy again. The microwave will make the crust soft and soggy — avoid it if you can.
Air fryer reheating: If you have an air fryer, reheat at 370°F for 4-5 minutes. This is honestly the best method for bringing the crust back to life — it gets almost as crispy as when it was first cooked.
Freezing: You can freeze the cooked breaded chicken cutlets without the sauce. Let them cool completely, place in a single layer on a baking sheet, freeze until solid, then transfer to a freezer-safe bag for up to 2 months. Reheat directly from frozen in a 375°F oven for 20-25 minutes until heated through and crispy. Make the sauce fresh when ready to serve.
Wrapping it up
Crispy dill pickle parmesan chicken is the recipe that turns chicken breast from an afterthought into the undisputed star of the dinner table. The pickle brine marinade, the shattering parmesan crust, and that creamy tangy dill pickle sauce all work together in a way that is genuinely greater than the sum of its parts.
Make it once and you will completely understand why this combination works so well. It is bold, crispy, tangy, and satisfying in all the right ways. Give it a try and let me know how it turns out — happy cooking 🙂
Crispy dill pickle parmesan chicken — the crunchy, tangy dinner that will completely change your chicken game
Description
Chicken breast cutlets marinated in dill pickle brine and buttermilk, coated in a crunchy panko and parmesan crust, pan fried to golden perfection, and topped with a creamy tangy dill pickle sauce. Bold, crispy, and absolutely packed with flavor from the very first bite.
Ingredients
For the pickle brine marinade:
For the parmesan crust:
For the creamy dill pickle sauce:
Instructions
-
Place chicken cutlets in a shallow dish. Pour pickle brine and buttermilk over the chicken. Cover and refrigerate for at least 30 minutes or up to 4 hours.
-
In a small bowl whisk together mayonnaise, sour cream, pickle brine, chopped dill pickles, fresh dill, and garlic powder. Season with salt and pepper. Cover and refrigerate until ready to serve.
-
Set up breading station with whisked eggs in one shallow bowl and panko, parmesan, garlic powder, onion powder, dried dill, smoked paprika, salt, and pepper combined in another.
-
Remove chicken from marinade letting excess drip off. Dip each cutlet in egg wash then press firmly into the parmesan breadcrumb mixture coating both sides thoroughly. Rest breaded cutlets on a plate for 5 minutes.
-
Heat olive oil in a large skillet over medium heat. Cook chicken cutlets for 4-5 minutes on the first side undisturbed until deeply golden. Flip and cook for another 3-4 minutes until golden and internal temperature reaches 165°F. Transfer to a wire rack.
-
If chicken needs more time to cook through, transfer to a 375°F oven for 5-8 minutes.
-
Spoon creamy dill pickle sauce generously over each chicken cutlet. Garnish with sliced dill pickles and fresh dill sprigs. Serve immediately.
