

Let me tell you something about dump cakes. The name is terrible. Truly, whoever came up with it did the entire concept a massive disservice because nothing about “dump cake” sounds like something you’d want to eat. And yet — here we are — because once you taste one, the name stops mattering entirely.
I first made this lemon cream cheese dump cake on a Sunday afternoon when I had about 45 minutes, a block of cream cheese that needed to be used, and a serious craving for something sweet and citrusy.
I had zero interest in making a proper lemon tart from scratch. So I did what I do — I improvised. I layered, I dumped, I baked. What came out of that oven was one of the best things I have ever made in my kitchen, and I am not being dramatic about that.
The bright tang of the lemon curd, the creamy richness of the cream cheese layer, the golden buttery crumble on top — it all comes together in a way that feels way more intentional than the effort involved.
This is the dessert you bring to a potluck when you want people to ask you for the recipe. IMO, every home cook needs this one in their back pocket.
Why you’ll love this recipe
- It literally could not be easier — You are layering ingredients in a baking dish and putting it in the oven. No mixers, no special equipment, no complicated techniques. If you can open a can and spread cream cheese, you can make this.
- Big flavor with minimal ingredients — Lemon curd, cream cheese, cake mix, and butter do all the heavy lifting here. A short ingredient list that punches well above its weight.
- That texture combination is unreal — You get a creamy, almost cheesecake-like layer in the middle, a gooey lemon layer underneath, and a crispy golden buttery topping. Three textures in one bite.
- Feeds a crowd — This bakes in a 9×13 dish and serves up to 12 people comfortably. It is the perfect dessert for family dinners, potlucks, or any time you need to feed a group without losing your mind.
- It works for any season — The citrus makes it feel fresh and bright in spring and summer, but the warm, buttery, golden topping makes it just as comforting in fall and winter. It truly has no off-season.
- Beginner friendly — This is genuinely one of the best recipes to make if you are new to baking. There is very little that can go wrong, and the results always look impressive straight out of the dish.
Ingredients
For the lemon layer:
- 2 cans (21 oz each) lemon pie filling or lemon curd
- 2 tablespoons fresh lemon juice
- 1 teaspoon lemon zest
For the cream cheese layer:
- 8 oz cream cheese, softened to room temperature
- 1/3 cup granulated sugar
- 1 teaspoon vanilla extract
For the topping:
- 1 box (15.25 oz) yellow cake mix
- 1/2 cup unsalted butter, sliced into thin pats
Optional garnish:
- Powdered sugar for dusting
- Fresh lemon slices or zest
- Whipped cream for serving
Key ingredient notes:
Cream cheese — This one matters a lot. Make sure your cream cheese is fully softened to room temperature before you use it. Cold cream cheese will not spread smoothly and you will end up with lumps in your layer. Pull it out of the fridge at least an hour before you start, or even the night before.
Lemon pie filling vs lemon curd — Both work well here. Lemon pie filling gives you a sweeter, slightly thicker base layer. Lemon curd gives you a sharper, more intense citrus flavor. Personally, I lean toward lemon curd for a bolder lemon punch, but either works beautifully. Use whichever one excites you more.
Yellow cake mix — Standard yellow cake mix is the classic choice here and it works perfectly. You can also use a butter cake mix for an even richer, more buttery topping. Do not prepare the cake mix according to the box instructions — you are using it dry, straight from the box.
Butter — Use real butter, not margarine. The butter melts down through the dry cake mix as it bakes and creates that irresistible golden, slightly crispy topping. Margarine just does not behave the same way and the topping will not get that same color and texture.
Fresh lemon juice and zest — These are optional but strongly recommended. Adding a little fresh lemon juice and zest to your lemon filling brightens the whole flavor and adds that fresh citrus note that takes this from good to great.
Step-by-step instructions
Step 1: Preheat and prep your dish
Preheat your oven to 350°F. Lightly grease a 9×13 inch baking dish with butter or cooking spray. This makes cleanup easier and helps the edges of the cake release cleanly when you serve it.
Step 2: Make the cream cheese mixture
In a medium bowl, beat the softened cream cheese, granulated sugar, and vanilla extract together until smooth and well combined. A hand mixer works great here, but a sturdy spatula or wooden spoon will do the job too as long as your cream cheese is properly softened. Set this aside.
Step 3: Layer the lemon filling
Spread your lemon pie filling or lemon curd evenly across the bottom of your prepared baking dish. Add the fresh lemon juice and lemon zest directly over the filling and give it a gentle stir to combine. You want an even, consistent layer across the entire bottom of the dish.
Step 4: Add the cream cheese layer
Drop spoonfuls of the cream cheese mixture evenly over the lemon layer. Use the back of a spoon or an offset spatula to gently spread it into a mostly even layer. It does not need to be perfectly smooth — a little unevenness actually adds to the texture of the finished cake. Do not press down hard or you will mix the layers together.
Step 5: Add the cake mix
Pour the dry yellow cake mix evenly over the top of the cream cheese layer. Spread it out gently with a spoon so it covers the cream cheese in an even layer all the way to the edges of the dish. Do not stir or mix it in — it sits on top as a dry layer.
Step 6: Add the butter
Lay the thin pats of butter evenly across the top of the dry cake mix. Try to cover as much of the surface as possible with the butter pats so that the cake mix gets evenly moistened as the butter melts during baking. Any dry spots that the butter does not reach will stay powdery after baking, so good coverage here matters.
Step 7: Bake
Place the dish in your preheated oven and bake for 40 to 45 minutes. You are looking for a golden brown, slightly crispy top with the edges bubbling. The center should be set and not jiggly when you give the dish a gentle shake. If the top is browning too quickly before the edges are bubbling, loosely tent with foil for the last 10 minutes.
Step 8: Cool and serve
Remove from the oven and let the cake cool for at least 20 minutes before serving. This is important — the layers need time to set up properly. Dust with powdered sugar right before serving if you like. Serve warm or at room temperature, with whipped cream on the side if you want to go all out.
Serving suggestions
Serve it warm with whipped cream — A big dollop of freshly whipped cream on a warm square of this cake is one of life’s genuinely simple pleasures. The cold cream against the warm, tangy cake is a combination that works every single time.
Add a scoop of vanilla ice cream — If you are serving this as a dinner party dessert, a scoop of good vanilla ice cream alongside a warm square elevates the whole thing. The ice cream melts slightly into the warm cake and creates something that feels almost indulgent.
Dust with powdered sugar — Right before serving, a light dusting of powdered sugar makes the top look polished and bakery-worthy. It adds a subtle extra sweetness too.
Garnish with fresh lemon — A thin slice of fresh lemon or a small pile of lemon zest on each serving plate makes a beautiful, simple presentation. It signals to your guests exactly what flavor they are about to enjoy.
Serve chilled for a different experience — This cake actually tastes incredible cold straight from the fridge too. The cream cheese layer firms up slightly and the whole thing takes on more of a lemon cheesecake bar quality. Worth trying both ways to find your preference.
Storage tips
Refrigerator — Cover the baking dish tightly with plastic wrap or transfer leftovers to an airtight container. The cake keeps well in the fridge for up to 5 days. Because of the cream cheese layer, you should not leave this at room temperature for more than 2 hours.
Freezer — This cake freezes well. Cut it into individual portions, wrap each piece in plastic wrap, and place in a freezer-safe bag or container. It keeps in the freezer for up to 2 months. Thaw individual portions overnight in the refrigerator.
Reheating — To serve warm from the fridge, microwave individual portions for 20 to 30 seconds. For a larger portion reheated from frozen, thaw first then warm in a 300°F oven for about 10 minutes. The topping will crisp back up slightly in the oven which is a nice bonus.
Make ahead tip — You can assemble this cake the night before, cover it, and refrigerate it unbaked. Pull it out of the fridge while the oven preheats and bake as directed, adding about 5 extra minutes to the bake time since it is starting cold.
A quick note before you go
Dump cakes get a bad reputation because of the name, and that has always felt deeply unfair to me. This lemon cream cheese version especially deserves better press. It is bright, it is creamy, it is comforting, and it takes less than an hour from start to finish. That is exactly the kind of recipe I built this space for.
If you make this one, I really do want to hear about it. Leave a comment, pin it, share it with a friend who needs a simple win in the kitchen. Food is better when it is shared — that is kind of the whole point.
With gratitude, Kip
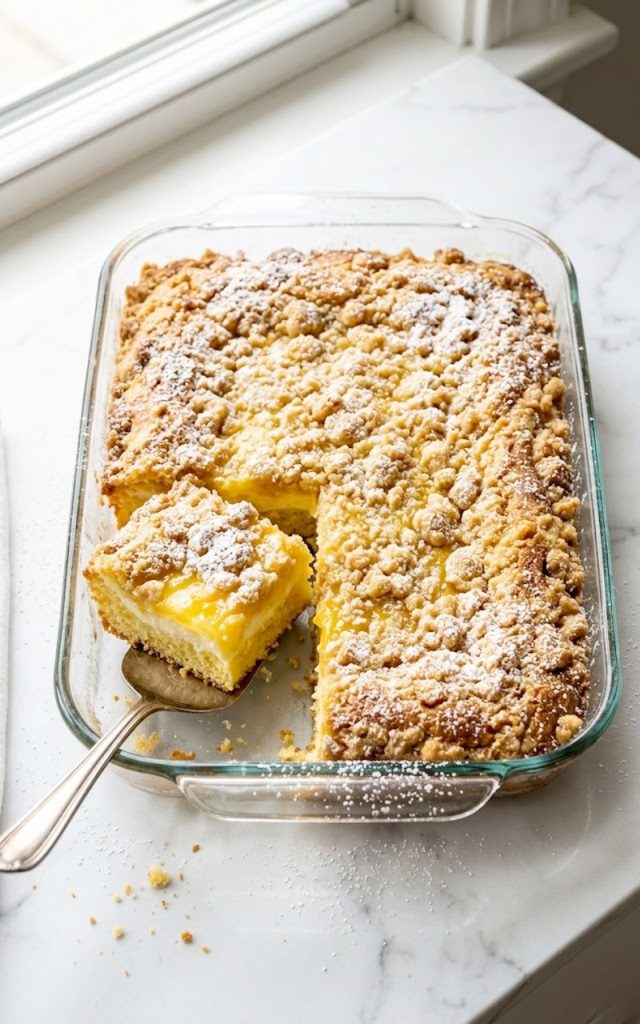
Lemon cream cheese dump cake – The easiest citrusy dessert you’ll ever make
Description
Layers of bright lemon curd, velvety cream cheese filling, and a golden buttery cake topping all baked together in one dish. This lemon cream cheese dump cake is the kind of dessert that looks like you spent hours on it but comes together in under an hour with just a handful of ingredients.
Ingredients
Lemon layer:
Cream cheese layer:
Topping:
Instructions
-
Preheat oven to 350°F. Grease a 9x13 inch baking dish.
-
Beat cream cheese, sugar, and vanilla until smooth. Set aside.
-
Spread lemon filling evenly in the bottom of the dish. Add lemon juice and zest and stir gently.
-
Drop spoonfuls of cream cheese mixture over the lemon layer and spread gently.
-
Pour dry cake mix evenly over the cream cheese layer. Do not stir.
-
Lay butter pats evenly across the top of the cake mix.
-
Bake 40 to 45 minutes until golden brown and bubbling at the edges.
-
Cool for 20 minutes before serving. Dust with powdered sugar if desired.
