

You know those bananas sitting on your counter, the ones that have gone way past yellow and are now more brown than anything else? Yeah, those ones. Most people toss them or feel guilty every time they walk past. I used to do the same thing — until I made these Banana Bread Oatmeal Bars and never looked back.
These bars are everything I love about banana bread but in a grab-and-go format that actually works for real life. We’re talking soft, chewy, naturally sweetened oatmeal bars loaded with chocolate chips — ready in about 30 minutes and meal-prep friendly enough to carry you through the whole week. If that doesn’t sound like a Monday morning upgrade, I don’t know what does.
No fancy equipment, no hard-to-find ingredients, no stress. Just a bowl, a fork, and those bananas that were about to meet their end anyway. Let’s make something delicious out of them.
Why you’ll love this recipe
- It’s stupidly easy to make. One bowl, basic ingredients, no mixer needed. If you can mash a banana, you can make these bars.
- Perfect for meal prep. Bake a batch on Sunday and breakfast is handled Monday through Friday. You’re welcome.
- Naturally sweetened. The ripe bananas do most of the sweetness heavy lifting here, so you’re not dumping cups of sugar into your morning.
- Kid-approved. Chocolate chips on top? My family never complains. Enough said.
- Gluten-free friendly. Swap in certified gluten-free oats and you’ve got a breakfast that works for almost everyone at the table.
- Wholesome but still feels like a treat. That’s the Kip promise — comfort food that doesn’t make you feel like you need to apologize for eating it.
Ingredients with key notes
Dry ingredients:
- 3 cups rolled oats — Use old-fashioned rolled oats, not instant. Instant oats will make the bars too soft and they won’t hold their shape. If you need these gluten-free, just grab certified GF oats.
- 1 teaspoon baking powder — This gives the bars a slight lift so they don’t come out completely dense.
- 1 teaspoon cinnamon — Classic banana bread flavor. Don’t skip this one.
- 1/4 teaspoon salt — Balances the sweetness. Always.
Wet ingredients:
- 3 large ripe bananas, mashed — The riper the better. Brown, spotty bananas are sweeter and mash easier. This is genuinely the best use for overripe bananas.
- 1/3 cup honey or maple syrup — Both work great. Maple syrup gives a slightly richer flavor, honey keeps it lighter. Your call.
- 1/4 cup milk of choice — Dairy or non-dairy both work here. Almond milk, oat milk, regular milk — whatever you’ve got in the fridge.
- 2 eggs — These bind everything together. For an egg-free version, use 2 flax eggs (2 tablespoons ground flaxseed mixed with 6 tablespoons water, rested for 5 minutes).
- 1 teaspoon vanilla extract — A little vanilla goes a long way in making these taste like actual banana bread.
- 1/2 cup chocolate chips — For mixing in and topping. IMO, semi-sweet is the move here, but dark chocolate chips work beautifully too.
Optional add-ins:
- 1/4 cup peanut butter or almond butter stirred into the batter for extra protein
- 1/4 cup chopped walnuts for crunch
- 1/2 teaspoon nutmeg alongside the cinnamon
Step-by-step instructions
Step 1: Preheat and prep your pan
Preheat your oven to 350 degrees F. Line a 9×13 inch baking pan with parchment paper and give it a light spray with cooking spray. The parchment paper is non-negotiable here — it makes removing the bars so much easier and saves you from a serious cleanup situation.
Step 2: Mash the bananas
In a large mixing bowl, mash your three ripe bananas with a fork until they’re mostly smooth. A few small lumps are totally fine — this isn’t a smoothie. The more brown and spotty your bananas, the sweeter and more flavorful your bars will be.
Step 3: Mix the wet ingredients
To the mashed bananas, add your honey (or maple syrup), milk, eggs, and vanilla extract. Stir everything together until well combined. The mixture will look a little loose and wet at this point — that’s exactly what you want.
Step 4: Add the dry ingredients
Add the rolled oats, baking powder, cinnamon, and salt directly into the wet mixture. Stir until everything is evenly combined. Fold in half of your chocolate chips. The batter will be thick — more like a soft dough than a pourable batter.
Step 5: Spread into the pan
Transfer the batter into your prepared baking pan and spread it out evenly using the back of a spoon or a spatula. Press it down gently to make sure it’s in an even layer from edge to edge. Scatter the remaining chocolate chips on top and press them lightly into the surface.
Step 6: Bake
Bake at 350 degrees F for 20-25 minutes, or until the edges are lightly golden and the center is set. A toothpick inserted into the middle should come out mostly clean (a little moisture is fine — these are meant to be chewy, not dry). Don’t overbake them or you’ll lose that soft, chewy texture that makes these so good.
Step 7: Cool and cut
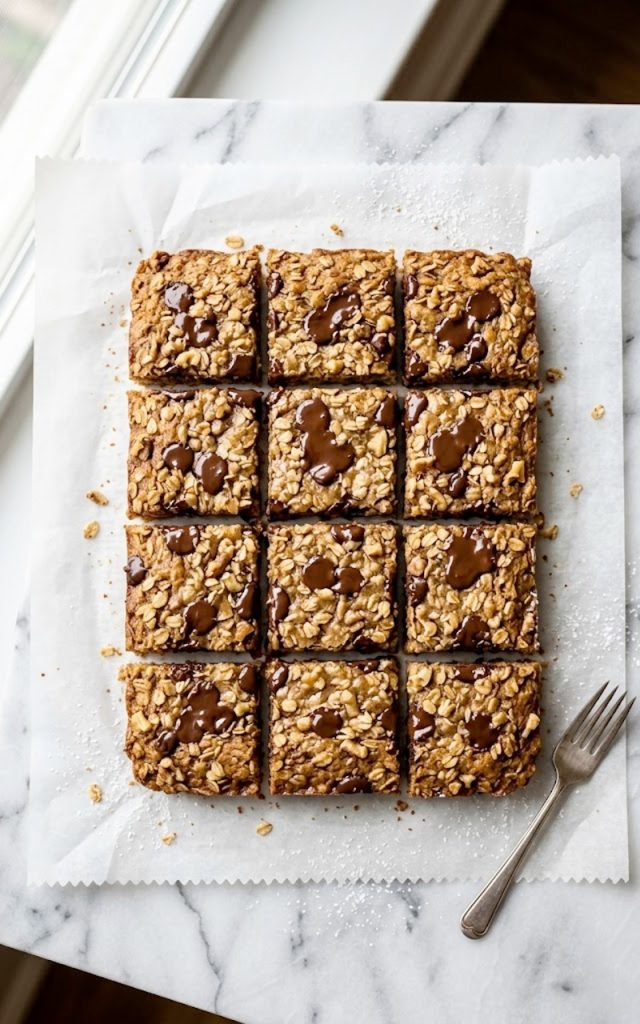
Let the bars cool in the pan for at least 15 minutes before lifting them out using the parchment paper. Transfer to a cutting board and slice into 12 bars. Trying to cut them while they’re still hot is a great way to end up with crumbles instead of bars — patience here pays off.
Serving suggestions
- Straight out of the fridge — These bars are honestly great cold. Grab one on your way out the door and you’re set.
- Warmed up with a drizzle of peanut butter — 15-20 seconds in the microwave, a little peanut butter on top, and suddenly breakfast feels like dessert.
- Paired with a smoothie or yogurt — If you want a more complete breakfast, these bars pair really well with a protein-rich yogurt or your morning smoothie.
- As a snack or post-workout bite — Don’t let the word “breakfast” limit you. These work great as an afternoon snack or a quick post-workout refuel.
- With a hot cup of coffee — Because is there a better breakfast combination than banana, chocolate, and coffee? I’ll wait.
Storage tips
At room temperature: Store the bars in an airtight container at room temperature for up to 2 days. Stack them with a small piece of parchment paper between layers so they don’t stick together.
In the refrigerator: These bars keep well in the fridge for up to 5-6 days in an airtight container. This is the ideal storage method if you’re meal prepping for the week.
In the freezer: Yes, these freeze beautifully. Wrap each bar individually in plastic wrap or parchment, then store them in a freezer-safe bag or container for up to 2 months. When you’re ready to eat, just thaw overnight in the fridge or pop one in the microwave for 30-45 seconds straight from frozen.
A quick note before you go
These Banana Bread Oatmeal Bars are one of those recipes that sounds too simple to be this good — and then you make them and suddenly you’re baking a double batch every Sunday. FYI, that’s exactly what happened to me.
Whether you’re meal prepping for a busy week, looking for a healthy snack that doesn’t taste like cardboard, or just finally dealing with those overripe bananas on your counter — this recipe has you covered.
Give them a try and let me know how they turn out. Drop a comment below, tag me on Pinterest, or just make them and silently feel great about your breakfast choices. Either way, I’m rooting for you. Now go mash those bananas 🙂
— Kip
Banana Bread Oatmeal Bars — The Healthy Breakfast Meal Prep You’ll Actually Look Forward To
Description
These Banana Bread Oatmeal Bars combine the cozy flavors of classic banana bread with the hearty goodness of oats — all baked into easy, portable bars that are perfect for busy mornings. Naturally sweetened, meal-prep friendly, and finished with chocolate chips because why not.
Ingredients
Instructions
-
Preheat oven to 350 degrees F. Line a 9x13 inch baking pan with parchment paper.
-
Mash bananas in a large bowl until mostly smooth.
-
Add honey, milk, eggs, and vanilla to the bananas. Stir to combine.
-
Mix in oats, baking powder, cinnamon, and salt. Fold in half the chocolate chips.
-
Spread batter evenly into the prepared pan. Top with remaining chocolate chips.
-
Bake for 20-25 minutes until edges are golden and center is set.
-
Cool for 15 minutes, then slice into 12 bars.
