

Five years ago, I would have bought a pack of Reese’s and called it a day. Now? I make these. And honestly, there’s no going back.
These Peanut Butter Oreo Bars are the kind of dessert that makes people stop mid-conversation and ask, “Wait, you made this?” Yes. Yes, I did. And the best part? They’re no-bake, dead simple, and come together in under 30 minutes.
If you love the combination of chocolate and peanut butter — and let’s be honest, who doesn’t — this recipe is about to become your new go-to.
Why you’ll love this recipe
- No oven required. These are completely no-bake, which means less cleanup and less stress.
- Only a handful of ingredients. Nothing fancy, nothing you can’t find at your local grocery store.
- They taste like a Reese’s cup but better. You made it, so it’s automatically superior.
- Perfect for making ahead. They actually taste better after chilling overnight — if they last that long.
- Kid-approved and crowd-pleasing. I’ve never seen anyone turn one of these down. Not once.
- Customizable. Swap the chocolate topping, add a pinch of sea salt, make it yours.
Ingredients with key notes
For the Oreo crust:
- 24 Oreo cookies (whole, with the filling) — don’t remove the cream filling, it helps bind the crust
- 5 tablespoons unsalted butter, melted — this is what holds everything together
For the peanut butter filling:
- 1 cup creamy peanut butter — use a regular commercial brand like Jif or Skippy, not natural peanut butter. Natural peanut butter is too oily and won’t set properly
- 1 cup powdered sugar — this gives the filling that signature dense, fudgy texture
- 4 tablespoons unsalted butter, softened — brings everything together into a smooth, scoopable filling
For the chocolate topping:
- 1 and 1/2 cups semi-sweet chocolate chips — you can also use milk chocolate if you prefer a sweeter topping
- 2 tablespoons coconut oil or vegetable shortening — this keeps the chocolate smooth and easy to slice without cracking
Step-by-step instructions
Step 1: Make the Oreo crust
Add your Oreos to a food processor and pulse until you get fine crumbs. No food processor? Throw them in a zip-lock bag and go at them with a rolling pin. Works just as well, and honestly it’s a decent stress reliever.
Pour in the melted butter and mix until the crumbs look like wet sand. Press the mixture firmly into the bottom of a lined 9×9 inch baking pan. Use the bottom of a flat glass to really pack it in — you want a solid, even crust. Pop it in the freezer while you work on the filling.
Step 2: Make the peanut butter filling
In a mixing bowl, combine the peanut butter, softened butter, and powdered sugar. Mix until smooth and well combined. The mixture will be thick — that’s exactly what you want. It should hold its shape when you scoop it.
Spread the peanut butter filling evenly over the chilled Oreo crust. Use an offset spatula or the back of a spoon to get a smooth, even layer. Put it back in the freezer for 10 minutes to firm up before adding the chocolate.
Step 3: Make the chocolate topping
Add your chocolate chips and coconut oil to a microwave-safe bowl. Microwave in 30-second intervals, stirring between each one, until fully melted and smooth. Don’t rush this — overheated chocolate gets grainy and nobody wants that.
Pour the melted chocolate over the peanut butter layer and spread it evenly all the way to the edges. Give the pan a gentle tap on the counter to smooth out any bubbles.
Step 4: Chill and slice
Refrigerate the bars for at least 2 hours, or until the chocolate is fully set. When you’re ready to slice, use a sharp knife warmed under hot water and wiped dry. This gives you clean cuts without cracking the chocolate top. Slice into 16 bars and try not to eat all of them immediately.
Serving suggestions
These bars are delicious straight from the fridge — cold, firm, and incredibly satisfying. Here’s how to make them even better:
- Sprinkle flaky sea salt over the chocolate topping before it sets. The sweet-salty combo is unreal.
- Serve alongside a cold glass of milk. Classic for a reason.
- Plate them up with a scoop of vanilla ice cream for a proper dessert moment.
- Cut them into smaller bite-sized pieces if you’re serving them at a party or potluck — they go fast.
Storage tips
Refrigerator: Store the bars in an airtight container in the fridge for up to 7 days. Keep them cold — the peanut butter filling softens at room temperature.
Freezer: These freeze beautifully. Layer them between sheets of parchment paper in a freezer-safe container and freeze for up to 3 months. Thaw in the fridge overnight before serving.
Room temperature: They can sit out for about an hour during serving, but don’t leave them out too long — the filling gets soft and the chocolate can lose its snap.
Let’s wrap this up
Look, I didn’t set out to reinvent dessert when I made these for the first time. I just wanted something that tasted like a Reese’s but felt a little more homemade. These bars delivered on every level.
They’re quick, they’re easy, and they’re the kind of thing you’ll make once and then find yourself making again two weeks later because someone in your house won’t stop talking about them. Fair warning 🙂
If you give these a try, I’d love to hear how they turned out. Drop a comment below or tag me on Pinterest — seeing your creations genuinely makes my day.
Happy cooking. — Kip
Peanut Butter Oreo Bars — Like a Homemade Reese’s Sitting on an Oreo Crust
Description
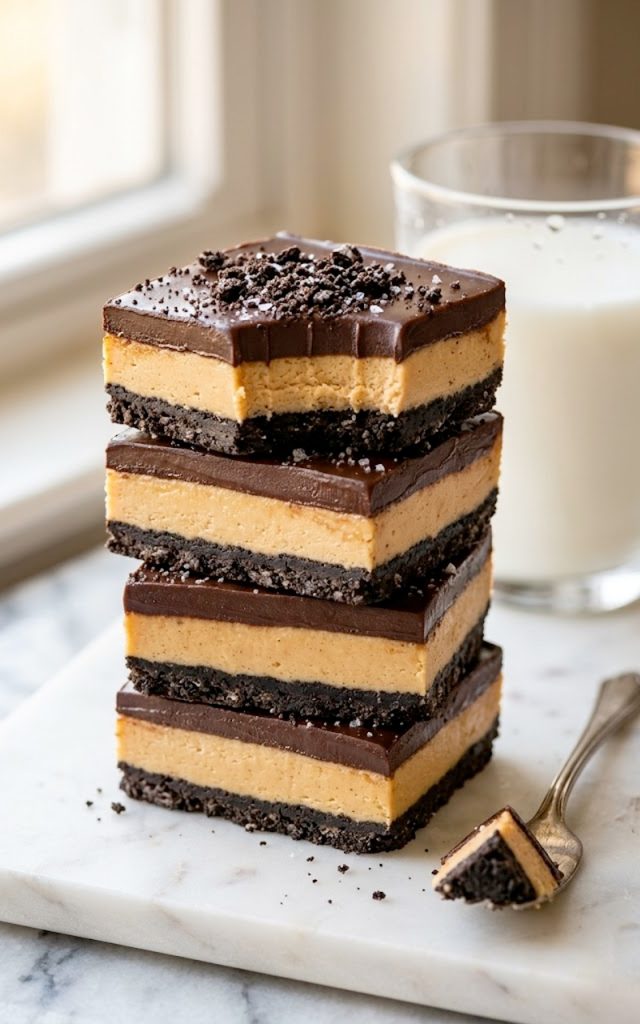
These Peanut Butter Oreo Bars are a no-bake dessert that layers a buttery Oreo crust with a thick, creamy peanut butter filling and a smooth chocolate topping. Think homemade Reese's cup sitting on an Oreo — because that's exactly what this is.
Ingredients
Oreo crust:
Peanut butter filling:
Chocolate topping:
Instructions
-
Line a 9x9 inch baking pan with parchment paper.
-
Pulse Oreos in a food processor until fine crumbs form. Mix in melted butter until the mixture resembles wet sand. Press firmly into the bottom of the pan. Freeze for 10 minutes.
-
Mix peanut butter, softened butter, and powdered sugar until smooth and thick. Spread evenly over the crust. Freeze for another 10 minutes.
-
Melt chocolate chips and coconut oil together in the microwave in 30-second intervals, stirring until smooth. Pour over the peanut butter layer and spread evenly.
-
Refrigerate for at least 2 hours until fully set.
-
Slice into 16 bars using a warm knife. Serve cold.
Note
- Use commercial creamy peanut butter for best results.
- Natural peanut butter will not set properly.
- Add flaky sea salt on top before chilling for a sweet-salty upgrade.
