

I know what you’re thinking. Cottage cheese ice cream sounds like something a nutritionist invented to ruin dessert. I thought the same thing the first time I saw it pop up on my feed. But curiosity got the better of me, and I’m really glad it did.
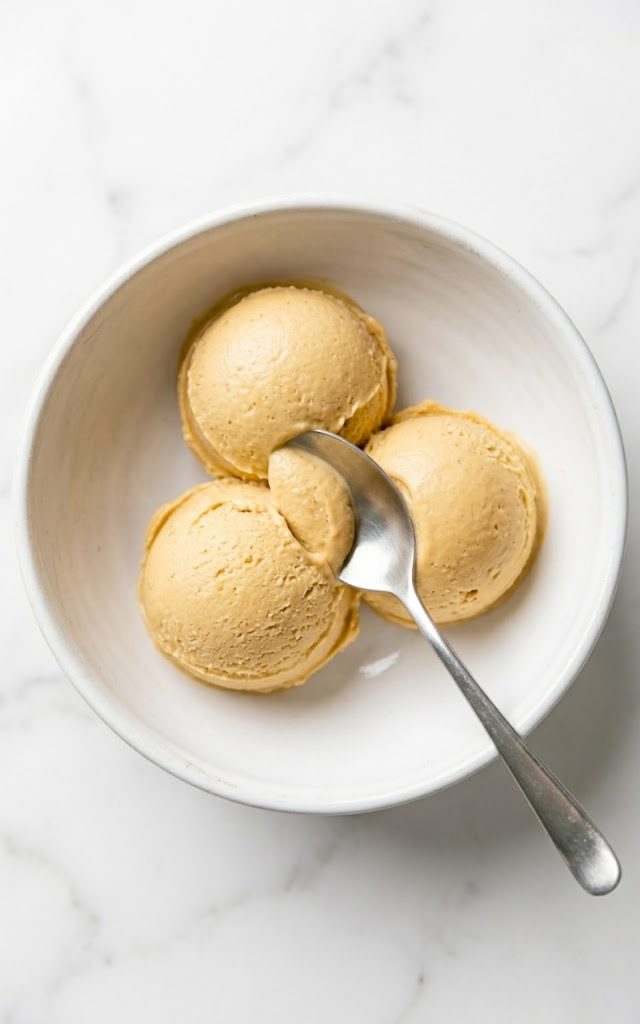
The first spoonful genuinely surprised me. It’s smooth, it’s creamy, it’s rich with peanut butter flavor, and it has absolutely no business being as good as it is. This is the kind of dessert that makes you feel like you’re getting away with something — because honestly, you kind of are.
Four ingredients, a blender, and a freezer. That’s the whole recipe. If you’ve been looking for a healthy frozen treat that doesn’t taste like a compromise, you just found it. FYI, this one has become a weekly staple in my kitchen and I’m not even a little sorry about it.
Why you’ll love this recipe
- It’s made with just four simple ingredients you can grab at any grocery store.
- The cottage cheese blends down completely smooth — no weird texture, no lumps, just pure creaminess.
- It’s naturally high in protein, which means dessert actually works in your favor for once.
- There’s no ice cream machine needed. Your blender and freezer do all the heavy lifting.
- It’s lower in sugar and calories than traditional ice cream but tastes just as satisfying.
- Kids love it too, which makes it one of those rare wins where the healthy option is also the crowd-pleasing option.
Ingredients with key notes
- 2 cups full-fat cottage cheese (full-fat is important here — it gives you that rich, creamy texture. Low-fat versions tend to turn out icier and less smooth)
- 1/2 cup natural peanut butter (use a smooth, runny natural peanut butter for the best results. The kind where the oil separates at the top. Avoid the sugary commercial brands — they throw off the flavor balance)
- 3 tablespoons honey or maple syrup (honey gives a slightly floral sweetness while maple syrup adds a deeper, richer flavor. Either works beautifully — use whichever you have on hand)
- 1 teaspoon pure vanilla extract (don’t skip this — it rounds out the peanut butter flavor and adds a warmth that ties everything together)
Optional add-ins:
- A pinch of sea salt (highly recommended — it makes the peanut butter flavor pop in a big way)
- 2 tablespoons mini chocolate chips folded in before freezing (if you want to take this to the next level, IMO this is the move)
Step-by-step instructions
Step 1: Blend everything together
Add the cottage cheese, peanut butter, honey and vanilla extract to a high-speed blender or food processor. Blend on high for about 60 to 90 seconds until the mixture is completely smooth and creamy. Stop and scrape down the sides halfway through to make sure everything is fully incorporated. The mixture should look like a thick, uniform peanut butter mousse with no visible curds.
Step 2: Taste and adjust
Give the blended mixture a taste. Want it sweeter? Add another tablespoon of honey. Want more peanut butter flavor? Go ahead. This is your ice cream — make it exactly how you like it. If you’re adding a pinch of sea salt, stir it in now.
Step 3: Transfer to a freezer-safe container
Pour the blended mixture into a loaf pan or any freezer-safe container. Spread it out evenly with a spatula. If you’re adding chocolate chips, fold them in now and give everything a gentle stir so they’re distributed throughout.
Step 4: Freeze
Cover the container tightly with plastic wrap or a lid and place it in the freezer. Let it freeze for at least 4 hours, or overnight for best results. The longer it freezes, the firmer and scoopable it becomes.
Step 5: Scoop and serve
When you’re ready to serve, take the container out of the freezer and let it sit on the counter for 5 to 8 minutes before scooping. This softens it just enough to scoop cleanly. Use a warm ice cream scoop for best results. Serve immediately and enjoy every single bite.
Serving suggestions
- Serve in a chilled bowl with a drizzle of extra peanut butter or honey on top for a little extra indulgence.
- Crumble a few graham crackers or granola over the top for a satisfying crunch contrast.
- Pair it with sliced bananas or fresh strawberries for a classic flavor combination that works every single time.
- Sandwich two scoops between two oat cookies for a high-protein ice cream sandwich that feels very extra but is actually very healthy.
- Top with a small handful of dark chocolate chips and a sprinkle of flaky sea salt for a dessert that looks and tastes like it came from a fancy creamery.
Storage tips
Freezer: Store the ice cream in a freezer-safe airtight container for up to 2 weeks. Press a piece of plastic wrap directly onto the surface of the ice cream before sealing the container — this prevents ice crystals from forming on top.
Thawing: Always let the ice cream sit at room temperature for 5 to 8 minutes before scooping. Cottage cheese based ice cream tends to freeze firmer than traditional ice cream, so giving it a few minutes to soften makes a big difference in texture.
Re-freezing: If the ice cream melts significantly, you can refreeze it but the texture may become slightly icier. For the best experience, only take out what you plan to eat.
Let’s wrap this up
Here’s the thing about this recipe — it has no right to be this good. It’s four ingredients, takes ten minutes to put together, and somehow produces ice cream that feels completely indulgent. That’s the kind of cooking I live for at Recipes By Kip.
Whether you’re eating healthy, chasing a protein goal, or just tired of feeling guilty about dessert, this one is for you. Make it once and I guarantee it becomes a regular in your rotation.
If you try it, leave a comment or tag me on Pinterest. I love seeing what you’re making, and there is nothing better than a community of people proving that healthy food can taste absolutely incredible.
Now go blend that ice cream. You deserve it.
With gratitude, Kip
Peanut Butter Cottage Cheese Ice Cream — Creamy, High Protein & No Churn
Description
This peanut butter cottage cheese ice cream is smooth, creamy, and packed with protein — and you only need four ingredients to make it. No ice cream machine, no complicated steps, no guilt. Just blend, freeze, and scoop. It tastes indulgent but works hard for your body at the same time.
Ingredients
Instructions
-
Add cottage cheese, peanut butter, honey and vanilla to a high-speed blender. Blend for 60 to 90 seconds until completely smooth.
-
Taste and adjust sweetness or peanut butter flavor as needed.
-
Pour into a freezer-safe loaf pan. Fold in chocolate chips if using.
-
Cover and freeze for at least 4 hours or overnight.
-
Remove from freezer, let sit for 5 to 8 minutes, then scoop and serve.
