

Some desserts are complicated. They require multiple bowls, a stand mixer, precise temperatures, and about three hours of your Saturday afternoon. This chocolate cobbler is not one of those desserts. This one is for the days when you need something deeply satisfying on the table in under an hour without breaking a sweat.
I first made this recipe on a whim one evening when I had a serious chocolate craving and zero motivation to do anything elaborate. I threw together a handful of pantry staples, slid the dish into the oven, and walked away genuinely not expecting much. What came out was one of the most impressive things I had ever accidentally made. A crispy, brownie-like crust on top with a thick, self-saucing fudge layer underneath that forms completely on its own while it bakes. I stood at the kitchen counter eating it straight from the dish. No regrets.
The magic of this recipe is in the science. You pour boiling water over the top of the batter before baking and it feels completely wrong — like you just ruined everything. But that water sinks to the bottom during baking and creates the most incredible fudgy sauce layer you’ve ever encountered. Trust the process on this one. It works every single time and it will absolutely blow your mind the first time you make it.
Why you’ll love this recipe
- It’s one of the easiest desserts you will ever make. Ten minutes of prep, one baking dish, and a handful of pantry ingredients. That’s the whole story.
- The self-saucing situation is genuinely magical. The recipe creates its own fudgy chocolate sauce underneath the crust as it bakes. No extra steps, no extra sauce to make. It just happens.
- It tastes like a brownie and a chocolate lava cake had a baby. That crispy top layer combined with the gooey fudge underneath is a texture combination that is very hard to beat.
- It’s a crowd-pleaser every single time. Kids love it, adults love it, people who claim they don’t eat dessert love it. It’s one of those recipes that has a 100 percent approval rating in my experience.
- It uses ingredients you already have. Flour, sugar, cocoa powder, butter, milk, vanilla. Nothing exotic, nothing you need to make a special trip for.
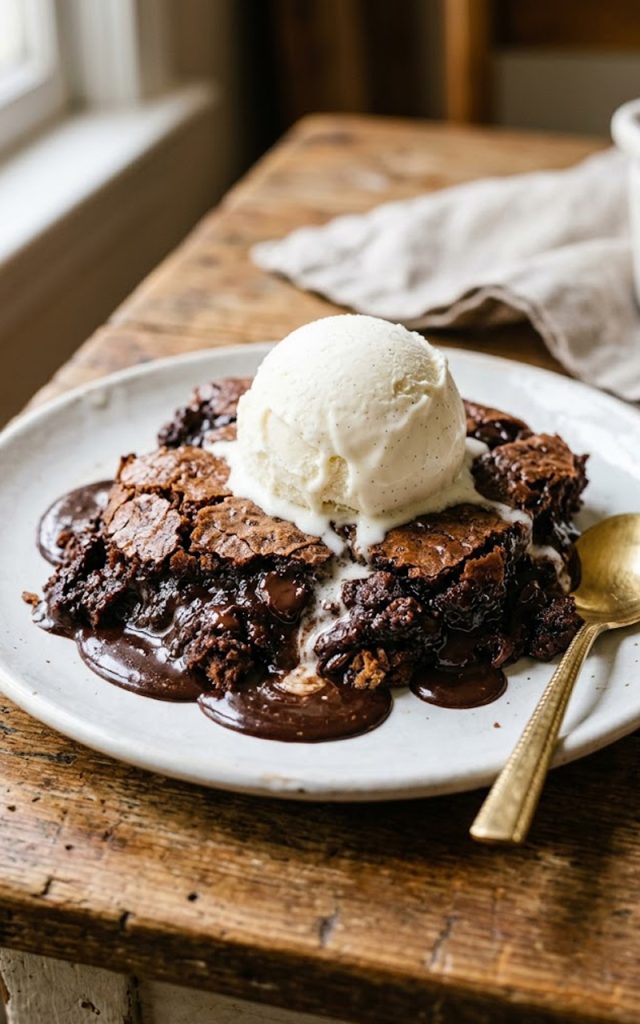
- It’s even better with ice cream. Serve it warm with a scoop of vanilla ice cream melting into that hot fudge sauce and you have one of the best dessert experiences of your life. IMO this pairing is non-negotiable.
Ingredients with key notes
- 1 cup all purpose flour — Spoon and level when measuring. Too much flour makes the top layer dense and cakey instead of that perfect tender crust you’re going for.
- 2 tsp baking powder — This gives the top layer its lift. Make sure yours isn’t expired — old baking powder is one of the most common reasons baked goods disappoint.
- 1/4 tsp salt — Just enough to enhance all the chocolate flavor. Don’t skip it even in a dessert recipe.
- 3/4 cup granulated sugar — Goes into the batter layer. Gives the top its slightly crispy, crackly texture as it bakes.
- 3 tbsp unsweetened cocoa powder — For the batter layer. Use a good quality cocoa powder here — it genuinely makes a difference in the final flavor.
- 1/2 cup whole milk — Whole milk gives the best richness and texture. You can use 2 percent but avoid skim milk here.
- 1/3 cup unsalted butter, melted — Melted and slightly cooled before mixing in. Butter adds richness and that indulgent flavor. Use unsalted so you control the salt level yourself.
- 1 and 1/2 tsp vanilla extract — Pure vanilla extract only. The imitation stuff is fine in a pinch but pure vanilla makes everything taste noticeably better.
For the topping layer:
- 1/2 cup granulated sugar — Mixed with cocoa and sprinkled over the batter. This layer is what creates the fudgy sauce as it bakes.
- 1/2 cup packed light brown sugar — The molasses in brown sugar adds a deep, almost caramel-like richness to the sauce layer that takes it to another level.
- 1/4 cup unsweetened cocoa powder — Combined with the sugars for the topping. The double hit of cocoa in this recipe is exactly why it tastes so intensely chocolatey.
- 1 and 1/2 cups boiling water — Poured carefully over the topping right before baking. This is the step that feels completely wrong but is absolutely essential. Do not skip it, do not reduce it, and do not stir after pouring.
Step-by-step instructions
Step 1 — Preheat and prepare your baking dish
Preheat your oven to 350F. Lightly grease an 8×8 inch or 9×9 inch baking dish with butter or cooking spray. Set it aside. You want the dish ready to go before you start mixing so you can move quickly once the batter comes together.
Step 2 — Make the batter
In a large mixing bowl whisk together the flour, baking powder, salt, granulated sugar, and cocoa powder until fully combined. Add the melted butter, milk, and vanilla extract. Stir everything together until a smooth, thick batter forms. It will be fairly thick — that’s exactly what you want. Spread the batter evenly into your prepared baking dish using a spatula.
Step 3 — Make the topping
In a separate small bowl combine the granulated sugar, brown sugar, and cocoa powder. Whisk them together until fully mixed with no lumps. Sprinkle this mixture evenly over the batter in the baking dish. Spread it as evenly as you can but don’t press it down into the batter — just let it sit on top.
Step 4 — Pour the boiling water
This is the step that looks completely wrong. Carefully pour the boiling water evenly over the top of the sugar and cocoa layer. Do not stir. Do not mix. Do not touch it. Just pour it over and let it sit. The batter will be underneath a layer of liquid and sugar and it will look like you’ve made a terrible mistake. You haven’t. Trust the process completely here.
Step 5 — Bake
Carefully transfer the baking dish to the preheated oven and bake at 350F for 35 minutes. The top should look set, slightly crackled, and have a matte finish when it’s done. The edges will pull away slightly from the sides of the dish. Do not overbake — you want that sauce layer underneath to stay gooey and not dry out.
Step 6 — Rest and serve
Remove the cobbler from the oven and let it rest for 5 to 10 minutes before serving. This allows the sauce layer to settle and thicken slightly. Serve warm, scooped directly from the dish into bowls, making sure to get both the top layer and that incredible fudgy sauce from the bottom with every spoonful.
Serving suggestions
This chocolate cobbler is genuinely one of the most versatile desserts for serving. Here are the best ways to enjoy it:
- Serve it warm with a generous scoop of vanilla ice cream placed directly on top. The ice cream melts into the hot fudge sauce and creates something that is almost impossible to describe without sounding dramatic.
- A dollop of freshly whipped cream on top adds a lighter, airier contrast to the richness of the cobbler. Works beautifully if you find ice cream too heavy.
- Dust the top lightly with powdered sugar just before serving for an elegant presentation that takes about four seconds of effort.
- Add a drizzle of caramel sauce over the top alongside the ice cream for a chocolate caramel combination that is absolutely worth the extra step.
- Serve it alongside a scoop of coffee ice cream instead of vanilla for a mocha-style dessert experience that is seriously underrated.
- Fresh raspberries or sliced strawberries on the side cut through the richness of the chocolate beautifully and add a pop of color to the presentation.
Storage tips
Room temperature: Cover the baking dish tightly with plastic wrap or foil and store at room temperature for up to 2 days. The sauce layer stays gooey and the top maintains a good texture when covered properly.
Refrigerator: For longer storage transfer portions to an airtight container and refrigerate for up to 4 days. The sauce thickens considerably when cold but loosens right back up when reheated.
Freezer: The cobbler freezes reasonably well. Portion it into freezer-safe containers and freeze for up to 2 months. Thaw overnight in the refrigerator before reheating.
Reheating: Reheat individual portions in the microwave for 30 to 45 seconds until warm and gooey again. You can also cover the whole dish with foil and warm it in a 300F oven for about 15 minutes. Add a fresh scoop of ice cream and it tastes just as good as day one.
Closing
Chocolate cobbler is the kind of dessert that earns you a reputation. People will ask you to bring it to every gathering, every holiday dinner, every potluck from this point forward. And the best part is you can smile and nod while knowing it took you about 10 minutes to put together. That’s your little secret.
Make it this week, serve it warm with ice cream, and watch what happens. Leave a comment below and tell me how it went, share your photos on Pinterest, or tag me so I can see your version of that incredible gooey sauce situation. I genuinely cannot wait to see it.
With love from my kitchen, Kip
Chocolate cobbler — the moist, decadent dessert that practically makes itself
Description
This chocolate cobbler is one of those desserts that sounds too good to be true until you make it and realize it's actually better than advertised. A tender, brownie-like top layer sits over a rich, self-saucing chocolate fudge layer that forms all on its own while it bakes. Served warm with a scoop of vanilla ice cream melting into that gooey sauce, it's the kind of dessert that makes people go quiet at the table — and that's always a good sign. Kip's version keeps it simple, straightforward, and deeply chocolatey because dessert should never require a culinary degree.
Ingredients
For the batter:
For the topping:
Instructions
-
Preheat oven to 350F. Lightly grease an 8x8 or 9x9 inch baking dish.
-
Whisk together flour, baking powder, salt, sugar, and cocoa powder in a large bowl. Add melted butter, milk, and vanilla. Stir until a smooth thick batter forms. Spread into the prepared baking dish.
-
In a separate bowl combine granulated sugar, brown sugar, and cocoa powder. Sprinkle evenly over the batter.
-
Carefully pour boiling water evenly over the top. Do not stir.
-
Bake at 350F for 35 minutes until the top looks set and slightly crackled.
-
Rest for 5 to 10 minutes then serve warm directly from the dish with vanilla ice cream.
