

Store-bought pita bread is one of those things that exists on a spectrum between tolerable and genuinely depressing. You know what I mean — the kind that comes in a sealed bag, tears before you can even fill it, and tastes roughly like nothing. That is not pita bread. That is a pita-shaped disappointment.
Real Greek pita bread is soft and pillowy with a slight chew, golden char spots from a hot pan, and a warmth that makes everything you eat with it taste better. And the thing nobody tells you is that making it from scratch takes about 30 minutes and requires ingredients you almost certainly already have in your kitchen right now.
I made this for the first time on a whim to go alongside a Greek chicken dish and ended up eating three pieces standing at the stove before dinner was even on the table. That is the kind of recipe that earns a permanent spot in the rotation immediately.
Why you’ll love this recipe
- It comes together in 30 minutes with basic pantry ingredients. Flour, yeast, olive oil, salt, sugar, and warm water. That is genuinely all you need to make bread that tastes this good. The simplicity is almost suspicious.
- The texture is completely different from anything store-bought. Soft, pillowy, slightly chewy, with those beautiful golden char spots from the hot pan. There is no comparison to the packaged version and once you experience the difference you will not go back.
- No oven required. These cook entirely on the stovetop in a hot skillet or griddle pan. No preheating, no baking sheets, no waiting for an oven. Just a hot pan and about two minutes per pita.
- It is incredibly versatile. Serve it with hummus, use it to scoop up stew or curry, stuff it with grilled chicken and vegetables, use it as a flatbread pizza base, or just eat it warm with a drizzle of olive oil and a pinch of flaky salt. All of the above are correct choices.
- Kids absolutely love making it. Rolling out the dough and watching it puff up in the pan is genuinely exciting. This is a great recipe to make with children because the results are fast and dramatic and delicious.
- It is naturally dairy free and egg free. No butter, no eggs, no dairy of any kind in the base recipe. It is also easily made vegan. This is one of those recipes that works for almost everyone at the table without any modifications.
Ingredients with key notes
For the dough:
- 2 cups all-purpose flour, plus extra for dusting — All-purpose flour works perfectly here. Bread flour also works and gives you a slightly chewier texture if that is what you prefer. Either way measure your flour correctly — spoon it into the measuring cup and level it off rather than scooping directly from the bag which packs the flour and gives you too much.
- 1 teaspoon instant yeast — Instant yeast does not need to be proofed in water first which is why this recipe comes together so quickly. If you only have active dry yeast, dissolve it in the warm water with the sugar and let it sit for 5 minutes until foamy before adding to the flour.
- 1 teaspoon sugar — Feeds the yeast and helps the pita brown beautifully in the pan. Do not skip it.
- 3/4 teaspoon salt — Salt is essential for flavor. Unsalted pita bread tastes flat and disappointing. Season your dough properly.
- 2 tablespoons olive oil — Adds flavor, helps the dough stay soft, and makes the finished pita slightly richer. Use a good quality olive oil since it is a key flavor component in such a simple recipe.
- 3/4 cup warm water — The water should be warm to the touch but not hot — around 100 to 110°F / 38 to 43°C. Water that is too hot kills the yeast. Water that is too cold does not activate it. Aim for the temperature of a warm bath.
For finishing:
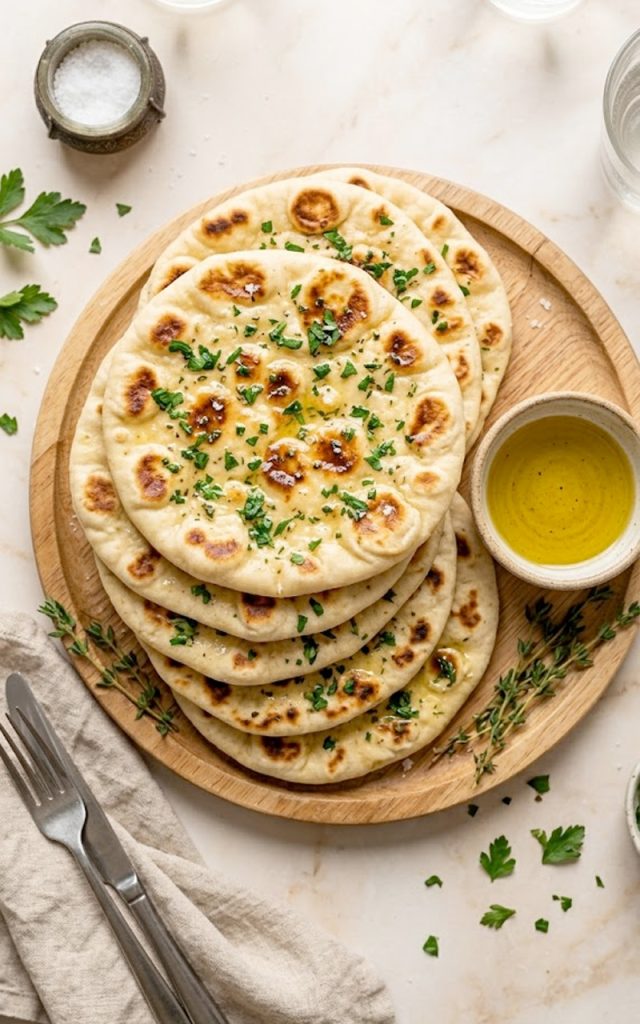
- 2 tablespoons melted butter or olive oil — Brushed over the pita immediately after it comes off the pan while it is still hot. This is what gives it that glossy, rich finish you see in the photos.
- 2 tablespoons fresh parsley, finely chopped — Mixed into the melted butter or olive oil for a simple herbed finish. This step is optional but it adds color, freshness, and a subtle herby flavor that makes the pita taste even more special.
- Flaky sea salt for finishing — A small pinch over the top right after brushing with the herb butter. This is a small detail that makes a big difference.
Step-by-step instructions
Step 1: Mix the dough
In a large bowl whisk together the flour, instant yeast, sugar, and salt. Make a well in the center and add the olive oil and warm water. Mix with a wooden spoon or your hands until the dough comes together into a shaggy mass. Turn it out onto a lightly floured surface and knead for 5 to 6 minutes until the dough is smooth, elastic, and slightly tacky but not sticky. If the dough feels too sticky add flour one tablespoon at a time. If it feels too dry add water one teaspoon at a time.
Step 2: Rest the dough
Shape the dough into a ball and place it in a lightly oiled bowl. Cover with a clean kitchen towel or plastic wrap and let it rest at room temperature for 10 minutes. This is not a full rise — you are just letting the gluten relax so the dough is easier to roll out. The yeast will still be doing a little work in this time and the dough will puff slightly.
Step 3: Divide and roll
After resting, turn the dough out onto a lightly floured surface and divide it into 6 equal pieces. Roll each piece into a smooth ball. Working with one ball at a time — keep the others covered with the towel — use a rolling pin to roll each ball into a round about 6 to 7 inches in diameter and roughly 1/4 inch thick. They do not need to be perfect circles. Rustic and slightly uneven is exactly right for homemade pita.
Step 4: Cook the pita
Heat a large skillet, cast iron pan, or griddle pan over medium-high heat until very hot — at least 2 minutes of preheating. You want the pan genuinely hot before the first pita goes in. A drop of water should sizzle and evaporate immediately when it hits the surface. Cook each pita dry with no oil in the pan for 1 to 2 minutes per side until puffy, cooked through, and golden with beautiful char spots on both sides. The pita should puff up significantly while cooking — that is the steam trapped inside creating those airy pockets. Do not press it down. Let it do its thing.
Step 5: Finish and serve
Stack the cooked pitas on a plate and cover with a clean kitchen towel to keep them warm and soft while you cook the remaining pieces. Mix the melted butter or olive oil with the chopped fresh parsley. Brush each pita generously with the herb butter immediately while it is still hot. Finish with a pinch of flaky sea salt. Serve warm.
Serving suggestions
Warm homemade pita is one of the most versatile things you can put on a table. Here are some of the best ways to serve it:
- Serve alongside hummus and a drizzle of good olive oil. This is the classic and it is a classic for a reason. The warmth of the fresh pita against creamy hummus with a puddle of olive oil and a sprinkle of smoked paprika is one of the best simple food combinations that exists.
- Use it to scoop up soups and stews. Thick lentil soup, Moroccan chicken, Greek chicken casserole — pita bread is the perfect vessel for capturing every last drop of a good sauce or broth. Far superior to regular bread for this purpose.
- Stuff it with grilled chicken, vegetables, and tzatziki. Fold the pita in half, stuff it generously, and you have a genuinely great sandwich that takes minutes to put together. Add some shredded lettuce, sliced tomato, and a squeeze of lemon.
- Use it as a flatbread pizza base. Top the pita with tomato sauce, mozzarella, and your toppings of choice and slide it under the broiler for 3 to 4 minutes until the cheese is bubbling. Incredibly fast weeknight dinner.
- Serve it warm with a simple olive oil and za’atar dipping mix. Mix good olive oil with za’atar spice blend in a shallow dish and serve alongside the warm pita for dipping. If you have never tried this combination you are in for a genuine treat.
Storage tips
Same day: Homemade pita bread is at its absolute best on the day it is made — specifically in the first hour after cooking. Serve it warm directly from the pan if at all possible.
Room temperature: Store cooled pita in an airtight zip-lock bag or wrapped in a clean kitchen towel at room temperature for up to 2 days. Keep them stacked together so they stay soft.
Fridge: Store in an airtight container or zip-lock bag in the fridge for up to 5 days. Refrigerated pita firms up and needs to be warmed before serving.
Reheating: The best way to reheat homemade pita is directly in a hot dry skillet for 30 to 60 seconds per side. It revives beautifully and gets soft and warm again almost instantly. You can also wrap in foil and heat in a 350°F oven for 5 minutes or microwave wrapped in a damp paper towel for 20 to 30 seconds.
Freezing: Homemade pita freezes excellently for up to 3 months. Stack the cooled pitas with a small piece of parchment paper between each one to prevent sticking, then seal in a freezer bag. Thaw at room temperature for 30 minutes or reheat directly from frozen in a hot skillet for 2 to 3 minutes per side. FYI frozen and reheated homemade pita is still significantly better than fresh store-bought. That says everything you need to know.
Make ahead tip: You can make the dough, let it rest, divide and roll the pitas, and store them uncooked layered with parchment paper in the fridge for up to 24 hours. Cook them straight from the fridge when you are ready. Add 30 extra seconds per side to account for the cold dough.
A quick closing thought
Making bread from scratch for the first time is one of those kitchen moments that feels surprisingly significant. There is something deeply satisfying about mixing a few basic ingredients together and ending up with something warm and pillowy and genuinely delicious in under 30 minutes.
This pita bread started as a side dish and ended up stealing the show at the table more times than I can count. People always ask about it. They assume it took much longer or required some special knowledge. It did not. It just required a hot pan, a little patience with the kneading, and the willingness to try.
If you make this, tell me how it went. Did it puff up perfectly? Did you eat it straight from the pan before it even made it to the table? Did the herb butter situation become a whole thing? All of these outcomes are correct and I want to hear about every one of them.
Keep making things from scratch whenever you can. The difference is always worth it.
With gratitude, Kip
Homemade Greek pita bread in 30 minutes — soft fluffy and better than anything from the store
Description
Soft, fluffy, golden Greek pita bread with beautiful char spots made from scratch with simple pantry ingredients in just 30 minutes. No fancy equipment, no complicated technique, and absolutely no comparison to the rubbery packaged version sitting in your grocery store. Once you make homemade pita bread you will never go back.
