

If you have ever been to the North Shore of Oahu, you already know exactly what this recipe is about. Those legendary shrimp trucks parked along Kamehameha Highway, with lines stretching down the road and the smell of garlic butter hanging in the warm Hawaiian air — that is the experience this recipe brings straight to your kitchen.
The good news is you do not need a plane ticket to taste it. This Hawaiian garlic shrimp is bold, buttery, loaded with more garlic than you think is reasonable, and finished with just enough heat to keep things interesting.
It takes twenty minutes from start to finish and uses ingredients you can grab at any grocery store. The result is a plate of shrimp so good you will genuinely be licking your fingers and not even slightly embarrassed about it.
I first tried recreating this after a trip where the shrimp truck version lived in my memory rent-free for months. After a few attempts at getting the garlic-to-butter ratio exactly right, I landed on this version — and it has not left my weekly rotation since. Some recipes just stick around for good reason.
Why you’ll love this recipe
- Twenty minutes and done. This is legitimately one of the fastest impressive meals you can put on the table. If you can peel garlic and heat a pan, you are most of the way there already.
- That garlic butter sauce is absolutely unreal. We are talking a generous amount of garlic cooked low and slow in butter until it turns golden and fragrant, with paprika and chili building layer after layer of flavor underneath. It is the kind of sauce that makes you want to serve bread alongside just to mop up what is left in the pan.
- High in protein and naturally low carb. Shrimp is one of the leanest, highest protein seafood options out there. This dish delivers serious flavor without compromising on nutrition.
- Naturally gluten free and keto friendly. No swaps needed — this recipe is gluten free as written and fits perfectly into a low carb or keto lifestyle.
- Impressive enough for guests. This dish looks and tastes like something from a restaurant. Nobody needs to know it took you twenty minutes and one pan.
- Completely customizable heat level. Love spice? Add more chili. Cooking for someone who can’t handle heat? Pull it back. The base flavors are bold enough to carry the dish either way.
Ingredients with key notes
For the shrimp:
- 600g large raw shrimp, peeled and deveined — shell-on or shell-off both work but the original shrimp truck version is cooked shell-on for maximum flavor. If you want the full authentic experience, leave the shells on. If you want easier eating, peel them first
- 1 teaspoon paprika — regular or smoked both work. Smoked paprika adds an extra depth that I personally love here
- 1/2 teaspoon salt
- 1/2 teaspoon black pepper
- 1/4 teaspoon cayenne pepper — this is what gives the shrimp that initial kick before the sauce takes over
For the garlic butter sauce:
- 6 tablespoons unsalted butter — yes, six. This is not the recipe to start cutting corners on butter. The garlic needs fat to bloom properly and the sauce needs body
- 12 to 15 cloves fresh garlic, minced — and before you question that amount, just trust the process. This is Hawaiian garlic shrimp. The garlic is not a supporting character here, it is the whole show
- 2 tablespoons olive oil — combining butter and olive oil raises the smoke point so the garlic toasts without burning
- 2 tablespoons dry white wine or chicken stock — this deglazes the pan and lifts all those toasted garlic bits off the bottom, which is where all the flavor lives
- Juice of half a lemon
- 1/4 teaspoon red chili flakes
- Fresh parsley, finely chopped, for garnish
- Lemon wedges for serving
Step-by-step instructions
Step 1: Season the shrimp
Pat the shrimp completely dry with paper towels. Dry shrimp sear properly — wet shrimp steam instead, and steamed shrimp in a pan is not what we are going for here. Toss the dried shrimp with paprika, salt, black pepper, and cayenne pepper until evenly coated. Set aside while you prepare the sauce base.
Step 2: Toast the garlic
In a large skillet, heat the butter and olive oil together over medium heat. Once the butter is melted and the mixture is warm, add all of the minced garlic. This is the most important step in the entire recipe so pay attention — you want to cook the garlic slowly and gently, stirring regularly, for about 3 to 4 minutes until it turns lightly golden and incredibly fragrant. Do not rush this over high heat. Burnt garlic is bitter and will ruin everything you are working towards. Low and slow is the move here.
Step 3: Add the chili flakes
Add the red chili flakes to the golden garlic butter and stir to combine. Let them cook for about 30 seconds so the heat from the chili blooms into the butter. At this point your kitchen should smell absolutely incredible and anyone else in the house will have appeared in the doorway asking what you are cooking.
Step 4: Cook the shrimp
Increase the heat to medium-high. Add the seasoned shrimp to the pan in a single layer. Cook for 1 to 2 minutes on the first side without moving them — you want them to develop a slight golden sear on the outside. Flip each shrimp and cook for another 1 to 2 minutes on the other side. Shrimp cook very fast. The moment they curl into a C shape and turn pink and opaque all the way through, they are done. Pull them off the heat immediately. Overcooked shrimp turns rubbery and there is no fixing that.
Step 5: Deglaze the pan
Add the white wine or chicken stock to the pan and stir quickly to lift all the toasted garlic and spices from the bottom. Let it sizzle and reduce for about 1 minute. Squeeze in the lemon juice and give everything one final toss to coat the shrimp completely in that gorgeous garlic butter sauce.
Step 6: Garnish and serve
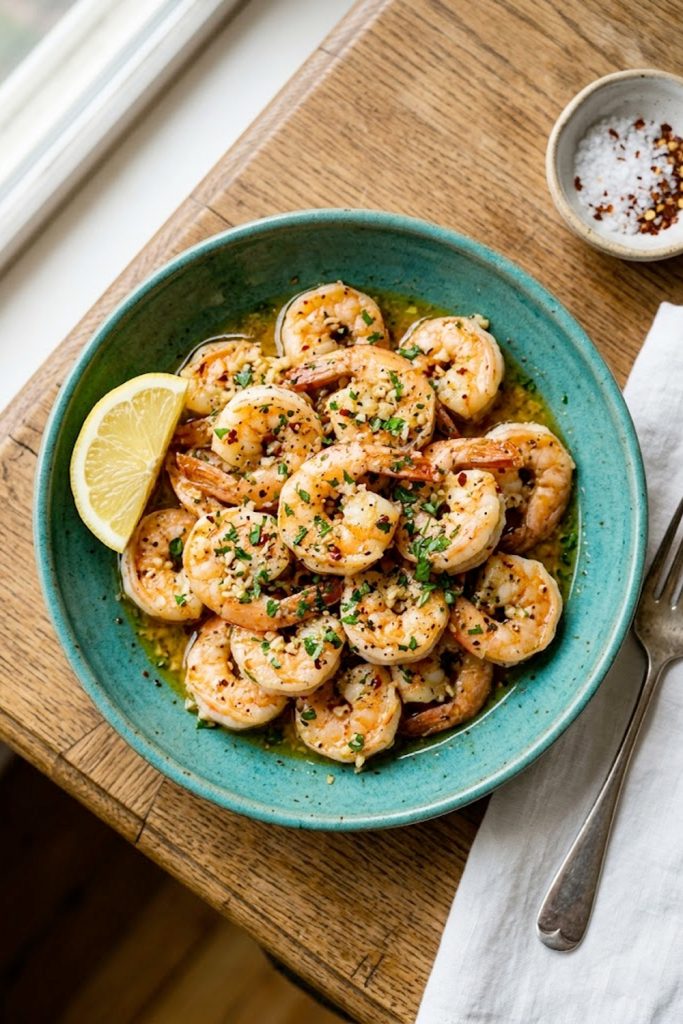
Remove from heat. Scatter freshly chopped parsley generously over the top and serve immediately with lemon wedges on the side. This dish waits for no one — serve it hot and eat it fast. Which, given how good it smells, should not be a problem.
Serving suggestions
- Serve over steamed white rice. This is the classic North Shore way. A scoop of plain steamed white rice underneath that garlic butter sauce is a combination that makes complete sense the moment you taste it.
- Pile it onto a plate with crusty bread. For mopping up every last drop of that garlic butter sauce from the plate. Non-negotiable. Absolutely essential.
- Try it over garlic butter noodles. Toss some cooked spaghetti or linguine in a little butter and garlic, pile the shrimp on top, and call it a full meal. It sounds extra but it works magnificently.
- Serve as an appetizer. This dish makes an incredible starter. Put it in the center of the table with some crusty bread and toothpicks and watch it disappear in about four minutes.
- Add it to tacos. Warm corn tortillas, a few of these garlic shrimp, some shredded cabbage, avocado slices, and a squeeze of lime. Hawaiian garlic shrimp tacos are genuinely one of the best things you can put in a tortilla.
- Pair with a simple green salad. A fresh arugula or cucumber salad with a light lemon dressing on the side balances out the richness of the garlic butter sauce beautifully.
Storage tips
Refrigerator: Store leftover shrimp in an airtight container in the fridge for up to 2 days. The garlic butter sauce will solidify when cold — this is completely normal. It melts right back when reheated.
Reheating: Reheat gently in a skillet over medium-low heat with a small knob of butter to bring the sauce back to life. Do not microwave shrimp if you can help it — it makes them tough and rubbery. A quick 2 to 3 minutes in a warm pan is all you need.
Freezing: Cooked shrimp can be frozen but the texture does change slightly after thawing. If you want to freeze, do so without the sauce, in a single layer on a tray first, then transfer to a freezer bag once solid. Freeze for up to 1 month. The sauce is best made fresh each time since it only takes a few minutes.
Make-ahead tip: You can peel, devein, and season the shrimp up to 24 hours ahead and keep them covered in the fridge. This makes the actual cooking process even faster when you are ready to eat — just pull them out and go straight to step two.
Closing
And there you have it — Hawaiian garlic shrimp that brings the whole North Shore shrimp truck experience to your kitchen in twenty minutes flat. Bold garlic, rich butter, a kick of heat, and shrimp cooked just right. It is the kind of recipe that earns a permanent spot in your rotation after the very first time you make it.
What I love most about this dish is how unapologetically simple it is. No complicated techniques, no hard-to-find ingredients — just really good flavors treated with respect and served hot. That is cooking at its best.
Make it this week and let me know what you think in the comments. And if you turned it into tacos — which I sincerely hope you did — tell me everything about it.
With love from my kitchen to yours — Kip.
Hawaiian garlic shrimp recipe (bold, buttery, and ready in 20 minutes)
Description
Hawaiian garlic shrimp is a iconic dish from the shrimp trucks of Oahu's North Shore — plump, juicy shrimp cooked in a deeply flavorful garlic butter sauce with paprika, white wine, lemon, and a kick of chili. It is fast, bold, and completely addictive. This version captures all the flavor of the original with simple ingredients and minimal effort.
Ingredients
Instructions
-
Pat shrimp dry and toss with paprika, salt, pepper, and cayenne. Set aside.
-
Heat butter and olive oil in a large skillet over medium heat. Add minced garlic and cook slowly for 3 to 4 minutes until lightly golden and fragrant.
-
Add chili flakes and stir for 30 seconds.
-
Increase heat to medium-high. Add shrimp in a single layer and cook 1 to 2 minutes per side until pink, opaque, and curled into a C shape.
-
Add white wine or stock and deglaze the pan. Stir and reduce for 1 minute. Squeeze in lemon juice and toss to coat.
-
Garnish with fresh parsley and serve immediately with lemon wedges.
