

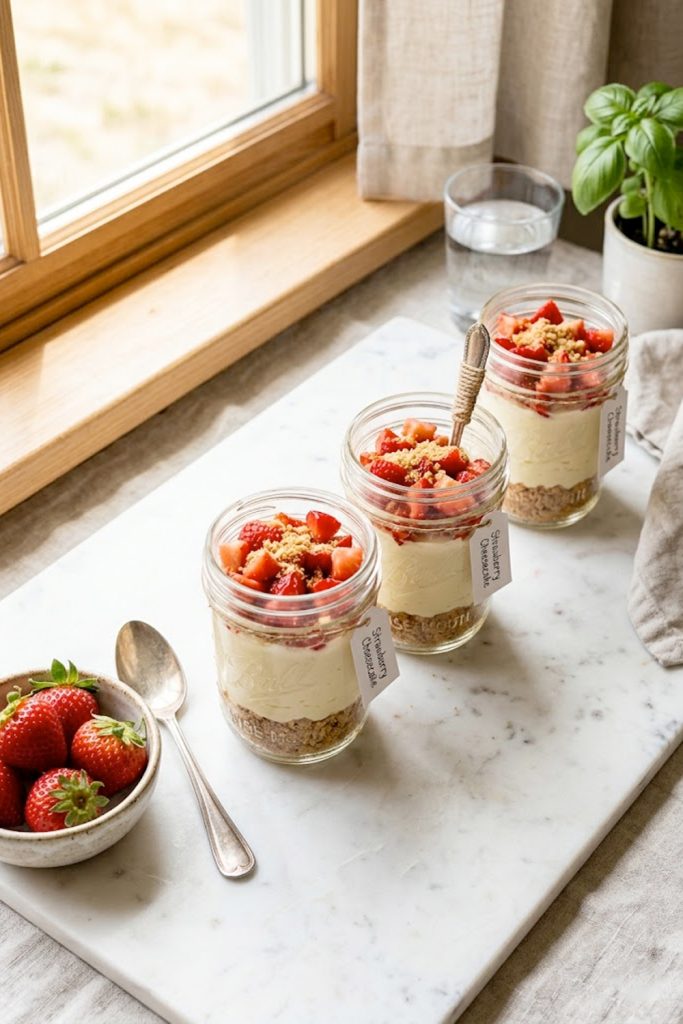

Let me be honest with you — I did not think a dessert could make me feel good about eating it. Cheesecake has always been that thing I’d eat and immediately feel guilty about. Then I started playing around with high protein versions in my kitchen, and everything changed.
These cheesecake jars are creamy, rich, and taste like a full-on dessert. But they’re secretly packing 30 grams of protein per serving. No baking, no fuss, no fancy equipment. Just layers of goodness that come together in about 15 minutes.
If you’ve been looking for a way to satisfy your sweet tooth without derailing your health goals — this is it. IMO, this might be one of the best recipes on this site. And I don’t say that lightly.
Why you’ll love this recipe
- No oven needed. Seriously — zero baking involved. You mix, layer, chill, and eat. That’s the whole process.
- 30 grams of protein per jar. This is dessert that actually pulls its weight. Great for post-workout recovery or hitting your daily protein goals without choking down another protein shake.
- Make-ahead friendly. Prep them Sunday night and you’ve got dessert — or honestly, breakfast — sorted for the whole week. No judgment here.
- Five ingredients you already have. No trips to specialty stores, no ingredients you can’t pronounce. Just real, simple stuff from your local grocery store.
- It tastes like actual cheesecake. Not a sad, watered-down version. The real deal — creamy, slightly tangy, sweet, and satisfying. People will not believe you made this in 15 minutes.
- Totally customizable. Swap the strawberries for blueberries, mangoes, or whatever fruit you have lying around. This recipe plays well with others.
Ingredients and key notes
For the crust layer:
- 1 cup graham cracker crumbs (about 8 full crackers, crushed)
- 2 tablespoons melted butter
- 1 tablespoon honey or maple syrup
Note: For a gluten free version, swap graham crackers for gluten free digestive biscuits or almond flour mixed with a little coconut oil and honey.
For the cheesecake filling:
- 1 cup full-fat cottage cheese
- 1 cup plain Greek yogurt (full fat works best)
- 4 oz cream cheese, softened
- 3 tablespoons honey or maple syrup
- 1 teaspoon vanilla extract
- 1 scoop unflavored or vanilla protein powder (optional but recommended)
Note: The cottage cheese is the secret weapon here. Once blended, it becomes silky smooth — you’d never guess it’s in there. Don’t skip blending it; chunky cottage cheese in cheesecake is not the vibe.
Note: Full-fat Greek yogurt gives you a creamier, richer filling. Low-fat works but the texture won’t be as thick.
For the topping:
- 1 cup fresh strawberries, diced
- 1 teaspoon honey (optional, to sweeten the berries)
Note: You can macerate the strawberries — just toss them with the honey and let them sit for 10 minutes. They release their juices and become almost jammy. Highly recommend.
Step-by-step instructions
Step 1: Make the crust
Crush your graham crackers into fine crumbs — a zip-lock bag and a rolling pin work perfectly. Mix the crumbs with melted butter and honey until the mixture resembles wet sand. It should hold together when you press it between your fingers. Set aside.
Step 2: Blend the filling
Add the cottage cheese, Greek yogurt, cream cheese, honey, vanilla extract, and protein powder (if using) into a blender or food processor. Blend on high for about 60 seconds until completely smooth and creamy. Taste it — adjust sweetness if needed. Try not to eat it all straight from the blender. I won’t blame you if you do though 🙂
Step 3: Prep the strawberries
Dice your strawberries and toss them with a teaspoon of honey if you want them a little sweeter. Let them sit while you assemble the jars. Those few minutes make a difference — trust the process.
Step 4: Assemble the jars
Grab four mason jars or any tall glasses you have. Start with a layer of the graham cracker crust at the bottom — press it down lightly. Add a generous layer of the cheesecake filling. Add another layer of crust. Then another layer of filling. Top with the diced strawberries and a final sprinkle of graham cracker crumbs.
Step 5: Chill and serve
Pop the jars in the fridge for at least 30 minutes before serving. This lets everything set and the flavors come together. If you can wait longer — an hour or overnight — even better. But 30 minutes is the minimum if you’re impatient like me.
Serving suggestions
- Serve straight from the fridge as a post-dinner dessert or a midday treat.
- Add a dollop of whipped cream on top if you’re feeling fancy — no judgment.
- Swap strawberries for mixed berries, sliced mango, or even a drizzle of peanut butter for a different flavor profile every time.
- These work brilliantly as a breakfast jar too — high protein, satisfying, and ready to grab from the fridge on a busy morning.
- Hosting guests? Serve them in clear glasses so the layers are visible. They look incredibly impressive for something this easy. FYI, no one needs to know how little effort went into this.
Storage tips
Refrigerator: Store the assembled jars covered with a lid or plastic wrap for up to 4 days. The crust will soften slightly over time but honestly — some people prefer it that way.
Freezer: These freeze well for up to 2 months. Freeze without the strawberry topping. When you’re ready to eat, thaw in the fridge overnight and add fresh fruit before serving.
Make-ahead tip: You can prep all the components separately — crust mix, filling, and fruit — and assemble right before serving if you want to keep the crust crunchier for longer.
Let’s wrap this up
Look, I’ve made a lot of desserts in this kitchen. Some complicated, some simple, some that looked great but tasted like disappointment. These cheesecake jars are none of that.
They’re quick, they’re genuinely delicious, and they make you feel good about what you’re eating. That’s the whole point of what we do here at Recipes by Kip — food that feeds your body and your soul without making you spend half your day in the kitchen.
Give these a try and let me know what you think in the comments. And if you put your own spin on them — different fruit, different crust, whatever — I’d love to hear about it. That’s the beauty of cooking. It’s never really finished.
Until next time — keep it simple, keep it delicious.
With love, Kip.
High Protein Cheesecake Jars — No-Bake, 30g Protein & Make-Ahead Easy
Description
These high protein cheesecake jars are everything you love about classic cheesecake — creamy filling, buttery graham cracker crust, fresh strawberries — but built smarter. Made with Greek yogurt and cottage cheese, each jar delivers serious protein without sacrificing an ounce of flavor. Perfect for meal prep, post-workout treats, or just when you need something delicious that won't wreck your day.
Ingredients
Crust:
Filling:
Topping:
Instructions
-
Mix graham cracker crumbs, melted butter, and honey until it resembles wet sand.
-
Blend cottage cheese, Greek yogurt, cream cheese, honey, vanilla, and protein powder until completely smooth.
-
Dice strawberries and toss with honey. Let sit for 10 minutes.
-
Layer crust, filling, crust, filling in each jar. Top with strawberries and a sprinkle of crust crumbs.
-
Chill for at least 30 minutes before serving.