

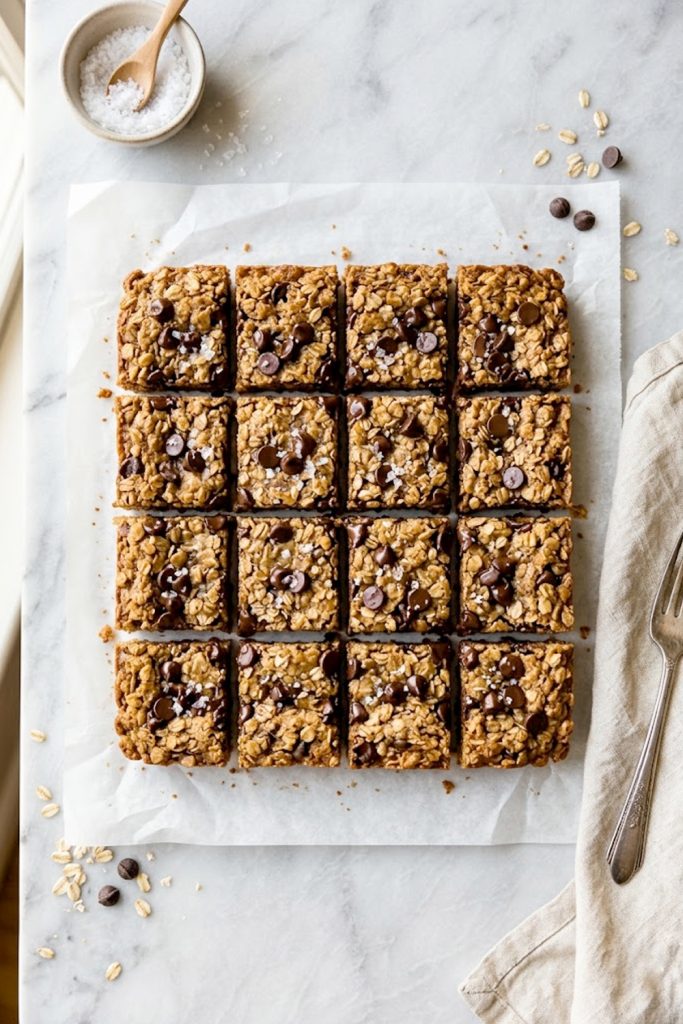

Let’s be honest — finding a snack that’s actually good for you AND tastes like dessert feels almost impossible. Most “healthy” bars you buy at the store taste like cardboard with a marketing budget. Not these.
I stumbled onto this recipe on one of those lazy Sunday afternoons when I wanted something sweet but didn’t want to completely derail my week. I had oats, some chocolate chips, and a few pantry staples. Thirty minutes later, I was sitting at my kitchen counter eating something that genuinely surprised me. Chewy, chocolatey, and filling — without the sugar crash afterward.
That’s the kind of recipe I live for. And trust me, once you make these, they’re going to become a regular in your kitchen too.
Why you’ll love this recipe
- It’s ready in 30 minutes. No chilling, no waiting, no overnight anything. Mix, bake, done.
- The ingredients are simple. Everything you need is probably already in your pantry right now.
- It’s genuinely healthy. Oats, natural sweetener, wholesome fats — comfort food that actually works for you.
- Kids go crazy for these. They taste like a treat, so nobody needs to know they’re eating something nutritious. FYI, that’s a win.
- They’re great for meal prep. Make a batch on Sunday and you have snacks sorted for the whole week.
- You can customize them easily. Swap chocolate chips for raisins, add nuts, go dairy-free — this recipe plays well with others.
Ingredients with key notes
- 2 cups rolled oats — Use old-fashioned rolled oats, not instant. Instant oats will make the bars too soft and they won’t hold their shape.
- 1/2 cup natural peanut butter — This is your binding agent and your fat source. Go for the kind with just peanuts and salt on the label. The oily, separated kind works perfectly here.
- 1/3 cup honey or maple syrup — Both work great. Maple syrup gives a slightly deeper flavor; honey is a little sweeter. Your call.
- 1 egg — Helps bind everything together and gives the bars a little chew. If you want to go egg-free, a flax egg works too (1 tbsp ground flax + 3 tbsp water, rested for 5 minutes).
- 1 tsp vanilla extract — Don’t skip this. It ties everything together.
- 1/2 tsp baking soda — Gives the bars a slight lift so they don’t come out completely flat.
- 1/4 tsp salt — Balances the sweetness and makes the chocolate pop.
- 1/2 cup chocolate chips — Use semi-sweet or dark chocolate chips for the best flavor. Dairy-free chips work perfectly if you need that option.
- Optional: 1/4 tsp cinnamon — I almost always add this. It adds a subtle warmth that makes these bars feel extra comforting.
Step-by-step instructions
Step 1: Preheat your oven Set your oven to 350F (175C). Line an 8×8 inch baking pan with parchment paper and lightly grease it. This makes removing the bars so much easier later — don’t skip the parchment paper.
Step 2: Mix the wet ingredients In a large mixing bowl, combine the peanut butter, honey (or maple syrup), egg, and vanilla extract. Mix until everything is smooth and well combined. If your peanut butter is thick, you can warm it slightly in the microwave for about 20 seconds to make mixing easier.
Step 3: Add the dry ingredients Add the rolled oats, baking soda, salt, and cinnamon (if using) to the wet mixture. Stir everything together until you have a thick, uniform dough. It’ll be sticky — that’s exactly what you want.
Step 4: Fold in the chocolate chips Reserve a small handful of chocolate chips for the top, then fold the rest into the dough. Mix until the chips are evenly distributed throughout.
Step 5: Press into the pan Transfer the dough into your prepared baking pan. Use damp hands or the back of a spoon to press it down into an even layer. Scatter the reserved chocolate chips on top and press them in gently.
Step 6: Bake Bake for 18-22 minutes, until the edges are golden brown and the center looks set. Don’t overbake — they’ll firm up as they cool. A slightly underdone center is better than an overdone one here.
Step 7: Cool and cut Let the bars cool in the pan for at least 15 minutes before cutting. I know it’s hard to wait, but cutting them too early means they’ll fall apart. Once cooled, lift out using the parchment paper and cut into 12-16 bars.
Serving suggestions
These bars are incredibly versatile. Here’s how I love to serve them:
- As a breakfast on the go — Grab one (or two, no judgment) with your morning coffee. They’re filling enough to carry you through to lunch.
- As an afternoon snack — That 3pm energy slump hits different when you have one of these waiting for you.
- As a light dessert — Warm one up for 10 seconds in the microwave and serve with a scoop of vanilla ice cream. You’re welcome.
- Packed in a lunchbox — Kids love these and they travel well, making them perfect for school lunches or office snack bags.
- Post-workout fuel — The oats and peanut butter give you a solid combination of carbs and protein to help you recover.
Storage tips
At room temperature: Store the bars in an airtight container at room temperature for up to 3 days. Layer them with parchment paper if stacking so they don’t stick together.
In the fridge: They keep well in the fridge for up to 7 days. I actually prefer them cold — they firm up nicely and the chocolate chips get a satisfying snap to them.
In the freezer: These freeze beautifully. Wrap individual bars in plastic wrap or parchment paper, place them in a freezer-safe bag, and freeze for up to 3 months. Pull one out the night before and let it thaw in the fridge, or give it a quick 30-second zap in the microwave.
A quick note before you go
These bars have become one of my most-made recipes, and honestly, that says a lot. They’re the kind of thing you make once and immediately add to your regular rotation.
Whether you’re reaching for one on a busy morning, packing them for a trip, or just treating yourself after a long day — I hope they bring you the same quiet satisfaction they bring me every single time.
If you make them, I’d love to hear how they turned out. Leave a comment below or tag me on Pinterest. Let’s keep cooking good food together.
With gratitude, Kip.
Healthy Chocolate Chip Oatmeal Bars (Quick, Easy & Surprisingly Delicious)
Description
These healthy chocolate chip oatmeal bars are everything you want in a snack — chewy, satisfying, and packed with wholesome ingredients. No fancy equipment, no complicated steps. Just simple, feel-good food that tastes like a treat but won't leave you feeling heavy afterward.
Ingredients
Instructions
-
Preheat oven to 350F (175C). Line an 8x8 inch pan with parchment paper.
-
Mix peanut butter, honey, egg, and vanilla until smooth.
-
Add oats, baking soda, salt, and cinnamon. Stir to combine.
-
Fold in chocolate chips, reserving a handful for the top.
-
Press dough evenly into the pan. Top with reserved chips.
-
Bake for 18-22 minutes until edges are golden and center is set.
-
Cool for 15 minutes, then cut into bars.