
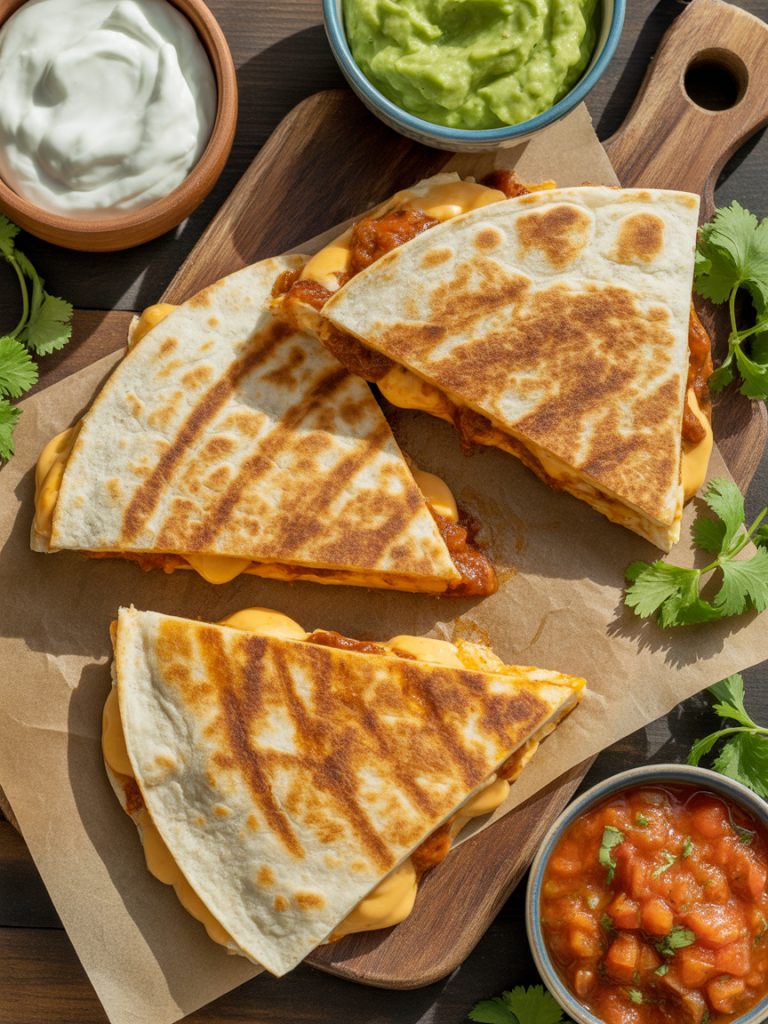

Sometimes you need dinner on the table fast, and it needs to be something that’ll make everyone at the table happy. These BBQ Chicken Quesadillas are that meal. We’re talking crispy, golden tortillas stuffed with tender shredded chicken coated in tangy BBQ sauce, loads of melted cheese, and just the right amount of red onion and cilantro for freshness.
The combination of sweet, smoky BBQ sauce with gooey melted cheese is absolutely addictive. Every bite gives you that perfect crispy-creamy texture contrast—crunchy tortilla on the outside, warm melty cheese and flavorful chicken on the inside. It’s comfort food that comes together in about 20 minutes with minimal effort and ingredients you probably already have.
I started making these BBQ chicken quesadillas as a way to use up leftover rotisserie chicken, and they quickly became a weekly staple in my house. They’re one of those recipes that feels like cheating because it’s so simple, but everyone thinks you put in way more effort than you actually did. Kids love them, adults love them, and honestly, they’re way better than anything you’d get at a chain restaurant.
Whether you’re using leftover chicken, rotisserie chicken from the store, or cooking chicken fresh, these quesadillas are about to become your go-to for busy weeknights. They’re also perfect for game day, quick lunches, or those nights when you just want something satisfying without any fuss.
Why These BBQ Chicken Quesadillas Are Absolutely Addictive
I’ve made quesadillas a hundred different ways, and these BBQ chicken ones consistently get the most requests. Here’s why they’re so incredibly good.
Ridiculously Quick and Easy
Twenty minutes from start to finish, and that’s if you’re moving slowly. If you’re using rotisserie chicken or leftovers, you’re literally just mixing chicken with BBQ sauce, assembling quesadillas, and cooking them for a few minutes per side. There’s no complicated prep, no long ingredient list, no special techniques. Just straightforward assembly and cooking. Perfect for those nights when you’re exhausted but still want real food that tastes good.
Sweet and Savory Perfection
The magic here is the combination of tangy, sweet BBQ sauce with salty, creamy melted cheese. It’s one of those flavor pairings that just works. The BBQ sauce adds moisture and tons of flavor to the chicken, while the cheese gets all gooey and helps bind everything together. The red onion adds a sharp bite that cuts through the richness, and fresh cilantro brings brightness. Every element plays a role, and together they create something way more delicious than the sum of their parts.
Kid-Friendly Winner
If you’re feeding picky eaters, these are golden. Most kids love quesadillas, and the BBQ sauce makes the chicken sweet and familiar rather than intimidating. You can easily adjust the spice level, leave out the onions and cilantro if your kids won’t eat them, and they’ll still be delicious. The crispy tortilla and melty cheese combo is universally appealing. IMO, having a few recipes like this that kids actually enjoy eating without complaining is worth its weight in gold.
Perfect for Leftovers
This is hands-down one of the best ways to use up leftover chicken. Rotisserie chicken from the grocery store, leftover grilled chicken, even canned chicken in a pinch—they all work beautifully. The BBQ sauce transforms even boring leftover chicken into something crave-worthy. You can also make extra and freeze them for quick future meals. They reheat surprisingly well, which makes them perfect for meal prep or those emergency dinner situations.
Your Simple Ingredient Checklist
The ingredient list is refreshingly short. Most of this is probably already in your kitchen, and what you need to buy is easy to find at any grocery store.
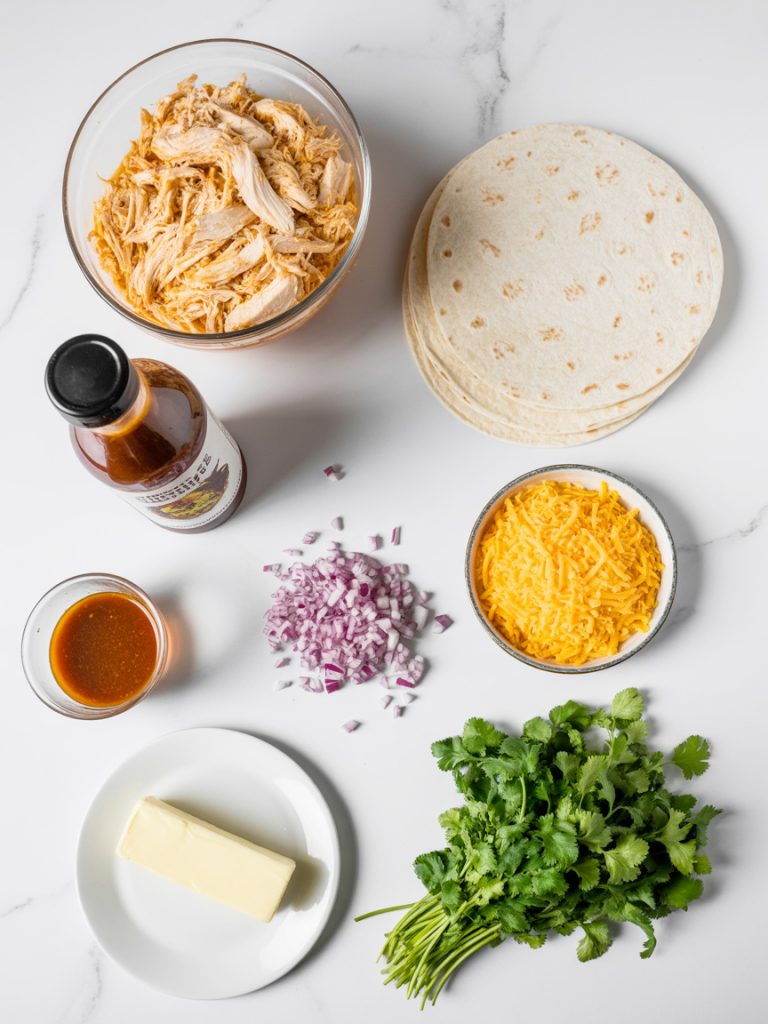
The Ingredient Lineup:
For the BBQ Chicken Filling:
- 3 cups cooked chicken (shredded or diced)
- ¾ cup BBQ sauce (your favorite brand)
- ¼ cup red onion (finely diced)
- 2 tablespoons fresh cilantro (chopped)
For the Quesadillas:
- 8 large flour tortillas (10-inch)
- 2 cups shredded cheese (cheddar, Monterey Jack, or Mexican blend)
- 2 tablespoons butter (for cooking)
For Serving:
- Sour cream
- Extra BBQ sauce for dipping
- Salsa or pico de gallo
- Guacamole
- Extra cilantro
Ingredient Tips and Substitutions:
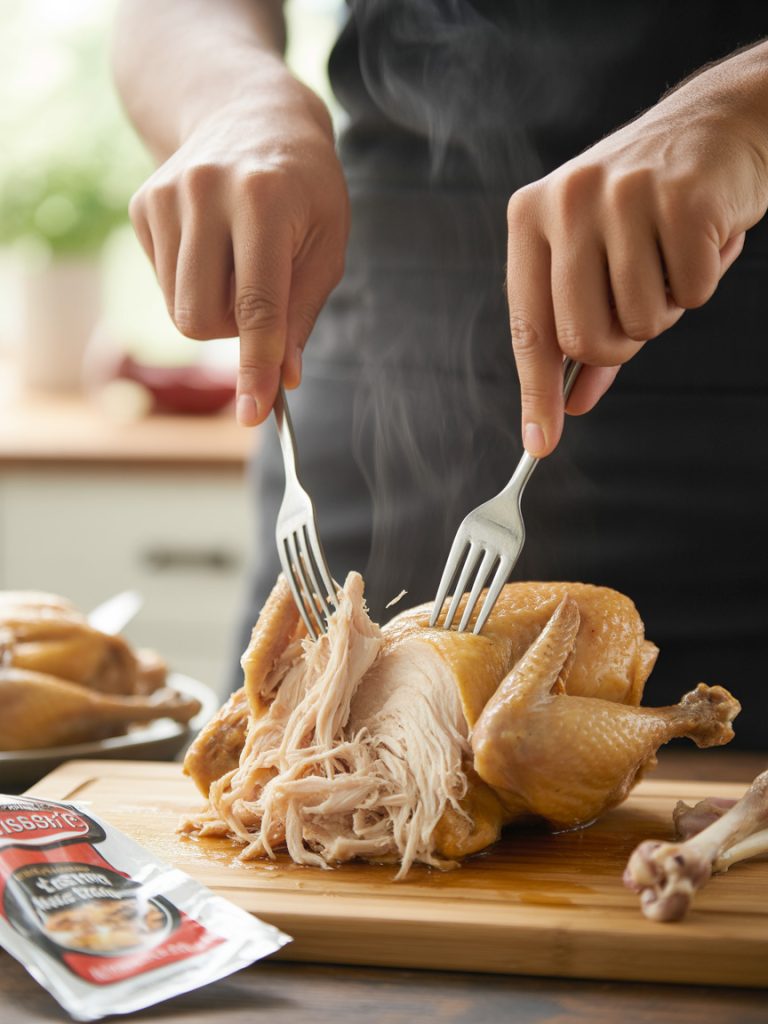
Cooked Chicken: This is the perfect recipe for using up leftovers. Rotisserie chicken from the grocery store is my go-to—just shred the meat and you’re done. Leftover grilled chicken, baked chicken breasts, or even leftover taco chicken all work great. If you’re starting from scratch, you can poach or bake chicken breasts, then shred them. In a real pinch, canned chicken works too, though the texture won’t be quite as good. You need about 3 cups of shredded chicken, which is roughly one rotisserie chicken or about 1 pound of cooked chicken breast.
BBQ Sauce: Use whatever BBQ sauce you love. Sweet and tangy sauces work best here—something like Sweet Baby Ray’s or your local favorite. If you like smoky flavors, go for a smokier sauce. For spice lovers, choose a spicy BBQ sauce. The sauce is what really flavors the chicken, so pick one you actually enjoy eating. You can even make your own if you’re feeling ambitious, but store-bought is totally fine and saves time.
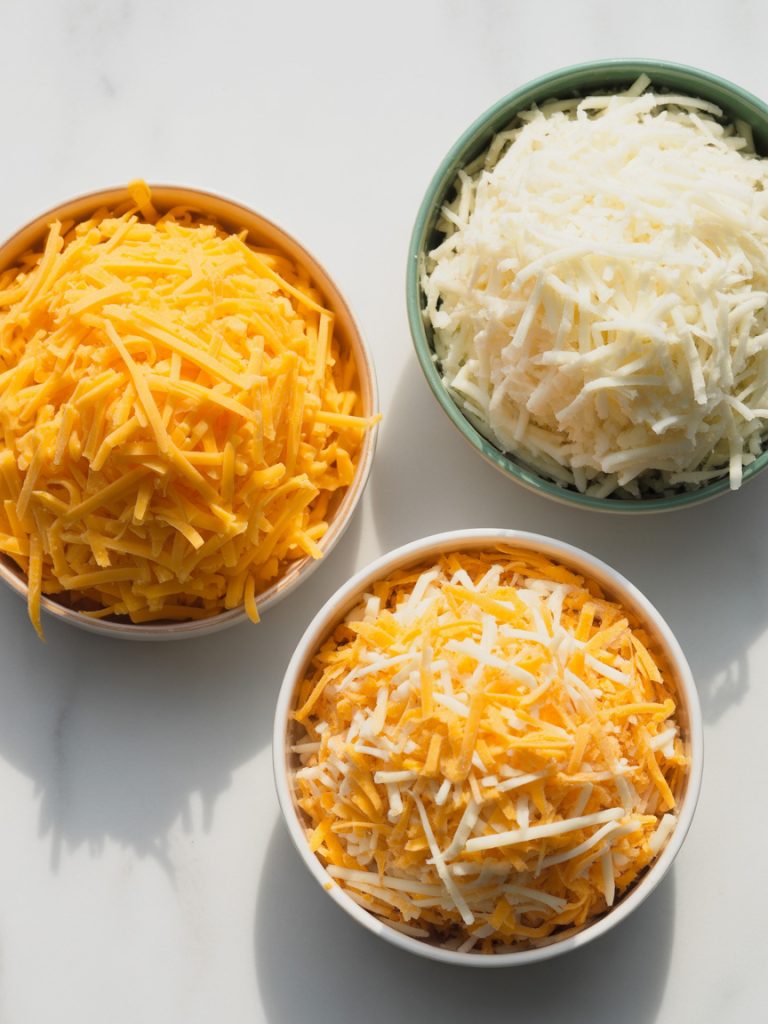
Cheese: Shredded cheddar is classic and melts beautifully. Monterey Jack is mild and creamy. A Mexican cheese blend (usually cheddar, Monterey Jack, and sometimes Colby) is perfect and convenient. For extra flavor, try pepper jack if you want some heat, or add a bit of smoked gouda. Freshly shredded cheese from a block melts better than pre-shredded (which has anti-caking agents), but pre-shredded is more convenient and works fine.
Tortillas: Large flour tortillas (10-inch) are standard for quesadillas. Look for ones that are fresh and pliable, not dry or cracked. Whole wheat tortillas work if you want more fiber. For gluten-free, use GF tortillas, though they can be more fragile. Smaller tortillas work too—you’ll just make more quesadillas or smaller portions.

Red Onion: This adds a sharp, fresh bite that balances the sweet BBQ sauce. If you don’t like raw onion, you can sauté it first to mellow the flavor, or just leave it out entirely. Green onions or scallions work as a milder substitute.
Cilantro: Fresh cilantro adds brightness and that authentic Mexican flavor. If you’re one of those people who thinks cilantro tastes like soap (it’s genetic, I get it), just skip it or substitute fresh parsley for color and a different kind of freshness.
Butter: Butter is best for cooking quesadillas because it adds flavor and creates a beautiful golden crust. You can use oil if you prefer, or even cooking spray for a lighter option, but butter gives you the best flavor and color.
Step-by-Step Cooking Instructions
Alright, let’s make these delicious BBQ chicken quesadillas. The process is super straightforward—even if you’ve never made quesadillas before, you’ll nail these.
Part 1: Prepare the BBQ Chicken Filling
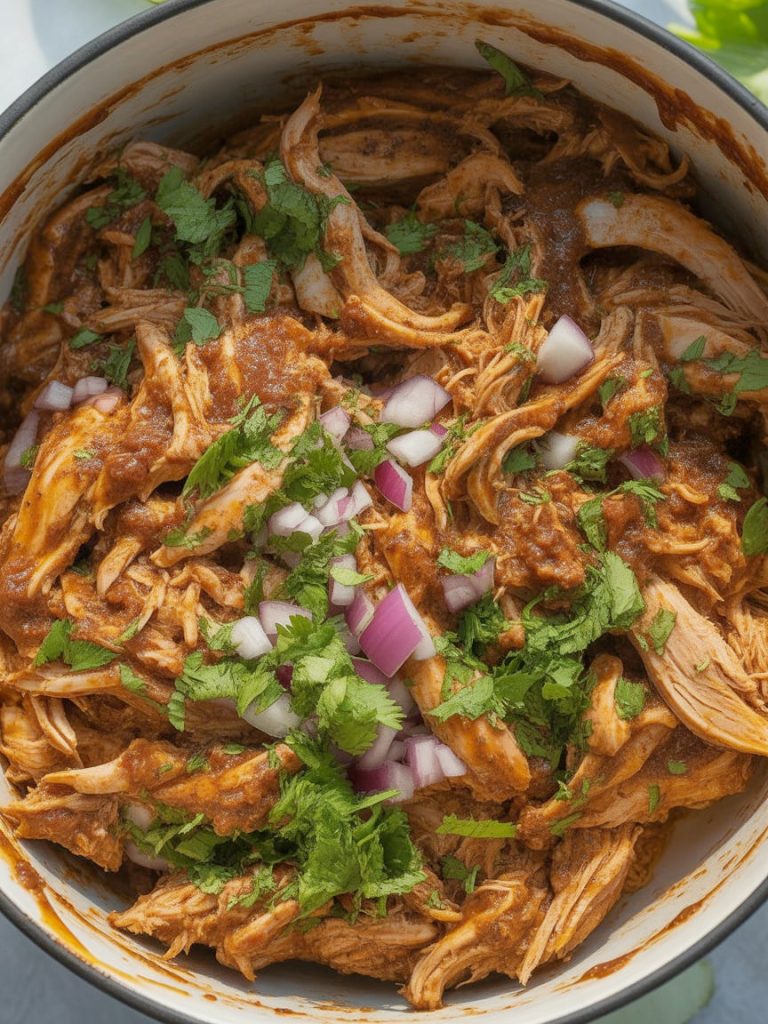
Shred or Dice the Chicken: If you’re using rotisserie chicken, pull the meat off the bones and shred it with your hands or two forks. Discard the skin and bones (or save them for making stock). If you’re using leftover cooked chicken, just shred or dice it into bite-sized pieces. You want relatively small pieces that will distribute evenly in the quesadilla and be easy to eat.
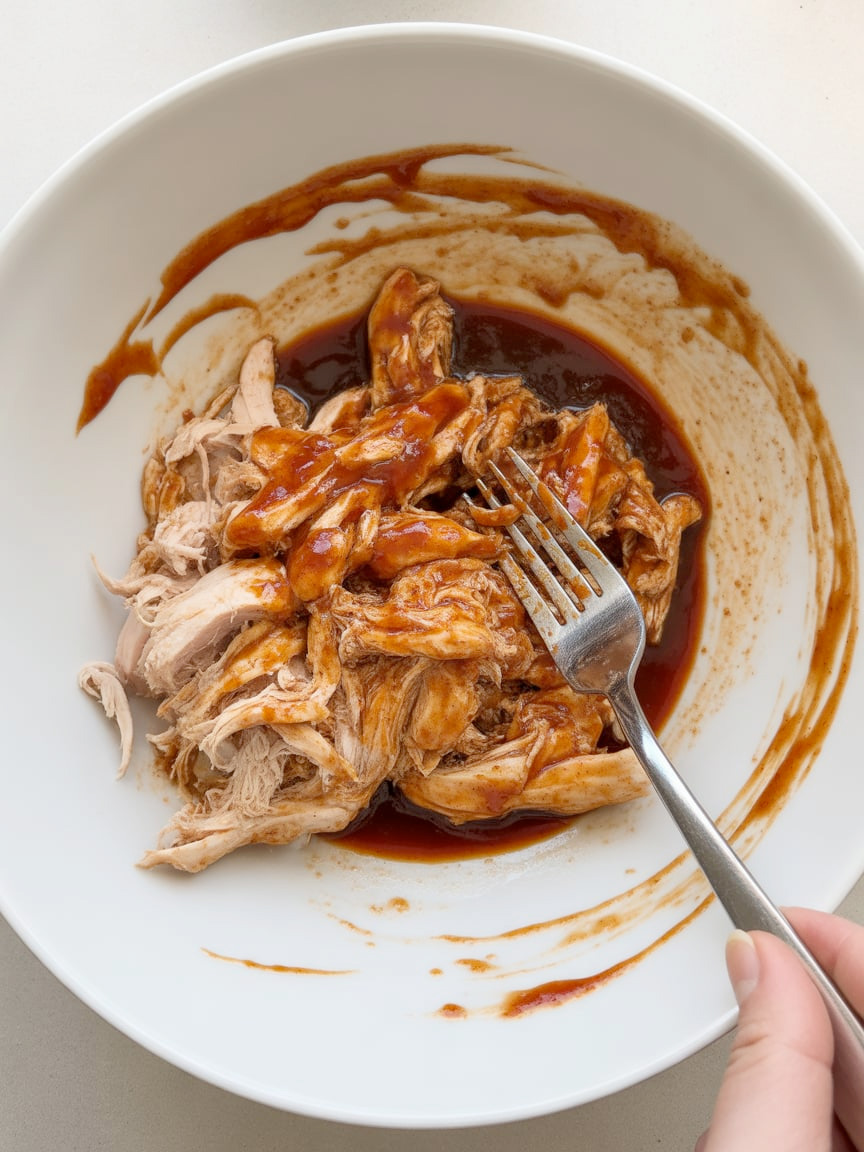
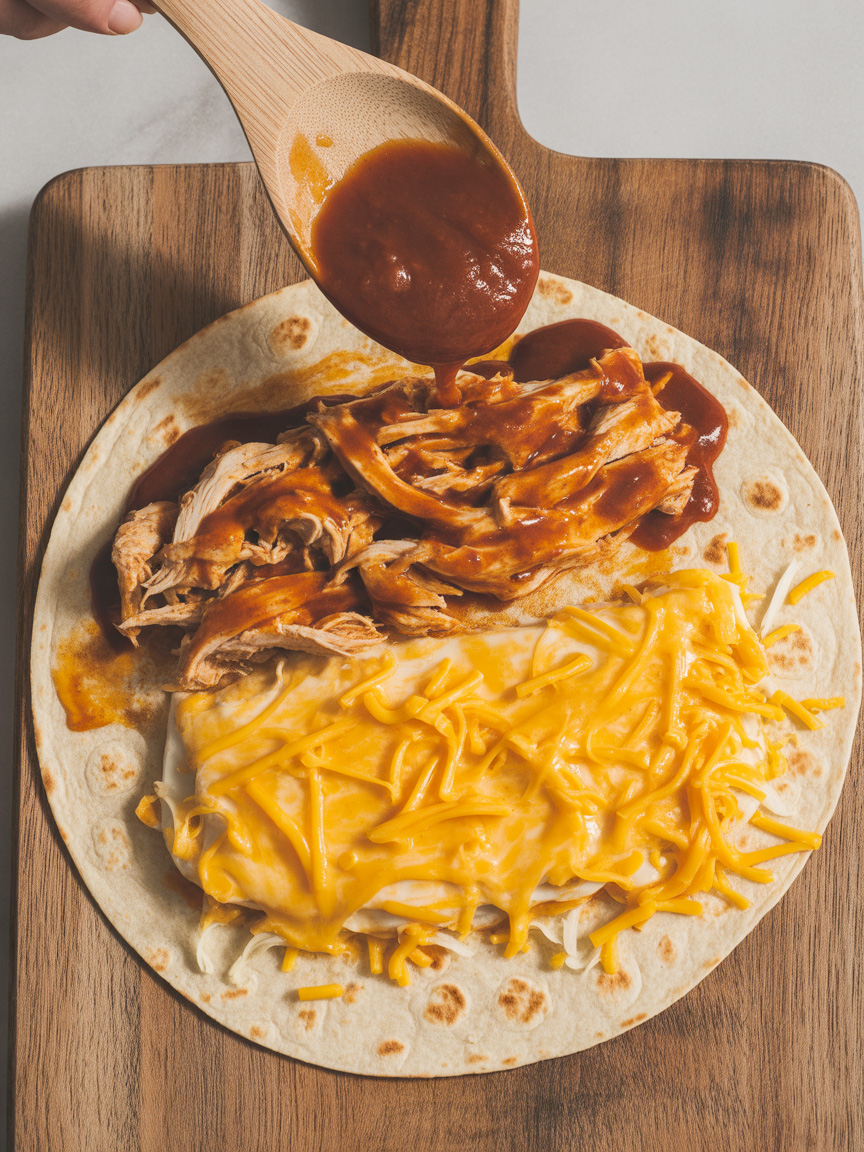
Mix with BBQ Sauce: Put the shredded chicken in a bowl and add the BBQ sauce. Mix everything together until the chicken is evenly coated. The chicken should be well-covered with sauce but not swimming in it. If it looks too dry, add a bit more BBQ sauce. If it’s too saucy and dripping, you might want to drain off a little excess—too much sauce can make the quesadillas soggy.

Add Onion and Cilantro: Stir in the diced red onion and chopped cilantro. Mix until everything is evenly distributed. Taste and adjust if needed—you could add a pinch of salt or pepper, though the BBQ sauce usually has plenty of seasoning already.
Part 2: Assemble and Cook the Quesadillas
Prep Your Workspace: Lay out your tortillas, shredded cheese, and BBQ chicken filling so everything is within easy reach. Have your butter ready and a spatula nearby. This assembly-line approach makes the process go much faster.
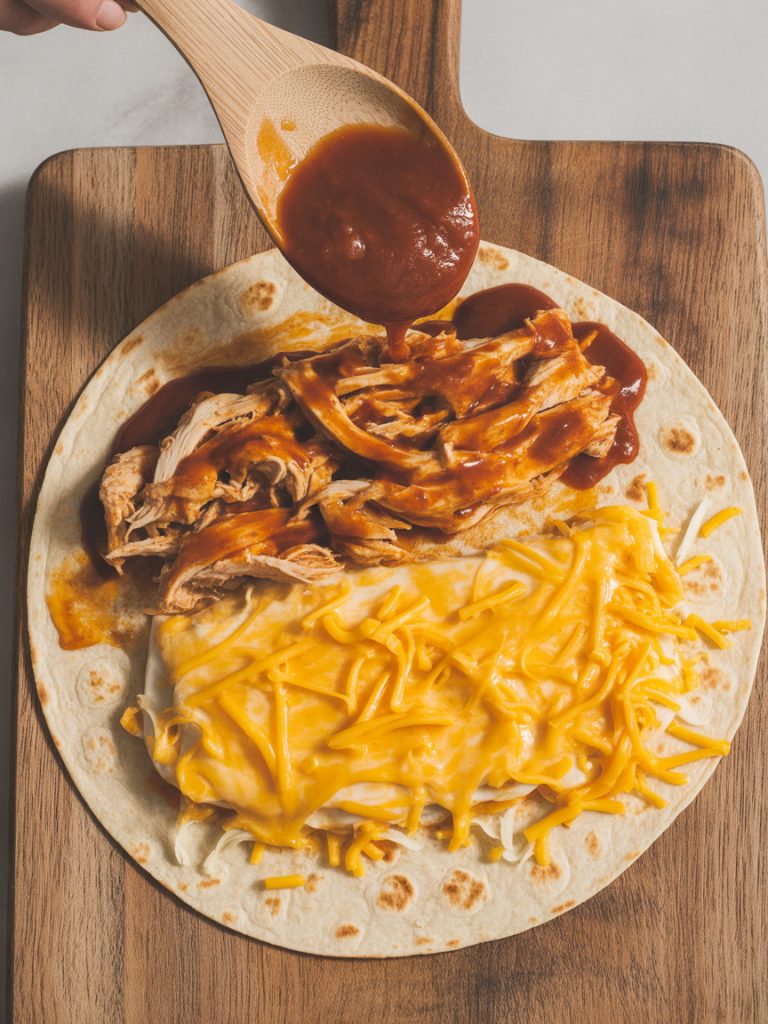
Assemble the Quesadillas: Place one tortilla flat on your work surface. Sprinkle about ¼ cup of shredded cheese over half of the tortilla. Spread about ½ to ¾ cup of the BBQ chicken mixture over the cheese on that same half. Top with another ¼ cup of cheese. The cheese on both sides helps everything stick together when it melts. Fold the empty half of the tortilla over the filled half, creating a half-moon shape. Press down gently. Repeat with remaining tortillas until you’ve assembled all four quesadillas.
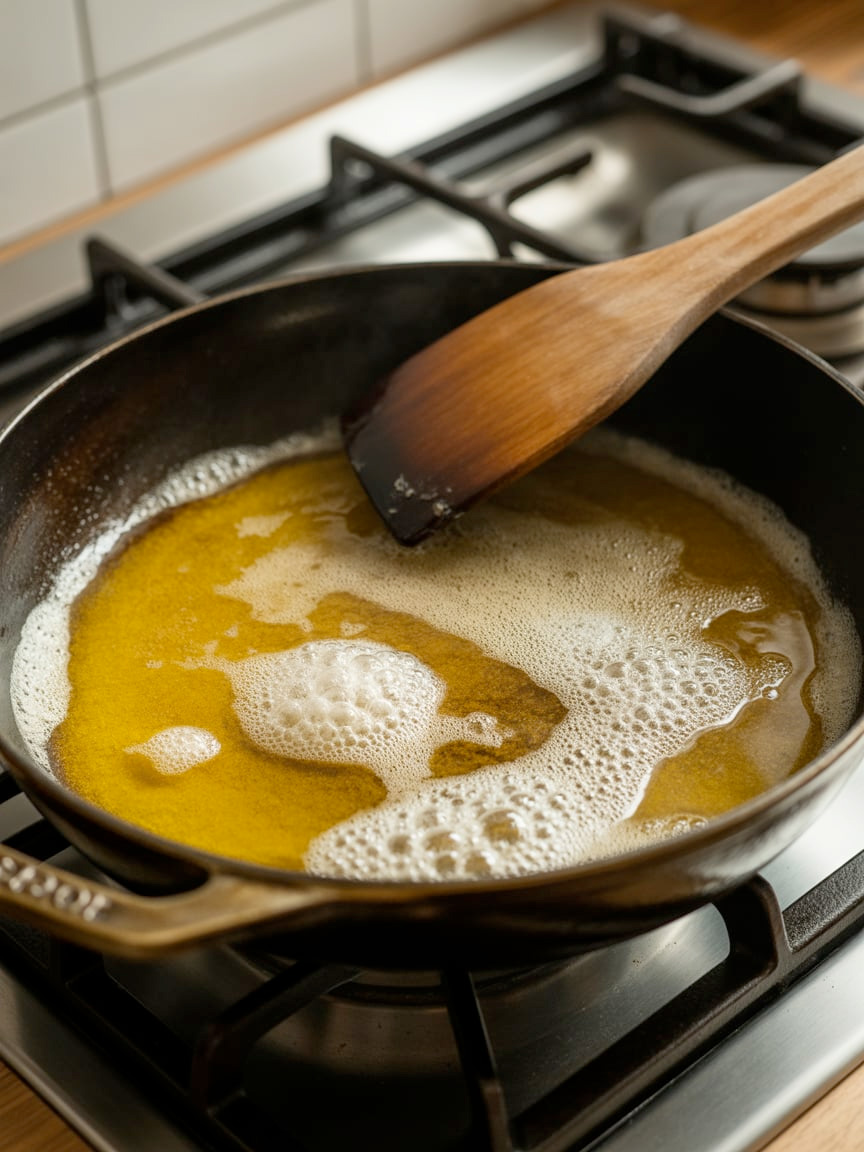
Heat Your Pan: Use a large skillet or griddle over medium heat. You want medium heat, not high—high heat will burn the tortilla before the cheese melts. Add about ½ tablespoon of butter to the pan and let it melt, swirling to coat the bottom.

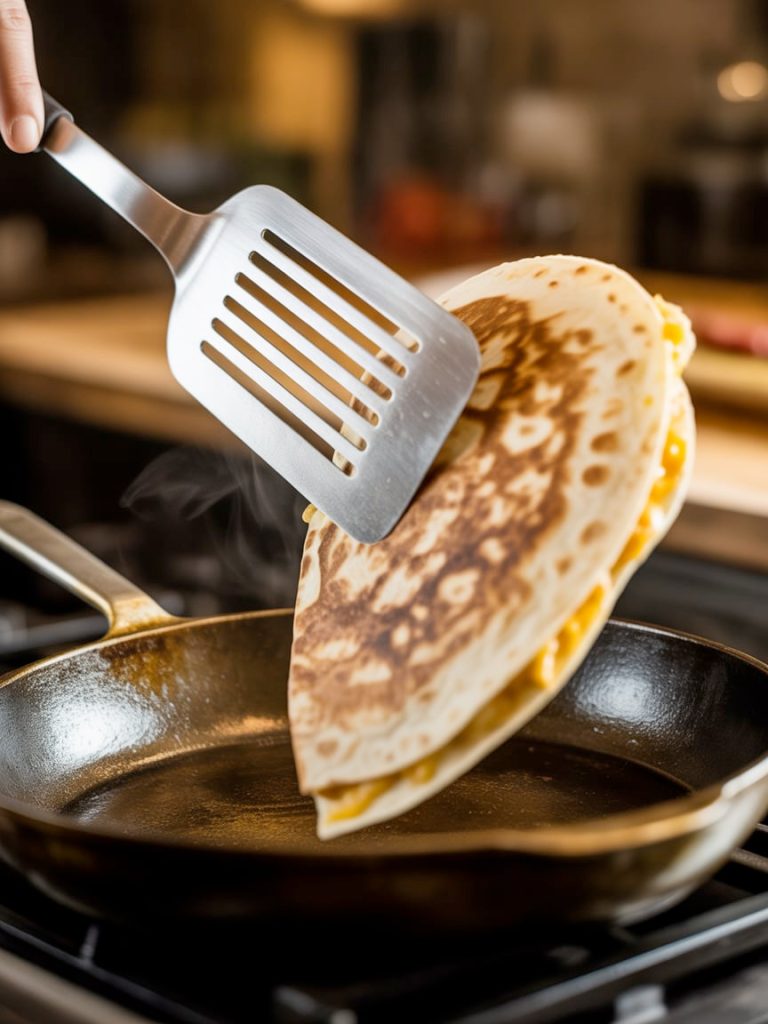
Cook the First Side: Place one or two quesadillas in the pan (however many fit comfortably without overlapping). Cook for 3-4 minutes without moving them, until the bottom tortilla is golden brown and crispy. You can peek at the underside by gently lifting with a spatula. The cheese should be starting to melt.
Flip and Cook the Second Side: Carefully flip the quesadilla using a large spatula. If some filling tries to escape, just tuck it back in. Add another ½ tablespoon of butter to the pan around the quesadilla—it’ll melt and get underneath, helping the second side get crispy and golden. Cook for another 3-4 minutes until the second side is golden brown and the cheese is fully melted. The quesadilla should feel solid and hold together well.
Keep Warm and Repeat: Transfer the cooked quesadilla to a cutting board or plate and tent with foil to keep warm. Repeat the cooking process with the remaining quesadillas, adding butter to the pan each time.
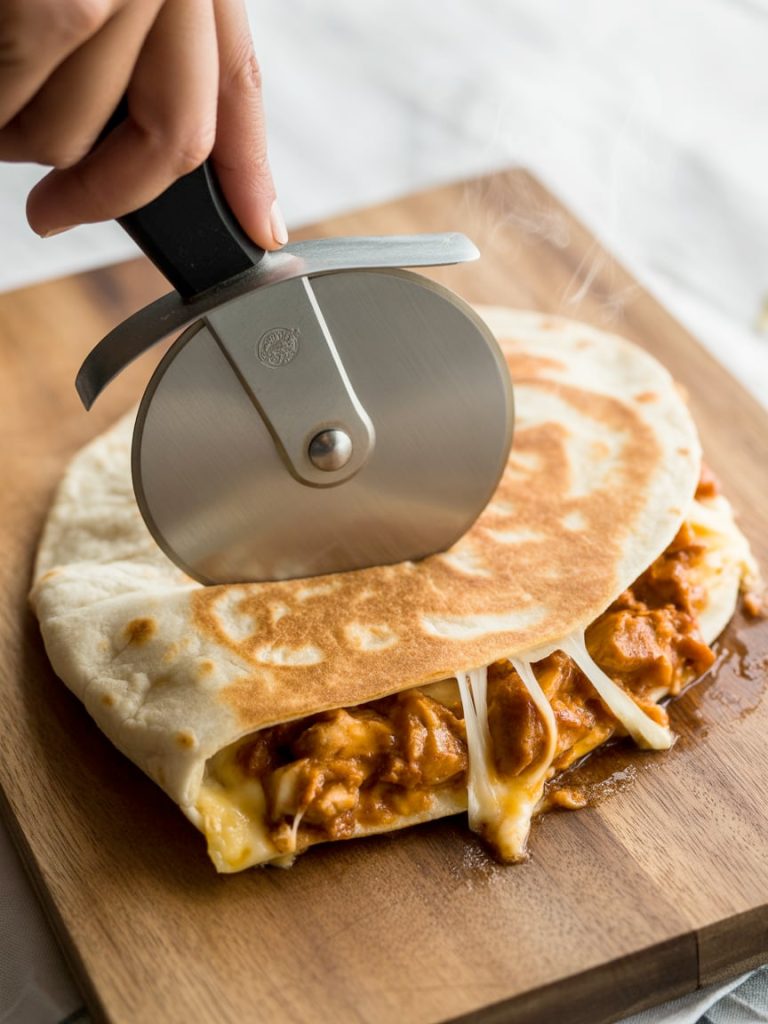
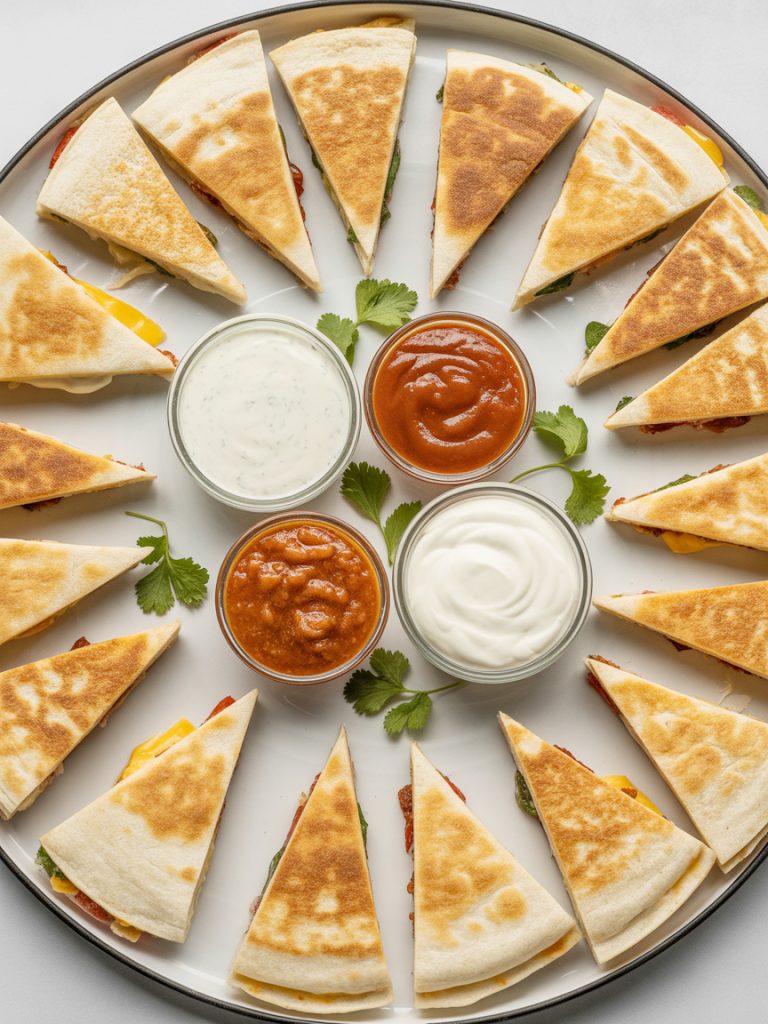
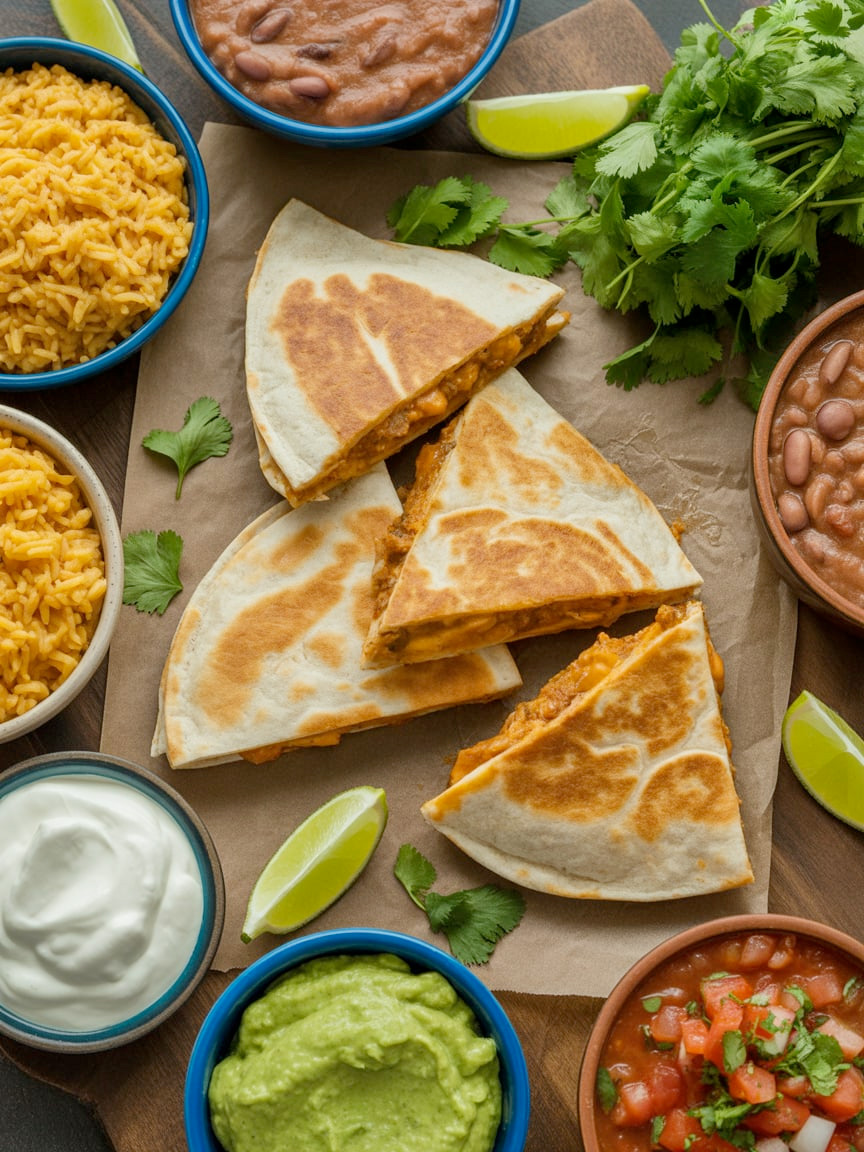
Slice and Serve: Once all your quesadillas are cooked, use a sharp knife or pizza cutter to slice each one into 3-4 wedges. Arrange on a serving plate and serve immediately with sour cream, extra BBQ sauce, salsa, and guacamole on the side for dipping.
Serving Suggestions
These BBQ chicken quesadillas are fantastic on their own, but here are some ways to round out the meal or customize them:
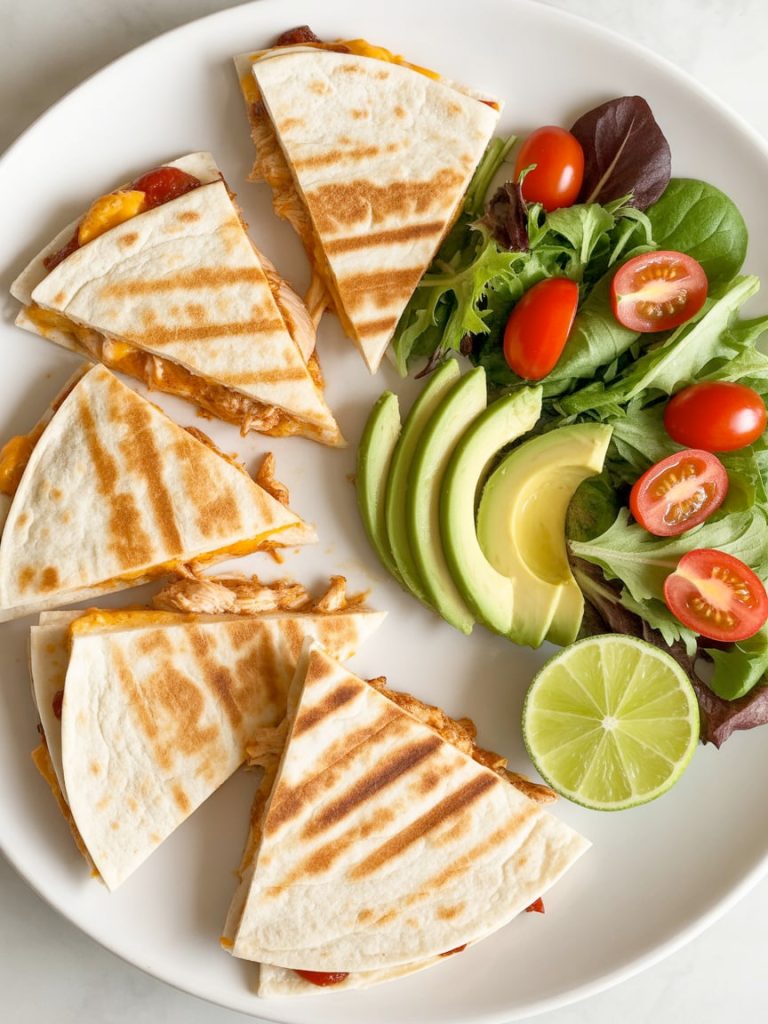
Classic Tex-Mex Style: Serve with sides of Mexican rice, refried beans, and a simple salad with lime vinaigrette. Add all the classic toppings—sour cream, guacamole, salsa, and extra cilantro.

Game Day Spread: Cut the quesadillas into smaller wedges and serve as appetizers or finger food alongside other game day favorites. They’re perfect for sharing and easy to eat while watching the game.
Make it a Meal: Pair with a side of tortilla chips and queso, black beans, corn salad, or Mexican street corn. A margarita doesn’t hurt either. 🙂
Healthier Version: Use whole wheat tortillas, reduced-fat cheese, and serve with a big fresh salad on the side instead of heavier sides. The quesadillas themselves are pretty indulgent, so balance them with lighter accompaniments.
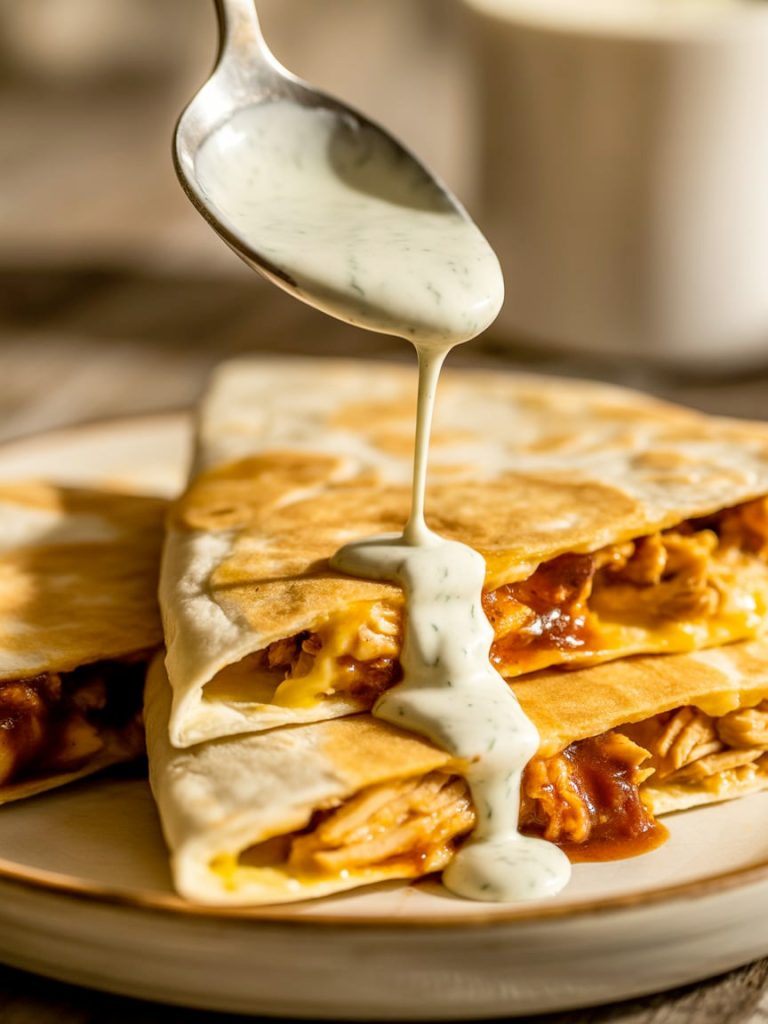
Ranch Drizzle: Drizzle ranch dressing over the quesadillas or mix ranch with BBQ sauce for dipping. It sounds weird, but ranch and BBQ is an incredible combination that takes these to another level.
Add More Veggies: Stuff the quesadillas with sautéed bell peppers, corn, black beans, or jalapeños for extra nutrition and flavor.

Closing
These BBQ Chicken Quesadillas are the kind of recipe that saves weeknight dinners. They’re fast, they’re easy, they use up leftovers, and most importantly, they taste absolutely delicious. That combination of tangy BBQ sauce, melty cheese, and crispy tortilla is just irresistible, and the fact that you can throw them together in 20 minutes makes them a legitimate lifesaver.
I love how versatile these are. You can customize the filling, adjust the spice level, add more vegetables, or keep them super simple. They work for feeding kids, entertaining friends, meal prepping for the week, or just making a quick dinner for yourself. That kind of flexibility means you’ll actually make them repeatedly instead of them being a one-time thing.
If you’ve got leftover chicken sitting in your fridge or a rotisserie chicken from the store, you’re already halfway to having these on your dinner table. Give them a try this week—they’re the kind of easy, satisfying comfort food that everyone loves and nobody gets tired of.
Enjoy every crispy, cheesy bite! 😊
BBQ Chicken Quesadillas: A Quick & Delicious 20-Minute Dinner
Description
Crispy flour tortillas stuffed with shredded BBQ chicken, melted cheese, red onions, and cilantro. These easy quesadillas combine sweet tangy BBQ sauce with gooey cheese for a crowd-pleasing meal that's ready in minutes.
Ingredients
Instructions
-
In a bowl, combine shredded chicken with BBQ sauce, diced red onion, and chopped cilantro. Mix until chicken is evenly coated.
-
Place one tortilla flat. Sprinkle ¼ cup cheese over half the tortilla. Top with ½-¾ cup BBQ chicken mixture, then another ¼ cup cheese. Fold tortilla in half. Repeat with remaining tortillas.
-
Heat skillet over medium heat. Add ½ tablespoon butter and let melt.
-
Place quesadilla in pan. Cook 3-4 minutes until bottom is golden brown and crispy.
-
Flip quesadilla carefully with spatula. Add another ½ tablespoon butter to pan. Cook 3-4 minutes until second side is golden and cheese is fully melted.

-
Transfer to cutting board. Tent with foil to keep warm. Repeat with remaining quesadillas, adding butter to pan each time.
-
Slice each quesadilla into 3-4 wedges using sharp knife or pizza cutter.

-
Serve immediately with sour cream, extra BBQ sauce, salsa, and guacamole for dipping.
Note
Chicken Options: Rotisserie chicken, leftover grilled chicken, baked chicken, or even canned chicken all work.
Make Ahead: Assemble quesadillas ahead and refrigerate for up to 4 hours before cooking.
Freezing: Cooked quesadillas can be frozen for up to 2 months. Wrap individually in foil, then place in freezer bags. Reheat from frozen in 350°F oven for 15-20 minutes.
Crispier Quesadillas: Use a bit less filling and make sure not to oversaturate with sauce.
Storage: Store leftover quesadillas in airtight container for up to 3 days. Reheat in skillet, oven, or air fryer for best results.
