

Every time I put a plate of these blondie brownies on the table, the same thing happens. Someone glances at them, notices there is no chocolate fudge layer or dark cocoa color, and looks just slightly skeptical. Then they take one bite. And then they reach for another before they have even finished the first one. Every single time without fail.
Blondies do not get nearly the credit they deserve. People are so obsessed with chocolate brownies — and look, I get it, I really do — that they completely overlook what is honestly one of the most satisfying bars you can bake.
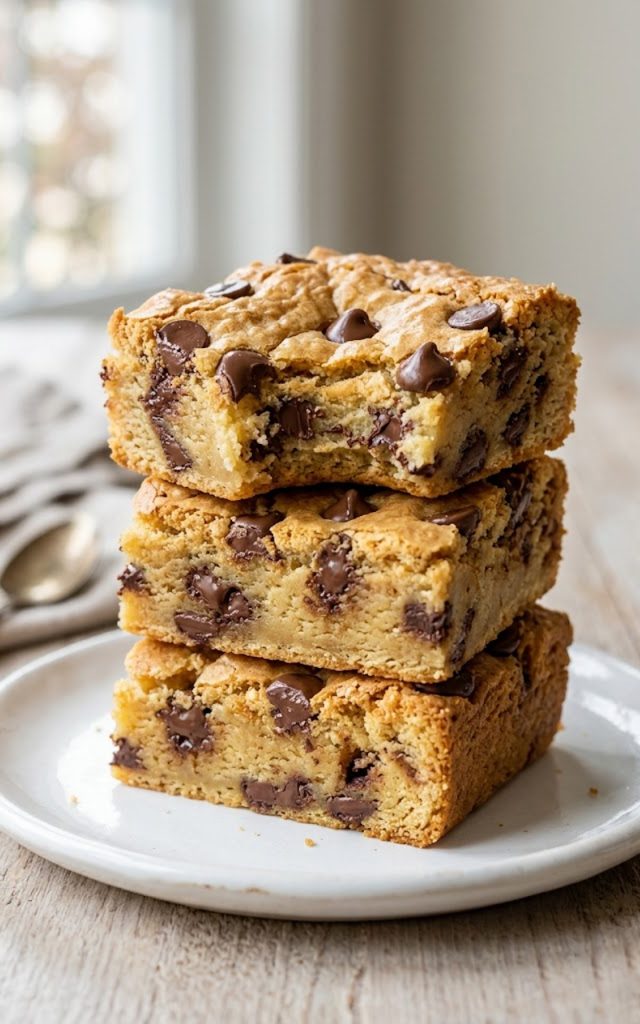
The deep caramel richness of brown sugar, the buttery density, the way the chocolate chips melt into pockets of sweetness throughout the chewy interior. This is comfort food in its purest, most unpretentious form.
This particular recipe is a vintage one and that is not a small thing. Vintage recipes exist because they work — because generations of home bakers kept coming back to them because nothing newer ever quite topped them. I made a few small tweaks over the years but the soul of this recipe is old school and honest and it shows in every single bite.
Why you’ll love this recipe
- Deep, rich brown sugar flavor that tastes like caramel in bar form — no cocoa powder required
- Dense, chewy, fudgy texture that somehow manages to be even more satisfying than a regular brownie
- Loaded with melty chocolate chips that create pockets of chocolate throughout every bar
- One bowl, one pan, and 35 minutes from start to finish
- A vintage recipe that has stood the test of time for very good reason
- Simple pantry ingredients you almost certainly already have sitting in your kitchen right now
Ingredients and key notes
For the blondies:
- 2 cups all-purpose flour — spoon and level carefully; packed flour makes the blondies dense and dry rather than chewy and fudgy
- 1 teaspoon baking powder
- 1/2 teaspoon baking soda
- 1/2 teaspoon salt — this is essential for bringing out the caramel depth of the brown sugar
- 3/4 cup unsalted butter, melted — melted butter is what gives blondies their signature dense, fudgy texture as opposed to a lighter cakey one
- 2 cups packed light brown sugar — this is the star ingredient and it needs to be properly packed for the recipe to work correctly
- 2 large eggs
- 2 teaspoons vanilla extract — use pure vanilla here; the vanilla flavor comes through prominently in blondies and imitation extract will taste flat
- 1 1/2 cups semi-sweet chocolate chips — divided between the batter and the top
Key notes:
- Brown sugar is everything in this recipe. It is what gives blondies that deep, almost toffee-like richness that makes them completely different from a regular sugar cookie bar. Make sure you pack it firmly into the measuring cup — loosely scooped brown sugar will leave you with blondies that are noticeably less rich and flavorful.
- Melted butter rather than softened butter is the right call here for the same reason it works in cookie bars — it creates a denser, fudgier texture instead of a lighter, cakier one. Let it cool slightly before adding the eggs so the heat does not scramble them.
- Do not overbake these. This is the most common blondie mistake and it is almost impossible to fix after the fact. The center should look just set and slightly glossy when you pull the pan from the oven. If the center looks completely matte and dry, they are already overbaked. Pull them out early and let the residual heat finish the job.
- Pure vanilla extract makes a meaningful difference in blondies specifically because vanilla is one of the primary flavor notes in the finished bar. The difference between pure and imitation is very noticeable here in a way that it might not be in a more heavily flavored recipe.
- Reserve about half a cup of the chocolate chips to press into the top before baking. This gives you that beautiful, bakery-style chocolate chip studded surface and ensures chocolate in every single bite of every single bar.
Step-by-step instructions
Step 1: Preheat your oven and prepare your pan
Preheat your oven to 350 degrees F. Line a 9×13 inch baking pan with parchment paper leaving overhang on all sides, and spray lightly with cooking spray. The parchment overhang is what allows you to lift the entire slab out cleanly once it has cooled, which makes slicing these bars significantly easier and neater.
Step 2: Whisk the dry ingredients
In a medium bowl, whisk together the flour, baking powder, baking soda, and salt until evenly combined. Set aside. Getting these evenly distributed before they go into the batter prevents any random pockets of leavening or salt in the finished bars.
Step 3: Combine the butter and brown sugar
In a large mixing bowl, whisk together the melted butter and packed brown sugar until smooth and fully combined. The mixture will look thick, dark, and slightly grainy at first — keep whisking and it will come together into a smooth, glossy mixture after about 60 to 90 seconds. This step is important and worth doing properly.
Step 4: Add the eggs and vanilla
Add the eggs and vanilla extract to the brown sugar mixture and whisk vigorously until fully incorporated and the mixture looks smooth and slightly lighter, about 1 minute. The eggs are what give these blondies their structure and that slight lift in the center, so make sure they are fully combined before the flour goes in.
Step 5: Fold in the dry ingredients
Add the flour mixture to the wet ingredients and use a rubber spatula to fold everything together until just combined. The batter will be thick — thicker than most brownie batters — and that is exactly right. Stop folding the moment you no longer see streaks of flour. Overmixing at this stage makes the blondies tough and dense in the wrong way instead of chewy and fudgy in the right way.
Step 6: Fold in the chocolate chips
Reserve about half a cup of chocolate chips and set them aside. Fold the remaining chocolate chips into the batter with the rubber spatula until evenly distributed. The batter is thick so this takes a little more effort than a thinner batter — just be thorough and patient and make sure every part of the batter has chocolate chips in it.
Step 7: Spread the batter into the pan
Transfer the batter into your prepared pan. It is thick and will not pour like a typical brownie batter — use a greased spatula or lightly greased hands to spread and press it out into an even layer all the way to the edges and corners. Take your time here because uneven batter leads to uneven baking.
Step 8: Top with chocolate chips
Scatter the reserved chocolate chips evenly across the entire surface of the batter and press them down very gently so they are partially embedded in the top. This is what creates that gorgeous, professional looking chocolate chip covered surface on the finished blondies.
Step 9: Bake
Bake for 23 to 25 minutes until the edges are golden and set and the center looks just barely done — slightly glossy is perfectly fine and actually preferred. The blondies will continue to cook from residual heat after the pan comes out of the oven so pulling them a minute or two early is always the right call. A toothpick inserted in the center should come out with a few moist crumbs attached, not completely clean.
Step 10: Cool completely before slicing
This is the hardest part but also the most important. Let the blondies cool completely in the pan on a wire rack before attempting to cut them — at least 45 minutes to an hour. Warm blondies cut into a gooey mess and will not hold their shape. Once fully cooled, use the parchment overhang to lift the slab onto a cutting board and slice into bars with a sharp knife.
Serving suggestions
These blondie brownies are genuinely excellent on their own but here are a few ways to enjoy them even more:
- Serve a warm bar with a scoop of vanilla ice cream for a dessert that is so simple and so good it almost feels unfair
- Drizzle melted caramel sauce over the top of the cooled blondies before slicing for a salted caramel blondie situation that is completely over the top in the best possible way
- Cut them into small bite-size squares for a party dessert platter — they hold up well at room temperature and are easy to eat without a fork
- Crumble a blondie over vanilla yogurt for a breakfast that technically qualifies as a balanced meal if you tilt your head and squint a little
- Wrap individual bars in parchment and tie with twine for a simple, beautiful homemade gift that people genuinely appreciate
- Serve alongside a cup of coffee or hot tea for an afternoon treat that is simple, satisfying, and exactly what a slow afternoon calls for
Storage tips
Room temperature: Store in an airtight container at room temperature for up to 4 days. Place a slice of white bread in the container to maintain that soft, chewy texture — the bread keeps the blondies from drying out over time. Replace the bread slice after a couple of days if needed.
Refrigerator: Store in an airtight container in the refrigerator for up to one week. Cold temperatures firm up blondies considerably so let them come back to room temperature for 15 to 20 minutes before eating or warm them in the microwave for 10 to 15 seconds to restore that fresh-baked chewiness.
Freezer — cut bars: Wrap individual bars tightly in plastic wrap and place them in a freezer safe bag or airtight container. Freeze for up to 3 months. Thaw at room temperature for about 30 minutes before serving. The texture holds up very well after freezing — these are one of the better desserts for freezing and reheating without significant quality loss.
Freezer — uncut slab: You can freeze the entire uncut blondie slab wrapped tightly in two layers of plastic wrap and then a layer of foil. Thaw in the refrigerator overnight and bring to room temperature before slicing the next day. This is a great make-ahead option for holidays and gatherings.
Before you go
Blondies are one of those recipes that quietly, consistently delivers without ever asking for much attention or credit. No complicated techniques, no specialty ingredients, no lengthy process. Just brown sugar, butter, eggs, flour, and enough chocolate chips to make every bite worth remembering.
Make this recipe once and it will earn a permanent spot in your baking rotation. Not because it is flashy or trendy but because it is genuinely, reliably delicious every single time you make it. And in the world of home baking, that consistency is worth more than almost anything else.
Give them a try this week. Share them if you can. And try — just try — to wait the full 45 minutes before cutting into them. It is worth it. Mostly.
With gratitude, Kip
Blondie brownies — the vintage one-pan bar that proves you don’t always need chocolate
Description
These blondie brownies are the kind of recipe that does not need any introduction once you take the first bite. Dense and chewy with a deep brown sugar richness that tastes almost like caramel, loaded with melty chocolate chips and baked in one pan in just 35 minutes. A vintage recipe that home bakers have been coming back to for generations — and once you make them, you will understand completely why.
Ingredients
Instructions
-
Preheat oven to 350 degrees F. Line a 9x13 inch pan with parchment paper and spray with cooking spray.
-
Whisk together flour, baking powder, baking soda, and salt in a medium bowl. Set aside.
-
Whisk melted butter and packed brown sugar together in a large bowl until smooth and glossy.
-
Add eggs and vanilla extract and whisk until fully combined and smooth.
-
Fold in the flour mixture with a rubber spatula until just combined. Do not overmix.
-
Fold in 1 cup of chocolate chips. Reserve the remaining half cup.
-
Spread batter evenly into the prepared pan using a greased spatula.
-
Scatter reserved chocolate chips over the surface and press gently into the batter.
-
Bake for 23 to 25 minutes until edges are golden and center looks just set.
-
Cool completely in the pan for at least 45 minutes before lifting out and slicing.
