
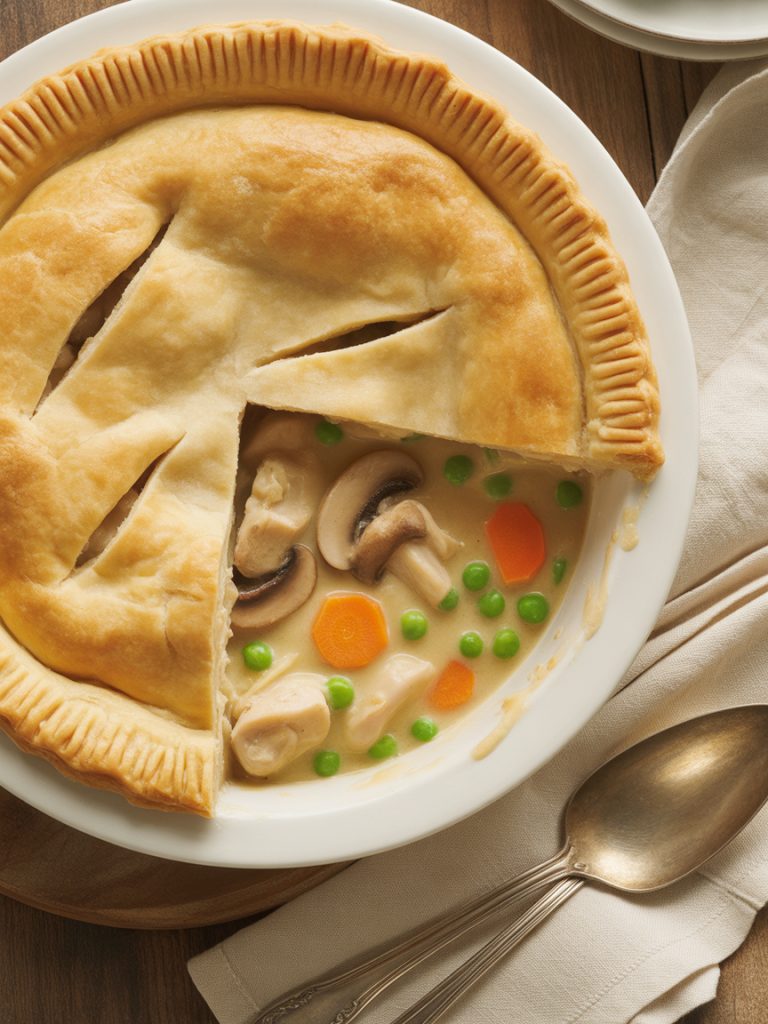

There’s something deeply satisfying about breaking through a flaky, golden crust to reveal a steaming pile of creamy chicken and mushrooms underneath. This Chicken Mushroom Pot Pie is the kind of meal that makes you feel like you’ve got your life together, even if you’re just winging it like the rest of us.
I used to think pot pie was one of those things you only got from the freezer aisle or ordered at restaurants. Then I made it from scratch one Sunday afternoon and realized it’s actually way easier than it looks. Sure, it takes a bit of time, but most of that is hands-off baking while your kitchen fills with the most incredible smell.
This has become my go-to for impressing people without actually stressing myself out. It’s comfort food that looks fancy, tastes amazing, and honestly? It’s just really fun to make.
Why You’ll Love This Recipe
Ultimate Comfort Food – Is there anything more comforting than pot pie? That combination of flaky pastry, creamy filling, tender chicken, and savory mushrooms is basically a warm hug in food form. This is what you make when you need something that feels like home, no matter where you actually are.
Flaky, Golden Crust That’s Actually Easy – I know pie crust has this reputation for being difficult, but honestly? It’s not that complicated. And if you’re really not feeling it, store-bought puff pastry or pie crust works perfectly. Nobody’s judging here. The point is that golden, buttery crust on top that everyone fights over.
Packed with Flavor and Texture – Every bite has something interesting going on. Tender chunks of chicken, earthy mushrooms, sweet carrots, a hint of thyme, all bound together in that creamy sauce. The textures play off each other—the crispy crust against the soft filling—and it’s just really, really satisfying.
Impressive but Achievable – This looks like you spent all day in the kitchen, but the actual hands-on time is maybe 30 minutes. The rest is just baking. Serve this at a dinner party and people will be genuinely impressed. Let them think you’re a culinary genius. You’ve earned it. 🙂
Perfect for Using Rotisserie Chicken – Grab a rotisserie chicken from the store and you’ve eliminated the most time-consuming part. Just shred it and you’re already halfway done. IMO, this is one of the best uses for leftover rotisserie chicken—way better than just eating it cold from the container.
Great for Meal Prep or Freezing – Make this ahead and freeze it (either baked or unbaked), and you’ve got an impressive meal ready to go whenever you need it. This is the kind of thing you make on a lazy Sunday so you can feel accomplished all week long.
Ingredients with Key Notes
For the Filling:
- 3 tablespoons butter – Real butter makes a difference.
- 1 lb mushrooms (cremini or mixed), sliced – Fresh is essential here.
- 1 medium onion, diced – Yellow or white works best.
- 2 carrots, peeled and diced – Adds color and sweetness.
- 2 celery stalks, diced – Classic pot pie flavor.
- 3 cloves garlic, minced – Always fresh.
- ⅓ cup all-purpose flour – For the creamy sauce base.
- 2 cups chicken broth – Low-sodium preferred.
- 1 cup heavy cream (or half-and-half) – Makes it luxurious.
- 3 cups cooked chicken, cubed or shredded – Rotisserie is perfect here.
- 1 cup frozen peas – Classic pot pie addition.
- 2 teaspoons fresh thyme (or 1 tsp dried) – Essential for that savory depth.
- 1 teaspoon fresh rosemary, finely chopped (or ½ tsp dried) – Optional but wonderful.
- Salt and black pepper to taste
- Pinch of nutmeg (optional) – Adds subtle warmth.
For the Crust:
Homemade Option:
- 2½ cups all-purpose flour – Plus extra for rolling.
- 1 teaspoon salt
- 1 cup (2 sticks) cold butter, cubed – Must be cold!
- 6-8 tablespoons ice water – Add gradually.
Store-Bought Shortcut:
- 2 store-bought pie crusts or 1 sheet puff pastry – Nobody will judge you.
For Assembly:
- 1 egg, beaten with 1 tablespoon water – For egg wash.
- Flaky sea salt (optional) – For sprinkling on top.
Key Notes:
Chicken Options: Rotisserie chicken is the easiest—just remove the meat and cube it. Leftover roasted chicken works great too. If you’re starting from scratch, poach chicken breasts in broth for 20 minutes, then shred. About 3 cups of cooked chicken equals roughly one rotisserie chicken or 1.5 lbs raw chicken.
Mushroom Selection: Cremini (baby bella) mushrooms have the best flavor for pot pie. A mix of cremini and shiitake adds extra depth. Regular button mushrooms work fine too. Slice them about ¼-inch thick so they hold up during baking.
Crust Shortcuts: Store-bought is totally fine here. Puff pastry gives you that fancy, flaky top without any rolling. Pre-made pie crusts work great too. If you’re making homemade, keep everything cold—that’s the secret to flaky crust.
Make It Yours: This recipe is flexible. Add corn, swap the peas for green beans, throw in some spinach at the end. Pot pie is forgiving and adaptable to whatever you have on hand.
Step-by-Step Instructions
Making the Filling:
Step 1: Sauté the Mushrooms and Vegetables
Melt 2 tablespoons of butter in a large skillet over medium-high heat. Add the sliced mushrooms and cook for 6-7 minutes, stirring occasionally, until golden brown and any liquid has evaporated. Remove mushrooms and set aside. In the same skillet, add the remaining tablespoon of butter. Add the onion, carrots, and celery. Cook for 6-7 minutes until the vegetables are softened. Add garlic and cook for 1 minute more.
Step 2: Make the Cream Sauce
Sprinkle the flour over the vegetables and stir to coat everything. Cook for 1 minute to eliminate the raw flour taste. Gradually pour in the chicken broth, stirring constantly to prevent lumps. Then add the heavy cream. Bring to a simmer and cook for 5-6 minutes, stirring occasionally, until the sauce has thickened and coats the back of a spoon.
Step 3: Add Chicken and Seasonings
Return the cooked mushrooms to the skillet along with the cubed chicken, frozen peas, thyme, rosemary, salt, pepper, and nutmeg if using. Stir everything together and let it cook for 2-3 minutes until the peas are thawed and everything is combined. Taste and adjust seasoning—it should be well-seasoned because the crust will dilute the flavors slightly.
Step 4: Cool the Filling
Transfer the filling to a bowl and let it cool for at least 20-30 minutes. This step is important—if you put hot filling under the crust, it’ll make the bottom soggy and the crust won’t bake properly. You can even make this a day ahead and refrigerate it.
Assembling and Baking:
Step 5: Prepare Your Pie Dish
Preheat your oven to 400°F (200°C). Lightly butter a 9-inch deep-dish pie pan or a 2-quart baking dish. If you’re using a bottom crust (optional), roll it out and line your dish with it, trimming any excess. Prick the bottom with a fork if using a bottom crust to prevent bubbling.
Step 6: Add the Filling
Pour the cooled filling into your prepared pie dish. It should come up to about ¾ inch from the top. Don’t overfill or it’ll bubble over during baking. Spread it out evenly.
Step 7: Top with Crust
If using homemade pastry, roll it out on a floured surface to about ⅛-inch thickness and large enough to cover your dish with about 1 inch of overhang. Drape it over the filling. If using store-bought pie crust, unroll it and place it on top. If using puff pastry, just lay the sheet over the filling. Trim the edges and crimp with a fork or your fingers to seal. Cut 3-4 slits in the top to allow steam to escape—this is crucial.
Step 8: Brush with Egg Wash
Beat the egg with 1 tablespoon of water. Brush this mixture over the entire top of the crust—this gives you that gorgeous golden color. Sprinkle with flaky sea salt if you’re feeling fancy.
Step 9: Bake to Perfection
Place the pie dish on a baking sheet (to catch any drips) and bake for 35-40 minutes until the crust is deep golden brown and the filling is bubbling through the slits. If the edges start browning too quickly, tent them with foil. Let it rest for 10-15 minutes before serving—this lets the filling set up so it’s not soupy when you cut into it.
Pro tip: The smell of this baking is going to drive you crazy in the best way. Resist cutting into it immediately—that rest time really does make a difference in how it holds together.
Serving Suggestions
With a Simple Green Salad – The richness of pot pie needs something light and fresh alongside it. A simple mixed green salad with lemon vinaigrette cuts through all that creamy goodness and makes the meal feel more balanced.
As Individual Pot Pies – Use ramekins or small oven-safe dishes to make individual portions. These are perfect for dinner parties—everyone gets their own little pot pie, which feels special and also eliminates the “who gets the most crust” arguments.
With Mashed Potatoes – I know, I know—carbs on carbs. But trust me, a scoop of creamy mashed potatoes on the side with pot pie is actually amazing. Very British, very comforting, absolutely no regrets.
For Sunday Dinner – This is classic Sunday supper food. Make it the centerpiece with some roasted vegetables and maybe a nice bottle of wine. It’s the kind of meal that makes everyone linger at the table.
As a Holiday Centerpiece – Pot pie works for Thanksgiving, Christmas, or any fall gathering. It’s festive without being fussy, feeds a crowd, and can be made ahead. Plus, it’s a nice break from turkey if you’re doing a non-traditional holiday meal.
With Cranberry Sauce – Sounds weird, but a little cranberry sauce on the side with pot pie is actually really good. That sweet-tart contrast works surprisingly well with the savory filling.
Storage Tips
Refrigerator: Store leftovers covered in the fridge for up to 3 days. The crust will soften a bit, but it still tastes great. Reheat individual portions in a 350°F oven for 15-20 minutes until heated through.
Freezing Unbaked: This is my preferred method. Assemble the entire pot pie, wrap it tightly in plastic wrap and then foil, and freeze for up to 3 months. When ready to bake, don’t thaw—just brush with egg wash and bake from frozen at 375°F for 60-70 minutes, covering with foil if it browns too quickly.
Freezing Baked: You can freeze it after baking, but the crust won’t be quite as good when reheated. Let it cool completely, wrap well, and freeze for up to 2 months. Thaw in the fridge overnight and reheat at 350°F for 25-30 minutes.
Reheating Tips: Always reheat pot pie in the oven, not the microwave. The microwave makes the crust soggy and sad. Cover with foil for the first 15 minutes of reheating to prevent over-browning, then uncover to crisp up the top.
Make-Ahead Strategy: Make the filling 1-2 days ahead and keep it refrigerated. Make or buy your crust ahead too. Then it’s just 10 minutes of assembly work when you’re ready to bake. This is perfect for entertaining—do all the work ahead so you can actually spend time with your guests.
Individual Pot Pie Storage: If you make individual pot pies, they freeze brilliantly. Wrap each one individually and you’ve got single-serving comfort food ready whenever you need it.
Final Thoughts
Making pot pie from scratch was one of those things that seemed intimidating until I actually did it. And now? It’s one of my favorite things to make, especially when I need something that feels like a proper, comforting meal.
There’s something really satisfying about pulling a golden, bubbling pot pie out of the oven. It makes your whole kitchen smell incredible, it looks impressive, and when you break through that crust into all that creamy filling? That’s the moment that makes the whole thing worth it.
Make this on a Sunday. Make extra and freeze one. Future you will be so grateful to have homemade pot pie ready to go when life gets crazy. This is the kind of food that reminds you why cooking at home is worth it.
Happy cooking!
Kip
Chicken Mushroom Pot Pie (Creamy, Comforting & Absolutely Delicious!)
Description
This Chicken Mushroom Pot Pie is the ultimate comfort food—tender chicken and earthy mushrooms in a rich, creamy sauce, all topped with a flaky, golden pastry crust. It's homemade warmth and satisfaction in every bite, perfect for family dinners or impressing guests.
Ingredients
For the Filling:
For the Crust:
For Assembly:
Instructions
Make the Filling:
-
Cook mushrooms: Melt 2 tablespoons butter in large skillet over medium-high heat. Cook mushrooms 6-7 minutes until golden. Remove and set aside.
-
Cook vegetables: Add remaining butter to skillet. Sauté onion, carrots, and celery 6-7 minutes until softened. Add garlic, cook 1 minute.
-
Make sauce: Sprinkle flour over vegetables, stir to coat. Cook 1 minute. Gradually add broth, stirring constantly, then add cream. Simmer 5-6 minutes until thickened.
-
Combine: Return mushrooms to skillet. Add chicken, peas, thyme, rosemary, salt, pepper, and nutmeg. Cook 2-3 minutes. Transfer to bowl and cool 20-30 minutes.
Assemble and Bake:
-
Prep: Preheat oven to 400°F. Butter a 9-inch deep-dish pie pan or 2-quart baking dish.
-
Fill: Pour cooled filling into prepared dish.
-
Top with crust: Roll out or place pastry over filling. Trim edges, crimp to seal. Cut 3-4 steam vents in top.
-
Egg wash: Brush beaten egg mixture over entire crust. Sprinkle with sea salt if desired.
-
Bake: Place on baking sheet and bake 35-40 minutes until crust is deep golden brown and filling bubbles through vents. Let rest 10-15 minutes before serving.
Note
- Must cool filling before adding crust to prevent sogginess
- Store-bought crust saves time without sacrificing quality
- Can be assembled and frozen unbaked for up to 3 months
- Rotisserie chicken is the perfect shortcut
- Don't skip the rest time after baking—helps filling set
