

Some of my earliest Christmas memories involve standing on a step stool in my grandma’s kitchen, covered in flour and surrounded by cookie cutters and colored sprinkles. Making Christmas cookies wasn’t just about the cookies—it was about the magic, the anticipation, the way the whole house smelled like vanilla and butter.
These Christmas Sprinkle Cookies are my grown-up version of that magic, simplified for busy holiday schedules. No complicated decorating, no royal icing that takes hours to dry, no stress. Just soft sugar cookies rolled in festive sprinkles that bake right onto the cookies. The result looks impressive but is actually the easiest Christmas cookie you’ll ever make.
I started making these when I realized I wanted the fun and festivity of decorated cookies without spending my entire Saturday hunched over a piping bag. Kids go crazy for the rolling-in-sprinkles part, adults love how easy they are, and everyone agrees they taste amazing. That’s a holiday baking win in my book. 🙂
Why You’ll Love This Recipe
Simple Sugar Cookie Base That’s Foolproof This is a straightforward sugar cookie recipe that works every single time. No fancy techniques, no weird ingredients, just butter, sugar, eggs, flour, and vanilla. If you can cream butter and sugar, you can make these cookies.
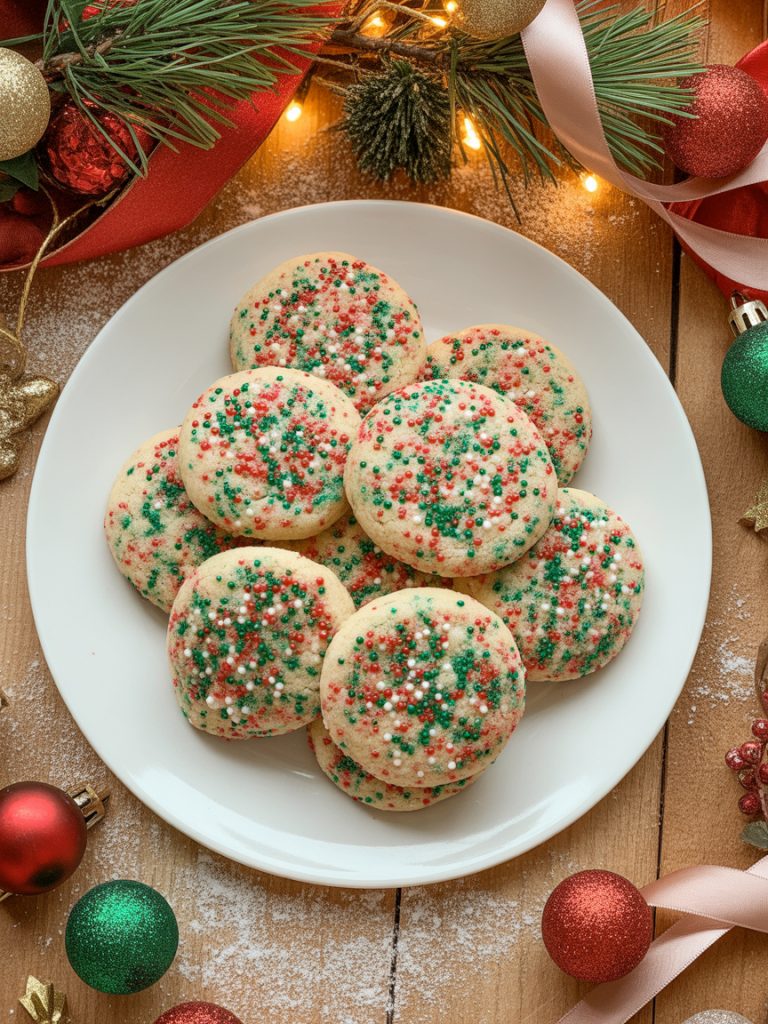
Covered in Festive Sprinkles Before Baking This is the genius part—you roll the dough balls in sprinkles before baking, so the sprinkles bake right onto the cookies. No frosting, no decorating, no waiting for anything to dry. The cookies come out of the oven already festive and beautiful.
Perfect for Cookie Exchanges and Holiday Parties These cookies look fancy enough for a party but are easy enough to make in large batches. They stack and transport well, and everyone loves them. Plus, they’re recognizable as “Christmas cookies” without being overly cutesy.
Kids Love Making (and Eating) These The rolling-in-sprinkles step is perfect for little hands. Kids can’t really mess this up, and they feel like they’re doing something important. It’s a great way to get them involved in holiday baking without the chaos of cookie cutters and frosting.
Make-Ahead Friendly for Busy Holiday Season You can make the dough ahead and refrigerate it for up to 3 days, or freeze it for up to 3 months. You can also bake the cookies ahead and store them in an airtight container. This is crucial during the hectic holiday season.
Endlessly Customizable With Different Sprinkles Red and green for Christmas, obviously. But you could do blue and white for Hanukkah, pastels for a baby sprinkle, rainbow for a birthday, pink and red for Valentine’s—the base cookie works year-round with different sprinkles.
Ingredients
For the Cookies:
- 1 cup (2 sticks) unsalted butter, softened to room temperature
- 1 cup granulated sugar
- 1 large egg, room temperature
- 2 teaspoons vanilla extract
- 2¾ cups all-purpose flour
- 1 teaspoon baking powder
- ½ teaspoon salt
- Optional: 1-2 drops red or green food coloring (for colored dough)
For Coating:
- 1-2 cups Christmas sprinkles (jimmies, nonpareils, or a festive mix)
Key Ingredient Notes:
Room Temperature Butter is Crucial: The butter needs to be soft enough to cream with sugar but not melted. It should leave a slight indent when pressed. Take it out of the fridge 30-60 minutes before baking. This is the most important step for the right cookie texture.
Granulated Sugar vs. Powdered: This recipe uses granulated sugar, which gives the cookies a slightly crispy exterior with a soft interior. Don’t substitute powdered sugar—it changes the texture completely.
Egg Temperature Matters: Room temperature eggs incorporate better into the dough. Put your egg in a bowl of warm water for 5 minutes if you forgot to take it out ahead.
Flour Measurement: Spoon flour into your measuring cup and level it off with a knife. Don’t pack it down or scoop directly from the bag, or you’ll end up with too much flour and dry cookies.
Sprinkle Selection: Jimmies (the long rod-shaped sprinkles) hold up best to baking and don’t bleed color. Nonpareils (the tiny ball sprinkles) work but can sometimes bleed slightly. The festive Christmas mixes with red, green, and white are perfect. Avoid sanding sugar—it’s too coarse for this application.
Food Coloring is Optional: If you want colored dough (red or green cookies with coordinating sprinkles), add 1-2 drops of gel food coloring when you add the vanilla. Gel works better than liquid and won’t affect dough consistency.
Step-by-Step Instructions
Step 1: Cream Butter and Sugar Perfectly
In a large bowl or stand mixer, beat the softened butter and sugar together on medium speed for about 3-4 minutes. The mixture should be light, fluffy, and pale in color. This step incorporates air and creates tender cookies.
Scrape down the sides of the bowl halfway through to make sure everything’s incorporated evenly.
Step 2: Add Wet Ingredients
Add the egg and vanilla extract (and food coloring if using). Beat on medium speed for another minute until everything is well combined and fluffy.
The mixture might look slightly curdled—that’s normal. It’ll come together when you add the flour.
Step 3: Mix in Dry Ingredients
In a separate bowl, whisk together the flour, baking powder, and salt. This ensures the leavening is evenly distributed.
Add the dry ingredients to the wet ingredients in two additions, mixing on low speed just until combined after each addition. Don’t overmix—stop as soon as you don’t see any more flour streaks.
The dough will be soft and slightly sticky. That’s exactly what you want.
Step 4: Chill the Dough (Don’t Skip This!)
Cover the bowl with plastic wrap and refrigerate the dough for at least 30 minutes, or up to 3 days. Chilling is essential—it prevents the cookies from spreading too much in the oven and makes the dough easier to handle.
If you’re in a huge hurry, 20 minutes in the freezer works, but 30 minutes in the fridge is better.
Step 5: Shape and Roll in Sprinkles
Preheat your oven to 350°F. Line two baking sheets with parchment paper or silicone baking mats.
Pour your sprinkles into a shallow bowl or plate. Scoop about 1 tablespoon of dough and roll it into a ball between your palms. Roll the ball in the sprinkles until completely covered, pressing gently so the sprinkles stick.
Place the sprinkle-covered balls on the prepared baking sheets, spacing them about 2 inches apart. They’ll spread slightly while baking.
Step 6: Bake to Perfection
Bake for 10-12 minutes. The cookies are done when the edges are just barely starting to turn golden and the centers still look slightly soft. They’ll continue to set as they cool.
Don’t overbake! These cookies should be soft and tender, not crispy. If you see significant browning on top, you’ve gone too far.
Step 7: Cool and Enjoy
Let the cookies cool on the baking sheet for 5 minutes (they’re fragile when hot), then transfer to a wire rack to cool completely.
The sprinkles will be set and crunchy, and the cookies will be perfectly soft and buttery. Store in an airtight container once completely cool.
Serving Suggestions
Cookie Platters for Parties Arrange these on a festive platter with other Christmas cookies for variety. The colorful sprinkles make them stand out. Add some chocolate chip cookies, gingerbread, and maybe some fudge for a complete cookie spread.
Gift Packaging Ideas Stack cookies in clear cellophane bags tied with ribbon, pack them in decorative tins, or arrange them in boxes lined with tissue paper. These make wonderful homemade gifts—they look professional and taste amazing.
Pairing With Hot Chocolate or Milk The classic pairing never fails. These cookies are perfect for dunking. Set out a hot chocolate bar with marshmallows, whipped cream, and candy canes alongside a plate of these cookies.
Cookie Exchange Tips These are ideal for cookie exchanges because they’re sturdy, stack well, and look festive. Package them in dozens with a decorative recipe card. They transport beautifully without breaking or getting messy.
Making It a Family Tradition Set aside an afternoon for cookie baking. Let kids pick their sprinkle colors, play Christmas music, and make it special. These cookies are simple enough that even young kids can help meaningfully.
Ice Cream Sandwiches Use two cookies to sandwich a scoop of vanilla or peppermint ice cream. Roll the exposed ice cream edge in more sprinkles. Freeze until firm. Festive and delicious.
Storage Tips
Room Temperature Storage
Store completely cooled cookies in an airtight container at room temperature for up to 1 week. Place parchment or wax paper between layers to prevent them from sticking together.
The sprinkles might soften very slightly after a few days, but the cookies will still taste great.
Layering Cookies Without Sticking
If you’re stacking cookies in a container, put a sheet of parchment or wax paper between each layer. This prevents the sprinkles from sticking to the cookie above and keeps everything looking nice.
Freezing Baked Cookies
These freeze beautifully! Let cookies cool completely, then freeze in a single layer on a baking sheet for about an hour. Transfer frozen cookies to a freezer bag or airtight container. Freeze for up to 3 months.
Thaw at room temperature for about 30 minutes before serving. They taste freshly baked.
Freezing Cookie Dough for Later
This is a game-changer for holiday baking. Roll the dough into balls, then freeze on a baking sheet until solid (about 1 hour). Transfer to a freezer bag. Store for up to 3 months.
When ready to bake, roll frozen dough balls in sprinkles and bake directly from frozen, adding 1-2 extra minutes to the baking time. Fresh cookies anytime you want them!
How Long They Stay Fresh
These cookies are best within the first 3-4 days but will stay edible for up to a week. The texture gets slightly less tender over time, but they’re still good. Frozen cookies maintain their quality much better for longer storage.
Final Thoughts
Here’s what I love about Christmas Sprinkle Cookies: they capture the joy and festivity of the holidays without requiring hours of work or advanced baking skills. Sometimes the simplest things are the most magical, and these cookies prove that.
The act of making them—rolling those balls of dough in colorful sprinkles—is pure, uncomplicated fun. Kids can help, adults can relax and enjoy the process, and everyone gets to eat beautiful, delicious cookies at the end. That’s what holiday baking should be about.
These cookies have become a tradition in my house. Every December, we make a few batches, package some up for gifts, eat plenty straight from the cookie jar, and freeze the rest of the dough for those moments when we need fresh-baked cookies fast. They’re reliable, they’re festive, and they make people smile.
Give these a try and let me know what you think! Tag me on Instagram or Pinterest with your sprinkle cookie creations—I especially love seeing what creative sprinkle combinations people come up with. And if this becomes a holiday tradition in your house, that makes me so happy.
Now go make some colorful, joyful, delicious holiday magic. Your kitchen is about to smell like Christmas.
Happy baking!
— Kip
Christmas Sprinkle Cookies (Festive & Fun!)
Description
Christmas Sprinkle Cookies are the easiest, most festive holiday cookies you can make. These soft, buttery sugar cookies are rolled in colorful Christmas sprinkles before baking, creating a beautiful, festive coating that eliminates the need for frosting. The simple dough comes together quickly, and the fun part—rolling them in sprinkles—makes this a perfect activity for kids. They're ideal for cookie exchanges, holiday parties, or just filling your cookie jar with something cheerful. One bite of these tender, vanilla-scented cookies covered in crunchy sprinkles will bring back all those warm childhood Christmas memories.
Ingredients
For Coating:
Instructions
-
Beat softened butter and sugar together on medium speed 3-4 minutes until light and fluffy. Scrape down sides of bowl.
-
Add egg, vanilla, and food coloring (if using). Beat 1 minute until well combined.
-
In separate bowl, whisk together flour, baking powder, and salt. Add to wet ingredients in two additions, mixing on low just until combined. Don't overmix.
-
Cover bowl and refrigerate dough at least 30 minutes (or up to 3 days).
-
Preheat oven to 350°F. Line baking sheets with parchment paper.
-
Pour sprinkles into shallow bowl. Roll dough into 1-tablespoon balls, roll each ball in sprinkles until completely covered, pressing gently. Place on baking sheets 2 inches apart.
-
Bake 10-12 minutes until edges barely start to turn golden. Centers will look slightly soft—don't overbake!
-
Cool on baking sheet 5 minutes, then transfer to wire rack to cool completely.
Note
Make-Ahead: Freeze unbaked dough balls for up to 3 months. Bake from frozen, adding 1-2 minutes to baking time.
Storage: Store in airtight container at room te
