
I want to tell you about the afternoon I stood at my kitchen counter staring at three very ripe bananas and a can of cinnamon rolls I had completely forgotten about. Two separate plans. One moment of inspiration. And honestly, one of the best decisions I have ever made in this kitchen.
The idea was simple — take everything that makes banana bread so comforting and swirl a proper cinnamon roll filling right through the middle of it. Not a sprinkle of cinnamon on top.
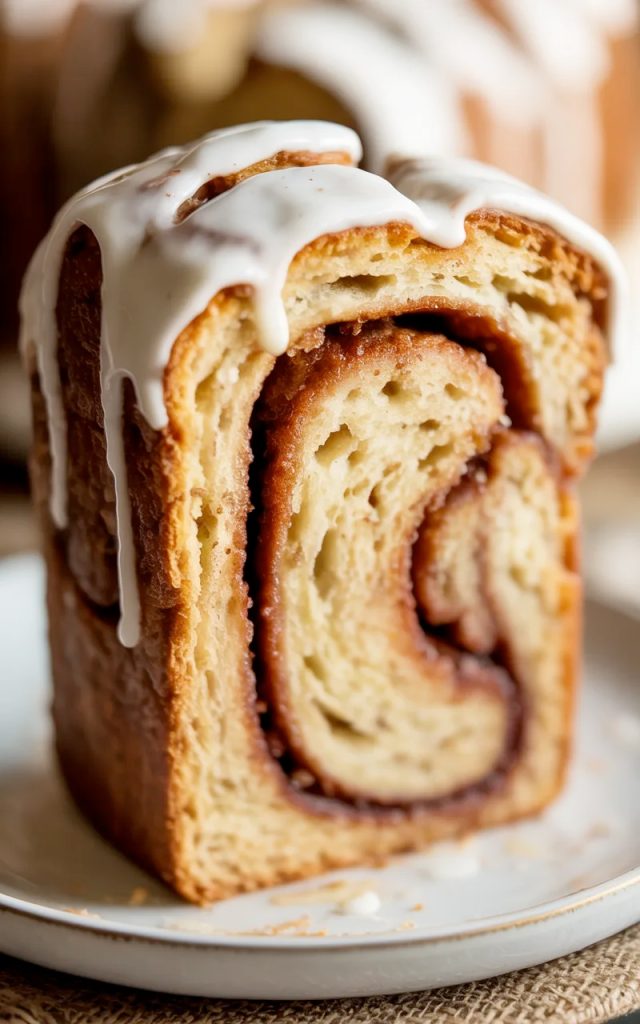
Not a pinch mixed into the batter. An actual buttery, brown sugar cinnamon swirl layered through every slice, finished with a vanilla glaze drizzled over the top. The kind of thing that makes people walk into your kitchen and immediately ask what that smell is.
What came out of that oven was something I have now made more times than I can count. It is moist, it is rich, it has that deep cinnamon warmth in every bite, and the glaze on top sets into something slightly crisp and absolutely perfect. If you have got ripe bananas on your counter right now and an hour to spare, this is exactly what you should be making today.
For the banana bread batter:
For the cinnamon swirl filling:
For the vanilla glaze:
Key ingredient notes:
Very ripe bananas — This is the single most important ingredient in the entire recipe and the ripeness matters more than anything else. You want bananas that are heavily spotted, mostly brown, and soft enough to mash completely smooth with a fork. Green or barely yellow bananas will give you a bland, starchy bread with almost no banana flavor. The riper the banana, the more natural sugar it contains and the more intensely banana-flavored your loaf will be. If your bananas are not quite ripe enough, you can ripen them quickly by placing unpeeled bananas on a baking sheet and baking at 300°F for 15–20 minutes until the skins turn black. Let them cool before using.
Melted butter — Using melted rather than softened butter in the batter gives this banana bread a denser, more moist crumb — which is exactly what you want here. It also means there is no creaming step, which keeps the prep time short. Make sure the melted butter has cooled slightly before adding the egg so you do not accidentally scramble it.
Packed brown sugar for the filling — Pack it firmly when measuring. Brown sugar is what gives the cinnamon swirl filling its deep, caramel-like richness. Dark brown sugar will give you a more intense, molasses-forward flavor. Light brown sugar is a little milder. Both work — it comes down to personal preference. The filling should be the consistency of a thick, spreadable paste after mixing with the softened butter and cinnamon.
Ground cinnamon — Use fresh cinnamon for the best flavor. Old ground cinnamon that has been sitting in your spice cabinet for two years loses its potency and gives you a flat, muted flavor. If you cannot remember when you bought yours, now is a good time to replace it. The cinnamon is the star of the filling and it needs to be good.
Softened butter for the filling — The filling butter needs to be soft enough to mix smoothly with the brown sugar and cinnamon into a spreadable paste. If it is too hard it will not mix properly and you will end up with lumps in your filling. If it is too melted the filling will be too runny and will sink to the bottom of the batter rather than swirling through it. Room temperature — soft enough to press a finger into — is exactly what you are looking for.
Step 1: Preheat your oven and prep your pan
Preheat your oven to 350°F (175°C). Grease a standard 9x5 inch loaf pan with butter or non-stick spray, then line it with a strip of parchment paper along the bottom and up the two long sides. This makes it much easier to lift the finished loaf out of the pan cleanly. Set aside.
Step 2: Mash the bananas
Peel the ripe bananas and place them in a large mixing bowl. Mash them thoroughly with a fork until they are as smooth as possible with minimal lumps. A few small lumps are fine but the more thoroughly you mash, the more evenly the banana flavor distributes through the bread.
Step 3: Add the wet ingredients
Add the melted butter to the mashed bananas and stir to combine. Add the granulated sugar, egg, and vanilla extract and mix until everything is fully incorporated and the mixture looks uniform.
Step 4: Add the dry ingredients
Sprinkle the baking soda and salt over the wet mixture and stir briefly to combine. Add the flour all at once and fold it in gently with a spatula until just combined. Stop mixing as soon as you no longer see streaks of dry flour. Overmixing banana bread batter develops the gluten and gives you a tough, dense loaf instead of a tender one. A few lumps in the batter are completely fine.
Step 5: Mix the cinnamon filling
In a small bowl, mix together the softened butter, packed brown sugar, and ground cinnamon until it forms a thick, uniform paste. It should be smooth and spreadable. If it feels too stiff, let it sit at room temperature for another few minutes and stir again.
Step 6: Layer the batter and filling
Pour half of the banana bread batter into the prepared loaf pan and spread it into an even layer. Drop the cinnamon filling in small spoonfuls across the surface of the batter layer, spreading it as evenly as you can across the top without mixing it into the batter below. Pour the remaining banana bread batter over the top of the cinnamon filling and spread it gently to cover.
Step 7: Create the swirl
Using a butter knife or a thin skewer, insert it into the batter and swirl it through the batter in a figure-eight or S-shaped motion, going through the full depth of the loaf a few times. You want to create a visible swirl pattern without completely mixing the filling into the batter. Three or four swirling passes is enough — resist the urge to keep going or you will blend the layers together and lose the distinct swirl in the finished loaf.
Step 8: Bake
Place the loaf pan in the preheated oven and bake for 55–65 minutes. At the 55-minute mark, insert a toothpick or a thin skewer into the center of the loaf. If it comes out clean or with just a few moist crumbs attached, the bread is done. If it comes out with wet batter on it, return the loaf to the oven for another 5–10 minutes and check again. If the top of the loaf is browning too quickly before the center is cooked through, loosely tent it with a piece of aluminum foil for the last 15–20 minutes of baking.
Step 9: Cool in the pan
Remove the loaf from the oven and let it cool in the pan on a wire rack for 15 minutes before lifting it out using the parchment paper overhang. Transfer the loaf to the wire rack and let it cool for at least another 15–20 minutes before glazing. The loaf needs to be warm but not hot when you add the glaze — if it is too hot the glaze will run straight off and pool underneath.
Step 10: Make the glaze
Whisk together the sifted powdered sugar, milk, vanilla extract, and pinch of salt in a small bowl until completely smooth. The glaze should be thick enough to drizzle slowly from a spoon but thin enough to spread slightly when it hits the loaf. Add milk one teaspoon at a time to reach the right consistency.
Step 11: Glaze the loaf
Drizzle the glaze generously over the top of the warm loaf in a back-and-forth motion, letting it run down the sides slightly. The warmth of the loaf will cause the glaze to soak slightly into the top crust as it sets, which is exactly what you want. Let the glaze set for 10–15 minutes before slicing.
This loaf is incredible on its own but here are a few ways to make it even more of an occasion:
Room temperature: Store the cooled loaf wrapped tightly in plastic wrap or in an airtight container at room temperature for up to 3 days. The glaze will stay set and the bread will remain moist. After day three the texture starts to decline slightly so beyond that the fridge is a better option.
Refrigerator: Wrap the loaf tightly or store slices in an airtight container in the refrigerator for up to 7 days. The cold temperature can firm up the crumb slightly so give each slice a quick 15–20 second warm-up in the microwave before eating to bring it back to its soft, fresh-baked texture.
Freezer: This loaf freezes exceptionally well. For the most convenient option, slice the fully cooled loaf before freezing. Lay the slices in a single layer on a baking sheet and freeze for 1 hour, then transfer to a freezer-safe zip-lock bag or airtight container with parchment paper between slices. Freeze for up to 3 months. Thaw individual slices at room temperature for 30–45 minutes or microwave from frozen for 45–60 seconds. If you plan to freeze the loaf, hold off on the glaze and add it fresh after thawing for the best result.
Make-ahead tip: The banana bread batter can be made up to 24 hours ahead and stored covered in the refrigerator before baking. The cinnamon filling can also be made ahead and stored at room temperature. When you are ready to bake, assemble, swirl, and bake as directed adding a few extra minutes to the bake time since the batter will be cold.
Cinnamon roll banana bread is one of those recipes that feels like a bit of a revelation the first time you make it. Two things you already love, combined in a way that somehow makes both of them better. The cinnamon swirl running through the moist banana bread, the glaze setting on top, the smell that takes over your entire kitchen while it bakes — it all adds up to something genuinely special for what is essentially a one-bowl quick bread.
Make it on a weekend morning, slice it warm, and eat it with someone you like. That is pretty much the ideal use case for this loaf.
If you make it, drop a comment below and let me know how it went. Did you add nuts? Did you go heavy on the cinnamon filling? Did you eat three slices before it fully cooled? No judgment here whatsoever. Tag me on Pinterest and Instagram so I can see your loaves — I genuinely love every single one.
Happy baking — Kip
This cinnamon roll banana bread is what happens when two of the most comforting baked goods in existence decide to become one. A moist, tender banana bread batter gets layered with a buttery cinnamon sugar swirl that runs through every single slice, and the whole loaf gets finished with a smooth vanilla glaze that soaks slightly into the top as it sets. It is the kind of bake that fills your entire kitchen with the most incredible smell and tastes even better than it looks. Made with simple pantry ingredients and ready in just over an hour.