

My aunt Clara brought these to Christmas Eve dinner three years ago and I literally ate seven of them before the main course. No shame. The next day I called her begging for the recipe because I needed to make them immediately, and she laughed and said “I knew you’d ask—I already texted it to you.”
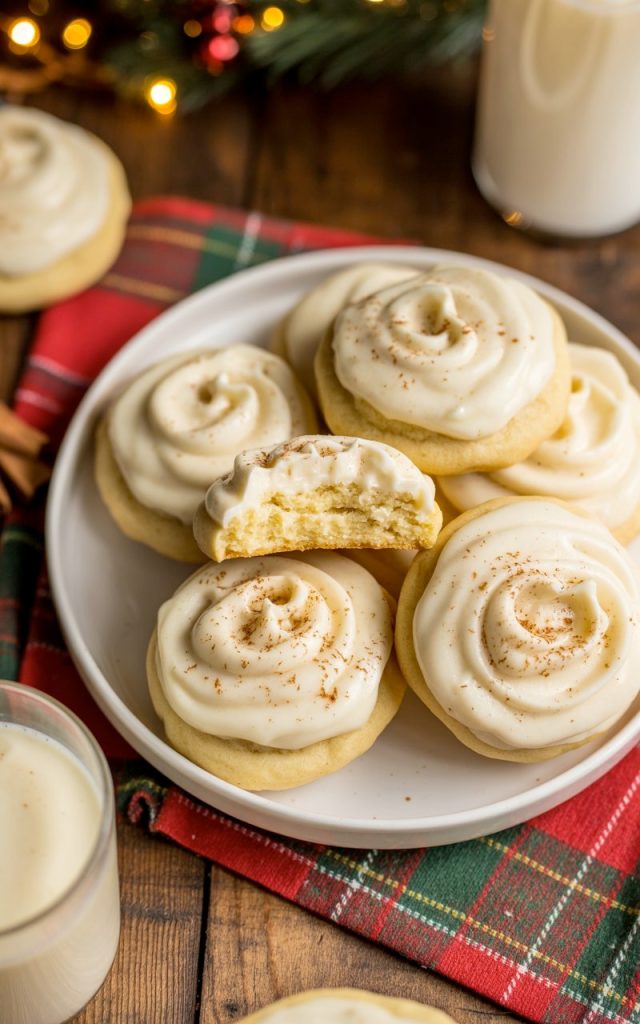
Best aunt ever, honestly. These cookies are everything you love about eggnog—that creamy richness, those warm spices, that festive vibe—but in soft, pillowy cookie form. The eggnog frosting on top is basically the cherry on top of an already perfect holiday treat.
I’ve been making these every Christmas since, and they’ve become the cookie everyone requests. Last year someone literally asked if they could take home the entire plate. I said no, obviously, but I took it as a compliment.
Why You’ll Love This Recipe
They taste exactly like eggnog. Not “kinda like eggnog if you squint.” Actually like drinking a glass of eggnog but in cookie form. The spices, the creaminess, the festive flavor—it’s all there.
Soft and pillowy texture. These aren’t your typical crispy cookies. They’re soft, almost cake-like, and they literally melt in your mouth. The kind of texture that makes you close your eyes and go “mmm.”
That eggnog frosting though. Creamy, sweet, with just a hint of nutmeg and rum extract. It’s what takes these from “really good cookies” to “I need to make a double batch” territory.
Easy enough for beginners. No chilling the dough for hours, no complicated techniques, no special equipment. Just mix, scoop, bake, frost. Even if you’re not a confident baker, these will turn out great.
Perfect for holiday parties. These are show-stoppers at cookie exchanges. Festive, beautiful, and different from the usual sugar cookies and gingerbread everyone else brings.
They freeze beautifully. Make them ahead, freeze them, and pull them out when you need them. Future you will be very grateful during the holiday chaos.
Ingredients
For the Cookies:
- 2¾ cups all-purpose flour (or use 1:1 gluten-free flour blend)
- 2 teaspoons baking powder
- ½ teaspoon salt
- 1 teaspoon ground nutmeg
- ½ teaspoon ground cinnamon
- 1 cup unsalted butter, softened (don’t use cold butter)
- 1 cup granulated sugar
- 2 large eggs
- 2 teaspoons vanilla extract
- 1 teaspoon rum extract (or use all vanilla if you prefer)
- ½ cup eggnog (use the good stuff, not the light version)
For the Eggnog Frosting:
- 4 cups powdered sugar
- ½ cup unsalted butter, softened
- 3-4 tablespoons eggnog
- 1 teaspoon vanilla extract
- ½ teaspoon rum extract (optional)
- ¼ teaspoon ground nutmeg (plus extra for sprinkling)
- Pinch of salt
Key Notes:
Eggnog matters: Use full-fat, quality eggnog. The light or fat-free versions don’t have the same richness and your cookies will suffer. This is not the time to cut calories—we’re making Christmas cookies, people.
Butter temperature is crucial: Your butter needs to be softened, not melted. It should leave an indent when you press it but still hold its shape. Too cold and it won’t cream properly. Too melted and your cookies will spread too much.
Don’t overmix: Once you add the flour, mix just until combined. Overmixing develops gluten and makes your cookies tough instead of tender. We want pillowy, not chewy.
Rum extract is optional: If you’re making these for kids or don’t want the rum flavor, just use all vanilla extract. They’ll still taste amazing and festive.
Gluten-free option: Use a good 1:1 gluten-free flour blend (like Bob’s Red Mill or King Arthur). They work perfectly in this recipe without any other modifications.
Step-by-Step Instructions
Step 1: Preheat and Prep
Preheat your oven to 350°F (175°C). Line two baking sheets with parchment paper or silicone mats. Trust me, these cookies are soft and can stick without proper lining.
Step 2: Mix the Dry Ingredients
In a medium bowl, whisk together the flour, baking powder, salt, nutmeg, and cinnamon. Set this aside—you’ll need it in a minute.
Step 3: Cream the Butter and Sugar
In a large bowl (or stand mixer), beat the softened butter and sugar together for 2-3 minutes until light and fluffy. This is important—don’t rush it. The air you’re incorporating makes the cookies tender.
Step 4: Add Wet Ingredients
Beat in the eggs one at a time, making sure each is fully incorporated before adding the next. Then mix in the vanilla extract, rum extract, and eggnog. The mixture might look slightly curdled—that’s normal and totally fine.
Step 5: Combine Wet and Dry
Add the flour mixture to the wet ingredients in two or three additions, mixing on low speed just until combined after each addition. Stop mixing as soon as you don’t see any dry flour. The dough will be soft and slightly sticky.
Step 6: Scoop and Bake
Using a cookie scoop (about 2 tablespoons), drop rounded balls of dough onto your prepared baking sheets, spacing them about 2 inches apart. They’ll spread a bit while baking. Bake for 10-12 minutes until the edges are just set and the tops look slightly puffed but still soft. Don’t overbake—they should barely have any color on the edges.
Step 7: Cool Completely
Let the cookies cool on the baking sheet for 5 minutes, then transfer to a wire rack to cool completely. This is crucial before frosting—warm cookies will melt your frosting into a puddle.
Step 8: Make the Frosting
While cookies cool, beat the softened butter in a large bowl until creamy. Gradually add the powdered sugar, one cup at a time, alternating with tablespoons of eggnog. Add vanilla extract, rum extract (if using), nutmeg, and salt. Beat until light and fluffy, about 2-3 minutes. If it’s too thick, add more eggnog. Too thin? Add more powdered sugar.
Step 9: Frost and Garnish
Once cookies are completely cool, spread or pipe the frosting on top of each cookie. Sprinkle with a tiny pinch of fresh nutmeg. Let the frosting set for about 15 minutes before serving or storing.
Serving Suggestions
These eggnog cookies are festive and versatile for the holidays:
Classic Christmas cookie platter. Arrange them on a festive plate with other holiday cookies—gingerbread, sugar cookies, peppermint bark. The eggnog cookies always disappear first, just saying.
Cookie exchange star. These are perfect for cookie swaps. They’re different, impressive, and everyone will want the recipe. Package them in cute tins or boxes tied with ribbon.
With hot cocoa or coffee. Serve them alongside mugs of hot chocolate or coffee for the ultimate cozy winter treat. The spices complement both perfectly.
Santa’s cookies. These are way better than plain sugar cookies for leaving out on Christmas Eve. Santa will definitely appreciate the upgrade.
Gift them. Stack them in clear cellophane bags tied with festive ribbon. They make beautiful homemade holiday gifts that people actually want to receive.
Brunch dessert. Serve them at holiday brunch alongside mimosas or eggnog lattes. They’re light enough for morning but special enough to feel celebratory.
Storage Tips
Room Temperature: Store frosted cookies in an airtight container at room temperature for up to 4 days. Place parchment paper between layers to prevent the frosting from sticking.
Refrigerator: If your kitchen is warm or you want them to last longer, refrigerate in an airtight container for up to 1 week. Let them come to room temperature before serving for the best texture.
Freezing unfrosted cookies: Bake the cookies, let them cool completely, then freeze in a single layer on a baking sheet. Once frozen solid, transfer to a freezer bag for up to 3 months. Thaw and frost when ready to serve.
Freezing frosted cookies: This works but is trickier. Freeze them on a baking sheet until the frosting is solid, then carefully layer in a container with parchment paper between layers. Freeze up to 2 months. Thaw in the fridge overnight.
Make-ahead tip: Bake the cookies up to a week ahead and store unfrosted in an airtight container. Make the frosting the day you’re serving and frost them fresh. This keeps everything tasting homemade.
Cookie dough freezing: You can freeze the unbaked dough! Scoop into balls, freeze on a baking sheet, then transfer to a freezer bag. Bake directly from frozen, adding 2-3 extra minutes to the baking time.
Final Thoughts
And there you have it—the eggnog cookies that turned me into that person who brings the same thing to every holiday party because everyone expects it now. Honestly? I’m not even mad about it.
These cookies are the perfect balance of festive, delicious, and actually achievable. They look impressive, taste amazing, and you don’t need to be a professional baker to pull them off. Plus, that moment when someone bites into one and their eyes light up? Never gets old.
So go ahead and make these. Start your own holiday tradition. Become the eggnog cookie person in your friend group. Trust me, it’s a good reputation to have. 🙂
Happy baking!
— Kip
Eggnog Cookies (Best Ever Holiday Recipe with Eggnog Frosting!)
Description
Incredibly soft eggnog cookies infused with warm holiday spices and topped with a creamy eggnog frosting. These melt-in-your-mouth treats capture all the festive flavors of the season and are perfect for holiday parties, cookie exchanges, or Santa's plate!
Ingredients
For the Cookies:
For the Eggnog Frosting:
Instructions
-
Preheat oven to 350°F (175°C). Line baking sheets with parchment paper.
-
Whisk together flour, baking powder, salt, nutmeg, and cinnamon in medium bowl.
-
Beat butter and sugar for 2-3 minutes until light and fluffy.
-
Beat in eggs one at a time, then vanilla, rum extract, and eggnog.
-
Add flour mixture in 2-3 additions, mixing just until combined. Don't overmix.
-
Scoop 2-tablespoon portions onto baking sheets, spacing 2 inches apart. Bake 10-12 minutes until edges are just set. Don't overbake.
-
Cool on pan 5 minutes, then transfer to wire rack to cool completely.
-
For frosting: Beat butter until creamy. Gradually add powdered sugar alternating with eggnog. Add extracts, nutmeg, and salt. Beat until fluffy.
-
Frost cooled cookies and sprinkle with nutmeg. Let set 15 minutes before serving.
