
There are certain foods that make a room go quiet the moment they hit the table. French dip sliders are one of those foods. The moment you pull that tray out of the oven — butter glazed buns golden and glistening, cheese melted and pulling, the smell of caramelized onions and roast beef filling every corner of the kitchen — conversation stops and hands start reaching.
The French dip sandwich has always been one of those deeply satisfying comfort foods. Tender roast beef, melty cheese, and a rich savory broth for dipping — it is the kind of meal that makes you slow down and actually enjoy what you are eating. Turning it into sliders takes everything great about the original and makes it shareable, snackable, and honestly even more fun to eat.
I make these for game days, family gatherings, weeknight dinners when I want something that feels special without requiring hours in the kitchen. Every single time, the tray is empty before I even sit down. Thirty minutes, one pan, and a dipping sauce that people will be talking about long after the meal is over. That is the kind of recipe worth keeping close.
For the sliders:
For the butter topping:
For the dipping sauce:
Step 1: Preheat your oven
Preheat your oven to 350 degrees Fahrenheit. Grease a 9x13 inch baking dish or line it with parchment paper and set aside.
Step 2: Caramelize the onions
Heat the olive oil in a skillet over medium low heat. Add the thinly sliced onions and season with a pinch of salt. Cook slowly, stirring every few minutes, for 15 to 20 minutes until the onions are deeply golden, soft, and sweet. Do not rush this step by turning up the heat — low and slow is what gives you that deep caramelized flavor. If the onions start to stick, add a small splash of water to the pan and stir. Set aside once done.
Step 3: Slice and prep the buns
Without separating the individual rolls, use a long serrated knife to slice the entire slab of slider buns in half horizontally, creating one large top half and one large bottom half. Place the bottom half in the prepared baking dish.
Step 4: Layer the fillings
Layer the thinly sliced roast beef evenly over the bottom half of the buns. Do not skimp here — a generous layer of beef is what makes these sliders truly satisfying. Spread the caramelized onions evenly over the roast beef. Lay the provolone cheese slices over the onions, covering the beef as evenly as possible. Place the top half of the buns over the cheese.
Step 5: Make and apply the butter topping
In a small bowl, whisk together the melted butter, Dijon mustard, Worcestershire sauce, minced garlic, and parsley. Brush this mixture generously and evenly over the entire top surface of the buns. Use all of it — every drop of this butter topping makes a difference. If you have a pastry brush, use it. If not, a spoon works fine.
Step 6: Bake the sliders
Cover the baking dish tightly with aluminum foil and bake for 15 minutes. This allows the cheese to melt fully and the fillings to heat through without the tops of the buns browning too quickly. After 15 minutes, remove the foil and bake for an additional 5 minutes until the tops of the buns are golden, glossy, and slightly caramelized. Keep a close eye on them during this final uncovered bake.
Step 7: Make the dipping sauce
While the sliders finish baking, combine the beef broth and Worcestershire sauce in a small saucepan over medium heat. Season with salt, pepper, garlic powder, and fresh thyme if using. Bring to a gentle simmer and cook for 3 to 4 minutes. Taste and adjust seasoning. Pour into small individual dipping bowls or one shared bowl for the table.
Step 8: Slice and serve
Remove the sliders from the oven and let them rest for 2 to 3 minutes. Use a sharp knife to cut between the individual rolls following the existing lines of the buns. Serve immediately alongside the warm dipping sauce.
These sliders are the kind of food that works everywhere and for everything. Set them out as an appetizer at a party and watch them disappear within minutes. Serve them as the main event for a weeknight family dinner alongside a simple green salad or some crispy oven fries. Put them at the center of a game day spread with other finger foods and they will be the first thing to run out.
For a more complete dinner, pair the sliders with a simple arugula salad dressed with lemon and olive oil — the peppery bitterness of the arugula cuts through the richness of the beef and butter beautifully. Roasted potato wedges or a creamy coleslaw also work really well alongside.
If you are serving these at a gathering, consider setting up a small station with the sliders, the dipping sauce in a warm bowl, and a few extra condiments on the side — a little horseradish sauce, some extra Dijon mustard, and a few pickles give guests the option to customize and makes the whole spread feel thoughtful and generous.
For kids, the dipping sauce is usually the most exciting part. Give them their own small bowl and watch them enthusiastically dip every bite. It makes the meal feel interactive and fun, which is always a win at the family dinner table.
Refrigerator: Store leftover sliders in an airtight container or wrap the baking dish tightly with plastic wrap. They will keep in the fridge for up to 3 days. Store the dipping sauce separately in a sealed jar or container in the fridge for up to 4 days.
Reheating: For the best results, reheat the sliders covered with foil in a 325 degree Fahrenheit oven for 10 to 12 minutes until warmed through. This keeps the buns soft and the cheese melty without drying everything out. Avoid the microwave if possible as it tends to make the buns tough and rubbery. Reheat the dipping sauce gently in a small saucepan over low heat or in the microwave in 30 second intervals.
Make ahead: These sliders are a fantastic make ahead option. Assemble the entire tray — layers of beef, onions, cheese, and butter topping — up to 24 hours in advance and keep it covered in the fridge. When ready to serve, bake as directed, adding an extra 5 minutes to the covered baking time since everything will be going in cold. The dipping sauce can also be made a day ahead and stored in the fridge.
Freezer: Assembled but unbaked sliders can be wrapped tightly in plastic wrap and then foil and frozen for up to 1 month. Thaw overnight in the fridge before baking as directed. The dipping sauce is not suitable for freezing.
Some recipes are just built for bringing people together, and French dip sliders are absolutely one of them. There is something about pulling a tray of golden, cheesy, butter glazed sliders out of the oven that immediately makes everyone in the room lean in a little closer. Add a bowl of warm dipping sauce on the side and you have created one of those food moments that people remember.
That is what I love most about cooking. Not the complexity. Not the technique. Just the way good food has this quiet power to gather people, slow them down, and remind them that the best moments in life often happen around a table.
Thank you for being here and for trusting me with your kitchen. I hope these sliders become a staple in your home the way they have in mine.
Drop a comment below and let me know how they turned out. Share them with someone who needs a great game day recipe. Tag me on social media so I can see your beautiful golden tray. Cooking is always better when it is shared.
Now go make something delicious.
With gratitude, Kip
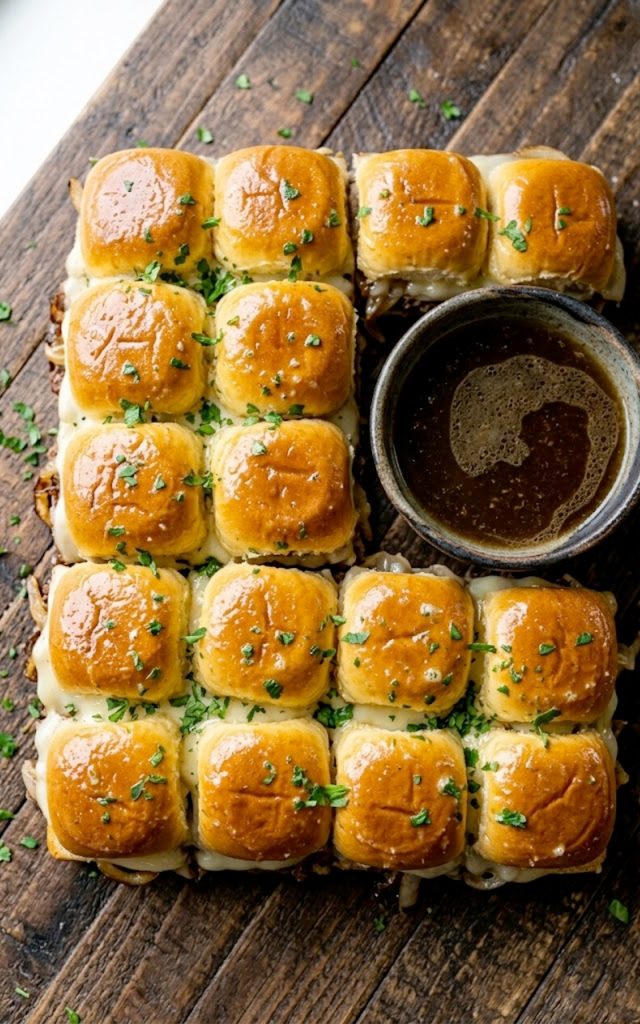
These French dip sliders take everything you love about the classic French dip sandwich and pack it into irresistible, shareable slider form. Thinly sliced roast beef, melty provolone cheese, and deeply caramelized onions are layered onto soft Hawaiian sweet rolls, brushed with a savory garlic butter and Worcestershire topping, and baked until golden and perfect. Served alongside a simple but deeply flavorful beef broth dipping sauce, these are the ultimate crowd pleasing appetizer or comforting weeknight dinner that comes together in just 30 minutes.