

There’s something almost magical about pulling fresh garlic knots out of the oven.
I’ll never forget the first time I made these from scratch. I’d always assumed garlic knots were one of those things you had to buy from a pizzeria—too complicated for a home cook. Then one night I had leftover pizza dough and thought, why not give it a shot?
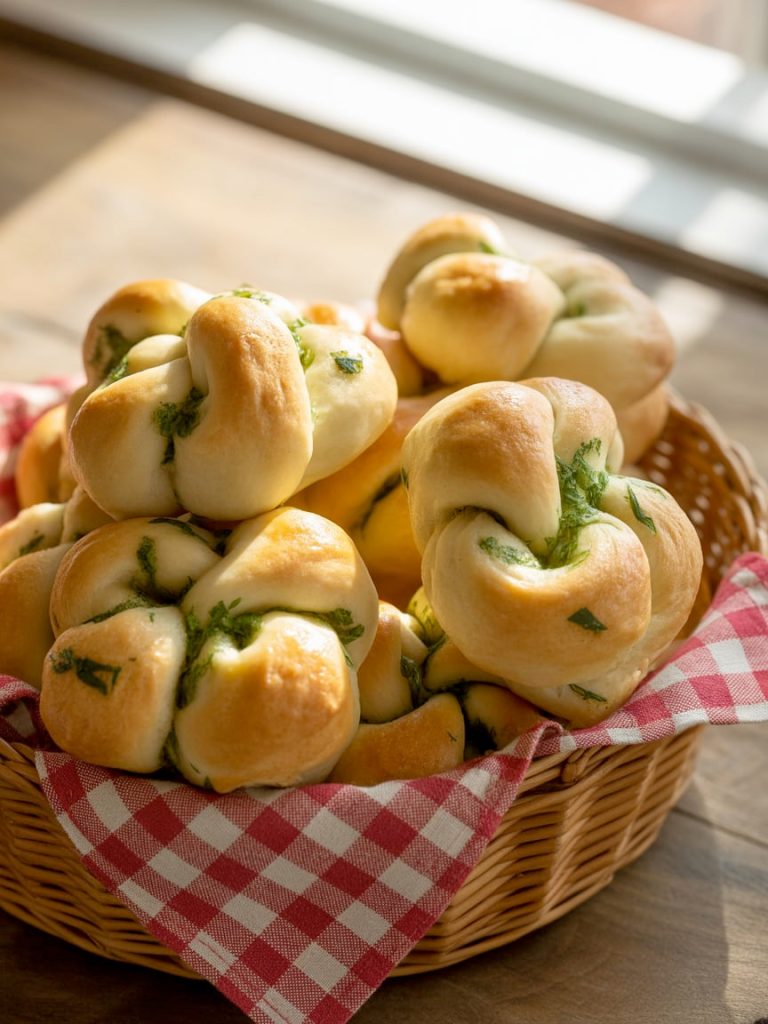
Thirty minutes later, I had a basket of soft, garlicky, buttery knots that tasted better than anything I’d ever ordered. My kitchen smelled incredible, and I felt like an actual baker. Now I make these all the time because they’re ridiculously easy and people absolutely lose their minds over them.
Why You’ll Love These Homemade Garlic Knots
Soft, fluffy, and perfectly garlicky. These knots are tender on the inside with just the right amount of chew on the outside. The garlic butter soaks in and creates this incredible flavor that’s not too overpowering—just right.
Ready in 30 minutes start to finish. Unlike traditional bread recipes that take hours, these use a quick-rise method. From mixing the dough to pulling them out of the oven, you’re done in half an hour.
Way better than store-bought. Once you taste homemade garlic knots, those frozen ones from the grocery store just don’t cut it anymore. Fresh garlic, real butter, and bread made from scratch—there’s no comparison.
Perfect side for everything. Pizza night? Check. Pasta dinner? Absolutely. Soup? Of course. These garlic knots complement basically any meal and make everything feel more special.
Kids and adults both love them. The garlic flavor is present but not harsh, and the soft, pillowy texture appeals to everyone. Even picky eaters devour these.
Easier than you think. If you can tie your shoes, you can shape these knots. The dough is forgiving, and the process is actually pretty fun. Plus, they look impressive even if your knots aren’t perfect.
What Makes These Garlic Knots Special
Here’s what separates amazing garlic knots from mediocre ones.
Fresh garlic butter is absolutely key. Some recipes use garlic powder mixed into butter, but that’s not the same. Fresh minced garlic sautéed in butter creates this incredible aromatic flavor that soaks into every bite.
The quick-rise dough is perfectly balanced—not too dense, not too fluffy. It’s substantial enough to hold up to the garlic butter without getting soggy, but light enough to stay tender and pull-apart soft.
Double garlic butter application is my secret. You brush them before baking AND after they come out of the oven. This gives you garlic flavor throughout the bread plus that glossy, buttery finish on top.
Proper shaping might seem fussy, but tying the dough into actual knots isn’t just for looks. It creates more surface area for the garlic butter to cling to, and those twisted layers pull apart beautifully when you eat them.
Ingredients You’ll Need
For the Dough:
- 2 1/4 teaspoons instant yeast (1 packet) – Instant yeast works faster than active dry. If using active dry, see FAQ.
- 1 tablespoon granulated sugar – Feeds the yeast and adds a touch of sweetness.
- 3/4 cup warm water (110°F) – Too hot kills the yeast, too cold won’t activate it. Aim for warm bath temperature.
- 2 cups all-purpose flour (plus more for dusting) – Bread flour works too for a chewier texture.
- 1 teaspoon salt – Essential for flavor.
- 2 tablespoons olive oil – Keeps the dough tender and adds flavor.
For the Garlic Butter:
- 4 tablespoons butter (1/2 stick) – Real butter, not margarine. This is where the flavor comes from.
- 4 cloves garlic, minced – Fresh garlic only. Don’t even think about using garlic powder here.
- 2 tablespoons fresh parsley, finely chopped – Adds color and freshness. Dried parsley works but fresh is way better.
- 1/4 teaspoon salt – Enhances all the flavors.
- 1/4 teaspoon Italian seasoning (optional) – Adds extra herb flavor if you want it.
Optional for Serving:
- Grated parmesan cheese – For sprinkling on top while they’re hot.
- Marinara sauce – Perfect for dipping.
- Red pepper flakes – If you like a little heat.
How to Make Garlic Knots from Scratch (Step-by-Step)
Step 1: Make the Simple Dough
In a large mixing bowl, combine the warm water, sugar, and yeast. Stir gently and let it sit for about 5 minutes until it gets foamy on top. This proves your yeast is alive and working.
Add the flour, salt, and olive oil to the yeast mixture. Using a wooden spoon or your hands, mix until a shaggy dough forms.
Turn the dough out onto a lightly floured surface and knead for about 5 minutes. You want it smooth and elastic—it should bounce back when you poke it. If it’s too sticky, add a tablespoon more flour. Too dry? Add a teaspoon of water.
The dough should be soft and slightly tacky but not sticking to your hands.
Step 2: Let the Dough Rise
Place the dough in a lightly greased bowl and cover it with a clean kitchen towel or plastic wrap.
Let it rise in a warm spot for about 10 minutes. It won’t double in size like traditional bread dough, but it should puff up noticeably. This quick rise is enough to make the knots soft and fluffy.
While the dough rises, preheat your oven to 400°F (200°C) and line a baking sheet with parchment paper.
Step 3: Shape the Knots
Once the dough has rested, turn it out onto a lightly floured surface. Roll or pat it into a rectangle about 1/4 inch thick.
Using a pizza cutter or sharp knife, cut the dough into strips about 1/2 to 3/4 inch wide and 6-7 inches long. You should get about 12 strips.
Here’s where it gets fun—take one strip and tie it into a simple knot, just like tying a loose knot in a rope. Tuck the ends underneath. Don’t overthink it! Even messy knots bake up beautifully.
Place each knot on your prepared baking sheet, spacing them about 2 inches apart. They’ll puff up as they bake.
Step 4: Bake Until Golden
While the oven finishes preheating, make your garlic butter. Melt the butter in a small saucepan over medium heat. Add the minced garlic and cook for about 1 minute until fragrant but not browned. Remove from heat and stir in the parsley, salt, and Italian seasoning.
Brush about half of the garlic butter over the shaped knots before baking. This helps them brown and adds flavor throughout.
Bake for 12-15 minutes until the knots are golden brown on top and sound hollow when tapped. They should be puffed up and gorgeous.
Step 5: Brush with Garlic Butter
As soon as the knots come out of the oven, brush them generously with the remaining garlic butter. Don’t be shy here—you want them glistening.
If you’re using parmesan, sprinkle it on now while they’re still hot so it sticks.
Let them cool for just a minute or two, then serve them warm. They’re best eaten fresh, so don’t wait too long!
Serving Suggestions
These garlic knots are incredibly versatile:
With pasta dishes – Serve alongside spaghetti, lasagna, fettuccine Alfredo, or any Italian meal. They’re perfect for soaking up extra sauce.
On pizza night – These are a traditional pizzeria side. Serve them with your favorite pizza and marinara for dipping.
With soup – Pair them with tomato soup, minestrone, or Italian wedding soup. The combination is cozy perfection.
As an appetizer – Serve in a basket with marinara sauce or garlic aioli for dipping. They disappear fast at parties.
For breakfast – These actually make a great breakfast bread. The garlic isn’t too strong in the morning, especially if you go light on the butter.
With salad – Add them to a simple green salad for a complete meal. They make any salad feel more substantial.
Storage and Reheating Tips
Room temperature: Store in an airtight container or zip-top bag at room temperature for up to 2 days. They’ll stay soft if properly sealed.
Refrigerator: You can refrigerate them for up to 5 days, but they’ll firm up. Reheat before serving to restore softness.
Freezing: These freeze beautifully! Let them cool completely, then freeze in a freezer bag for up to 3 months. Reheat from frozen—no need to thaw.
Reheating: The best method is wrapping them in foil and warming in a 350°F oven for 5-7 minutes. This keeps them soft. You can also microwave for 15-20 seconds, but they won’t be quite as good.
Make-ahead tip: You can shape the knots, place them on a baking sheet, cover tightly with plastic wrap, and refrigerate for up to 24 hours. Let them sit at room temperature for 10 minutes before baking.
Keep them soft: The key to soft garlic knots is not overbaking them and storing them in an airtight container while still slightly warm (but not hot). The steam helps keep them tender.
Recipe Variations and Substitutions
Cheesy Garlic Knots
Add 1/2 cup shredded mozzarella cheese to the dough when mixing. You can also stuff each knot with a small cube of mozzarella before tying. Sprinkle with parmesan after brushing with garlic butter for ultimate cheesy goodness.
Quick Garlic Knots with Store-Bought Dough
Use a pound of store-bought pizza dough from the grocery store. Let it come to room temperature, cut into strips, tie into knots, and bake. This cuts your time down to 15 minutes total. It’s not quite as good as homemade, but it’s still delicious and way faster.
Crescent Roll Garlic Knots (15-Minute Version)
Use refrigerated crescent roll dough. Separate the triangles, cut each into 3 strips, tie into knots, and bake at 375°F for 10-12 minutes. Brush with garlic butter afterward. These are the ultimate shortcut version—perfect for when you’re really pressed for time.
Gluten-Free Garlic Knots
Use a gluten-free flour blend (like Bob’s Red Mill 1-to-1) in place of all-purpose flour. Add 1/2 teaspoon xanthan gum if your blend doesn’t include it. The texture will be slightly different but still delicious. Handle the dough gently as it’s more delicate.
Garlic Bread Knots with Herbs
Add 1 tablespoon of fresh chopped basil or oregano to the dough. Mix Italian seasoning into the garlic butter along with a pinch of red pepper flakes. These have more complex herb flavors and a slight kick.
Make Them into Garlic Buns or Rolls
Instead of tying knots, shape the dough into 12 small rolls. Place them in a greased 9×13 pan touching each other for pull-apart garlic buns. Brush with garlic butter before and after baking. They’ll be softer and fluffier than knots.
Final Thoughts
So there you have it—homemade garlic knots that taste like they came from your favorite Italian restaurant.
I know “from scratch” can sound intimidating, but these are genuinely easy. The dough comes together in minutes, and tying knots is actually kind of fun (plus your kitchen will smell amazing).
Make these once and you’ll understand why I’ve never gone back to buying frozen garlic bread. Fresh, buttery, garlicky perfection in 30 minutes? That’s a win in my book.
Happy baking!
Kip
Garlic Knots Recipe (Easy Homemade & Ready in 30 Minutes!)
Description
These homemade garlic knots are incredibly soft, buttery, and loaded with fresh garlic flavor. They're surprisingly easy to make from scratch and ready in just 30 minutes. Perfect alongside pasta, soup, or pizza—they disappear faster than you can make them!
Ingredients
For the Dough:
For the Garlic Butter:
Optional for Serving:
Instructions
-
In a large bowl, combine warm water, sugar, and yeast. Let sit 5 minutes until foamy.
-
Add flour, salt, and olive oil. Mix until a shaggy dough forms. Turn out onto floured surface and knead 5 minutes until smooth and elastic.
-
Place dough in greased bowl, cover, and let rise 10 minutes in a warm spot.
-
Preheat oven to 400°F (200°C). Line a baking sheet with parchment paper.
-
Roll dough into a rectangle about 1/4 inch thick. Cut into 12 strips (1/2 to 3/4 inch wide, 6-7 inches long).
-
Tie each strip into a loose knot, tucking ends underneath. Place on prepared baking sheet 2 inches apart.
-
Melt butter in a small saucepan. Add garlic and cook 1 minute until fragrant. Remove from heat and stir in parsley, salt, and Italian seasoning.
-
Brush half the garlic butter over the knots before baking.
-
Bake 12-15 minutes until golden brown and puffed.
-
Immediately brush with remaining garlic butter. Sprinkle with parmesan if desired. Serve warm.
Note
- Water temperature matters—too hot kills yeast, too cold won't activate it
- Don't overbake or knots will be hard
- Brush with garlic butter while hot for best absorption
- Store in airtight container to keep soft
- Can freeze for up to 3 months
- For shortcut version, use store-bought pizza dough
