
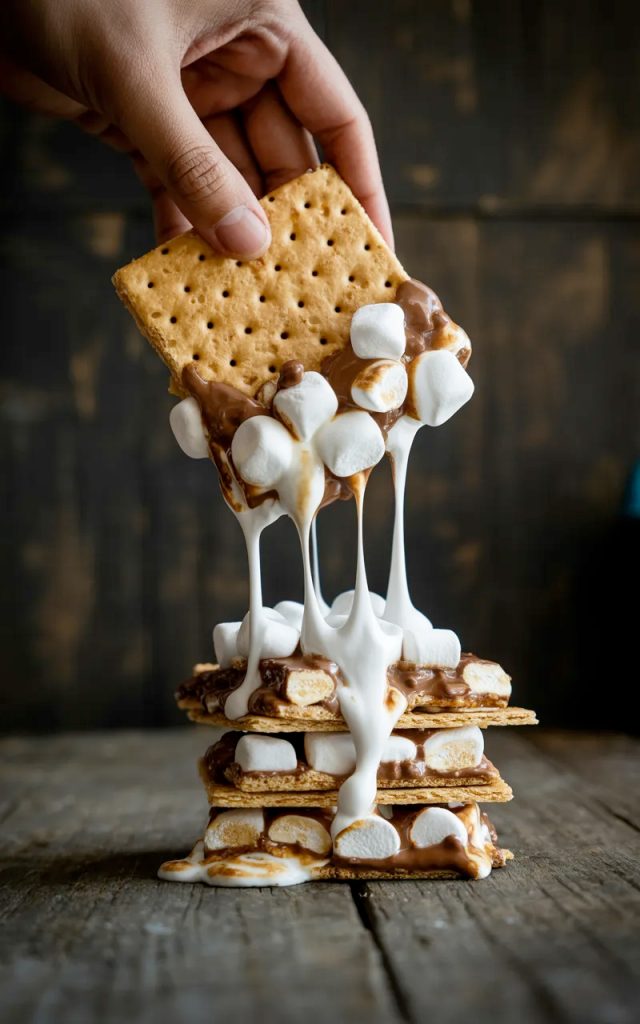

Let me paint you a picture. You pull a square of this out of the pan, and as you lift it up, long stretchy strings of melted marshmallow trail behind it like the most satisfying food moment you have ever witnessed.
The Golden Grahams crunch, the chocolate melts slightly as it hits your tongue, and the marshmallow does that thing where it is simultaneously crispy on the outside and pillowy soft on the inside. That is exactly what these Golden Grahams s’mores bars deliver every single time.
I first made these for a family gathering when I needed something fast, crowd-pleasing, and required absolutely zero oven time. They were gone in about fifteen minutes flat.
Children were involved. Adults were equally guilty. Someone asked me if I had bought them from somewhere which is honestly the highest compliment a no-bake treat can receive.
The best part is that this entire recipe comes together in about 20 minutes with ingredients you can grab at any grocery store. No baking, no special equipment, no complicated technique. Just pure, unapologetic s’mores goodness in bar form. Let’s get into it.
Why you’ll love this recipe
- That marshmallow pull is everything. When you lift a bar out of the pan and the marshmallow stretches in long glossy strings, you know you made something truly special. It is as satisfying to look at as it is to eat.
- No baking required. The entire recipe happens on the stovetop and then sets in the pan. No oven, no temperature monitoring, no worrying about overbaking. Just melt, mix, press, and wait.
- Ready in 20 minutes. Active cooking time is about 10 minutes. The rest is just waiting for the bars to set enough to cut — and honestly that is the hardest part of this entire recipe.
- Uses only a handful of ingredients. Golden Grahams cereal, marshmallows, butter, and chocolate chips. Simple, accessible, and incredibly delicious together.
- Universally loved. Kids go absolutely crazy for these. Adults pretend to eat just one and then quietly go back for more. FYI there is zero shame in that — these bars are genuinely that good.
- Perfect for any gathering. Potlucks, bake sales, birthday parties, movie nights, camping trips — these bars travel well, hold together beautifully, and make everyone happy regardless of age or occasion.
Ingredients with key notes
For the s’mores bars:
- 5 cups Golden Grahams cereal — The star ingredient and the reason this recipe works so well. Golden Grahams have that distinctive honey-graham flavor that is the soul of a proper s’more. Do not substitute with a regular graham cracker cereal or cornflakes — the specific flavor of Golden Grahams is what makes these bars taste like an actual s’more rather than just a sweet cereal bar. If you cannot find Golden Grahams, crushed regular graham crackers are the closest substitute but the texture will be different.
- 3 cups mini marshmallows, divided — Mini marshmallows melt more evenly and faster than large marshmallows which makes them the better choice for this recipe. You use most of them in the melted mixture and reserve a cup to stir in at the end — this is what gives you those visible whole marshmallow pockets and that dramatic pull when you lift a bar out of the pan.
- 1.5 cups chocolate chips — Semi-sweet chocolate chips are the classic choice here and the slight bitterness of semi-sweet chocolate balances the sweetness of the marshmallow perfectly. You can use milk chocolate chips for a sweeter, more candy-like result or dark chocolate chips if you want a more intense chocolate flavor. Stir most of them into the mixture and reserve a handful to scatter on top before the bars set for a more visually appealing finish.
- 4 tbsp unsalted butter — Melted with the marshmallows to create the sticky, gooey binding mixture that holds everything together. Use unsalted butter so you can control the salt level — a small pinch of salt in the mixture actually enhances all the flavors considerably.
- Pinch of salt — Balances the sweetness and makes the chocolate and graham flavors pop. Trust the process on this one.
Optional additions:
- 1 tsp pure vanilla extract — Stirred into the marshmallow mixture before adding the cereal. Adds a subtle warmth and depth.
- Extra mini marshmallows for the top — For visual appeal and extra gooey marshmallow pockets on the surface.
- Flaky sea salt for finishing — A light sprinkle of flaky sea salt over the top of the set bars adds a sophisticated sweet-salty contrast that elevates the whole thing considerably.
Step-by-step instructions
Step 1 — Prepare your pan
Line a 9×13 inch baking pan with parchment paper, leaving some overhang on the sides to use as handles when lifting the bars out later. Spray the parchment lightly with cooking spray. This setup is important — Golden Grahams s’mores bars are sticky and without proper lining and greasing they will bond to the pan in a way that makes clean removal basically impossible. Set aside.
Step 2 — Measure everything out before you start
This recipe moves quickly once the marshmallows start melting and you do not want to be scrambling to measure ingredients while your marshmallow mixture burns on the stove. Measure out your Golden Grahams cereal into a large bowl. Divide your marshmallows into two portions — 2 cups for melting and 1 cup to stir in at the end. Divide your chocolate chips — 1 cup to mix in and half a cup to scatter on top. Having everything ready before you turn on the heat makes the whole process smooth and stress-free.
Step 3 — Melt the butter and marshmallows
In a large heavy-bottomed pot or Dutch oven, melt the butter over medium-low heat. Once the butter is completely melted, add 2 cups of the mini marshmallows. Stir continuously with a wooden spoon or silicone spatula as the marshmallows melt — do not walk away from the stove at this point. The marshmallows can go from perfectly melted to burnt very quickly over too-high heat. Keep the heat at medium-low and keep stirring until the marshmallows are completely smooth, glossy, and fully melted into the butter. Add the pinch of salt and vanilla extract if using and stir to combine.
Step 4 — Remove from heat and add chocolate chips
Remove the pot from the heat completely. Add 1 cup of the chocolate chips to the hot marshmallow mixture and stir quickly. The residual heat will melt the chocolate chips into the marshmallow mixture — stir continuously until the chocolate is fully incorporated and the mixture is smooth and glossy with swirls of chocolate throughout. Working off the heat for this step prevents the chocolate from burning and seizing.
Step 5 — Add the Golden Grahams and remaining marshmallows
Working quickly — the mixture will start to thicken as it cools — add the Golden Grahams cereal to the pot and fold everything together using a silicone spatula, making sure every piece of cereal gets coated in the marshmallow and chocolate mixture. Once the cereal is mostly coated, add the reserved 1 cup of whole mini marshmallows and fold them in gently. You want them to stay mostly whole rather than melting completely — they create those irresistible gooey pockets and that dramatic marshmallow pull in the finished bars.
Step 6 — Press into the prepared pan
Transfer the mixture to the prepared pan immediately — it thickens fast and becomes harder to spread the longer you wait. Using a piece of parchment paper or a greased spatula, press the mixture evenly into the pan. Do not press too hard — you want the bars to have some loft and texture rather than being completely compacted and flat. Press just enough to create an even layer that holds together.
Step 7 — Add toppings and set
While the mixture is still warm and slightly tacky, scatter the reserved half cup of chocolate chips and any extra mini marshmallows over the top, pressing them in very gently so they adhere. If you are using flaky sea salt, sprinkle it on now. Let the bars set at room temperature for at least 1 hour before cutting — or refrigerate for 30 minutes for faster setting. The bars need to firm up enough to hold their shape when cut.
Step 8 — Cut and serve
Once set, use the parchment paper overhang to lift the entire slab out of the pan onto a cutting board. Using a sharp knife sprayed lightly with cooking spray — this prevents the sticky marshmallow from clinging to the blade — cut into squares or rectangles. Wipe the knife between cuts for the cleanest edges. Serve at room temperature for the best texture and that signature gooey marshmallow pull.
Serving suggestions
These Golden Grahams s’mores bars are spectacular on their own but here are a few ways to make serving them even more fun:
- With a scoop of vanilla ice cream — A warm slightly gooey bar alongside a cold scoop of vanilla bean ice cream is a combination that is hard to argue with. Warm the bar for about 10 seconds in the microwave first for maximum gooeyness.
- As part of a dessert board — Arrange cut bars alongside chocolate dipped strawberries, brownies, and other bite-sized sweets for a stunning dessert spread at a party.
- At a bonfire or camping trip — These are the ultimate campfire-adjacent treat. All the s’mores flavors without actually needing a fire. Pack them in an airtight container and they travel beautifully.
- As an after-school snack — Cut them into smaller squares and pack them in lunchboxes or set them out after school. Kids absolutely lose their minds over these.
- Drizzled with extra melted chocolate — Melt a handful of chocolate chips and drizzle over the cut bars for an extra chocolate hit and a more polished presentation.
Storage tips
Room temperature: Store cut bars in an airtight container at room temperature with parchment paper between layers to prevent sticking, for up to 3 days. They will soften slightly over time but still taste incredible.
Refrigerator: Store in an airtight container in the fridge for up to 5 days. The cold firms the bars up considerably — let them sit at room temperature for 10-15 minutes before serving for the best texture and that signature gooey marshmallow pull.
Freezing: These bars freeze surprisingly well. Wrap individual bars in plastic wrap and place in a freezer-safe bag or container for up to 2 months. Thaw at room temperature for about 30 minutes before serving. The texture holds up well and they taste nearly as good as fresh.
Cutting tip: For the cleanest cuts, always spray your knife lightly with cooking spray before cutting and wipe the blade clean between each cut. A warm knife — run briefly under hot water and dried — also cuts through the marshmallow much more cleanly than a cold blade.
Wrapping it up
Golden Grahams s’mores bars are the kind of treat that reminds you why simple recipes are often the best recipes. A handful of ingredients, twenty minutes of your time, and you end up with something so gooey, so chocolatey, so impossibly satisfying that people will ask you for the recipe before they even finish their first bar.
Make them for your next gathering, your next movie night, or just because you deserve something truly delicious on a random Wednesday. Give them a try and let me know how they turn out — happy cooking 🙂
Golden Grahams s’mores bars — the gooey, chocolatey no-bake treat that disappears in minutes
Description
No-bake Golden Grahams s'mores bars made with Golden Grahams cereal folded into a buttery melted marshmallow and chocolate mixture, pressed into a pan, and topped with extra chocolate chips and mini marshmallows. Gooey, crunchy, chocolatey, and impossible to stop eating.
Ingredients
For the s'mores bars:
Optional toppings:
Instructions
-
Line a 9x13 inch baking pan with parchment paper leaving overhang on the sides. Spray lightly with cooking spray. Set aside.
-
Measure out all ingredients before starting. Divide marshmallows into 2 cups and 1 cup portions. Divide chocolate chips into 1 cup and half cup portions.
-
Melt butter in a large heavy bottomed pot over medium-low heat. Add 2 cups mini marshmallows and stir continuously until completely melted and smooth. Add salt and vanilla if using.
-
Remove from heat. Add 1 cup chocolate chips and stir quickly until fully melted and incorporated into the marshmallow mixture.
-
Add Golden Grahams cereal and fold to coat. Add reserved 1 cup of whole mini marshmallows and fold in gently.
-
Transfer immediately to the prepared pan. Press into an even layer using greased parchment or a greased spatula. Do not compact too firmly.
-
Scatter remaining chocolate chips and extra mini marshmallows over the top while still warm. Add flaky sea salt if using.
-
Allow to set at room temperature for 1 hour or refrigerate for 30 minutes. Lift out using parchment overhang, cut into bars with a greased knife, and serve.
