

I’ll never forget the first time I walked past an Auntie Anne’s in the mall. That smell—warm, buttery, salty pretzel perfection—basically grabbed me by the nose and dragged me to the counter. But here’s the thing: those mall pretzels are expensive, and I can’t justify a mall trip every time I’m craving one.
So I learned to make them at home, and honestly? They’re even better than the mall version. Fresher, warmer, and you can customize them however you want. Plus, the process is way easier than you’d think. If you can make pizza dough, you can make pretzels.
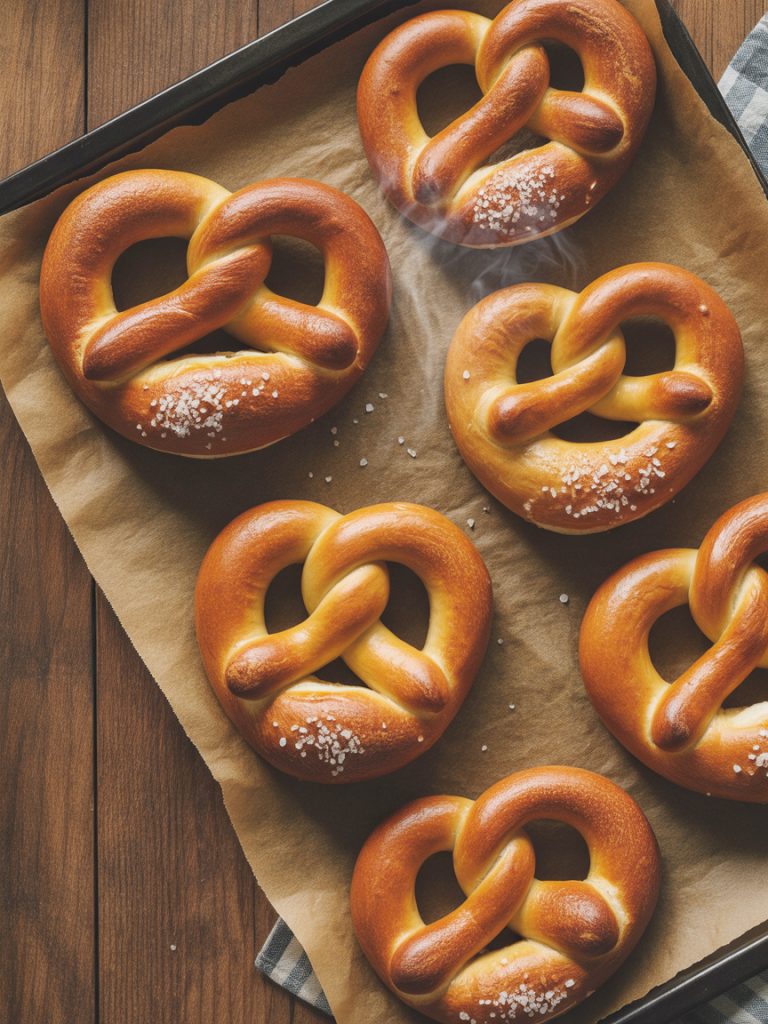
The first time I pulled a batch out of the oven and brushed them with melted butter, my kitchen smelled like a pretzel shop. My family devoured them in minutes, and I felt like some kind of baking wizard. Now I make these all the time—for parties, game days, or just because it’s Tuesday and I deserve warm pretzels. 🙂
Why You’ll Love This Recipe
Easier Than You Think I know homemade pretzels sound intimidating, but they’re honestly not complicated. The dough is simple, the shaping gets easier with practice, and the whole process is pretty forgiving. If I can do it, you definitely can.
Tastes Better Than Mall Pretzels Fresh from your oven beats sitting under a heat lamp at the food court every single time. These are warm, soft, buttery, and have that perfect pretzel chew. Once you make these, you’ll understand why homemade is worth it.
Fun to Make With Kids Kids love shaping pretzels! It’s like playing with Play-Doh except you get to eat the results. Sure, their pretzels might look a little wonky, but they’ll taste just as good. This is a great weekend project with the family.
Endless Flavor Variations Classic salted pretzels are amazing, but you can also do cinnamon sugar, everything bagel seasoning, garlic parmesan, jalapeño cheddar—literally whatever you want. Once you nail the basic recipe, the world is your pretzel.
Perfect for Parties and Game Day Set up a pretzel bar with different toppings and dipping sauces, and you’ve got an instant party hit. People go nuts for fresh, warm pretzels. They’re interactive, customizable, and way more impressive than buying a bag of chips.
Way Cheaper Than Buying Them A single mall pretzel costs $4-6. This recipe makes 8 pretzels for maybe $5 total. The math is pretty compelling, especially if you’re feeding a crowd or making them regularly.
Ingredients
For the Pretzel Dough:
- 1½ cups warm water (110-115°F, not too hot or it’ll kill the yeast)
- 1 tablespoon granulated sugar
- 2 teaspoons active dry yeast (or instant yeast)
- 4½ cups all-purpose flour (plus extra for kneading)
- 2 teaspoons salt
- 4 tablespoons unsalted butter, melted and slightly cooled
For the Baking Soda Bath:
- 10 cups water
- ⅔ cup baking soda
For Topping:
- 4 tablespoons melted butter (for brushing)
- Coarse sea salt or pretzel salt (regular table salt works too)
Optional Flavor Variations:
- Cinnamon Sugar: ½ cup sugar mixed with 2 teaspoons cinnamon
- Everything Bagel: Everything bagel seasoning instead of salt
- Garlic Parmesan: Garlic powder and grated parmesan
- Jalapeño Cheddar: Shredded cheddar cheese and sliced jalapeños
For Dipping Sauces (Optional but Recommended):
- Warm cheese sauce
- Honey mustard
- Spicy brown mustard
- Marinara sauce
- Cream cheese frosting (for cinnamon sugar pretzels)
Key Ingredient Notes:
Water Temperature Matters: The water needs to be warm (like bath water), around 110-115°F. Too hot and it’ll kill the yeast. Too cold and the yeast won’t activate. If you don’t have a thermometer, test it on your wrist—it should feel warm but not hot.
Active Dry vs. Instant Yeast: Both work great. If using instant yeast, you can skip the proofing step and mix it directly with the dry ingredients. The rise time stays the same.
Flour Measurement: Spoon flour into your measuring cup and level it off with a knife. Don’t pack it down or you’ll end up with too much flour and dense pretzels. You might need slightly more or less flour depending on humidity—the dough should be soft and slightly tacky but not sticky.
Baking Soda Bath is Essential: This is what gives pretzels their distinctive flavor, chewy exterior, and dark golden color. Don’t skip this step! It’s what makes a pretzel a pretzel instead of just bread shaped weird.
Coarse Salt: Pretzel salt or coarse sea salt works best because the large crystals stay visible and give you those satisfying salty bursts. Regular table salt works but use less—it’s more concentrated.
Step-by-Step Instructions
Step 1: Activate the Yeast
In a large mixing bowl, combine the warm water and sugar. Sprinkle the yeast over the top and let it sit for about 5 minutes until it gets foamy. This is called “proofing” and it tells you the yeast is alive and ready to work. If it doesn’t foam, your water was too hot or your yeast is dead—start over with fresh yeast.
Step 2: Make the Dough
Add the flour, salt, and melted butter to the yeast mixture. Stir with a wooden spoon until it comes together into a shaggy dough. Turn it out onto a lightly floured surface and knead for about 5-7 minutes until the dough is smooth and elastic. It should bounce back when you poke it.
You can also use a stand mixer with a dough hook—mix on low until combined, then knead on medium speed for 5-6 minutes. Way easier on your arms.
Step 3: Let It Rise
Form the dough into a ball and place it in a lightly greased bowl. Cover with a clean kitchen towel or plastic wrap and let it rise in a warm spot for about 1 hour, until it’s doubled in size.
If your kitchen is cold, turn your oven on to the lowest setting for just 1 minute, then turn it off. Put the covered bowl in there—it creates a perfect warm environment for rising.
Step 4: Prep for Baking
While the dough is rising, preheat your oven to 450°F. Line two large baking sheets with parchment paper or silicone baking mats. Grease them lightly with cooking spray.
Prepare your baking soda bath: In a large pot, bring 10 cups of water to a boil, then reduce to a simmer. Add the baking soda carefully—it’ll foam up a bit. Keep it at a gentle simmer.
Step 5: Shape the Pretzels
Once the dough has doubled, punch it down to release the air. Divide it into 8 equal pieces (a kitchen scale helps here—each piece should be about 4-5 ounces).
Roll each piece into a rope about 20-22 inches long. To shape a pretzel: form a U-shape, cross the ends over each other twice, then bring the twisted ends down and press them onto the bottom of the U. It takes practice, but even wonky pretzels taste great!
Don’t stress about perfection. Your first few might look weird, but by pretzel number 8, you’ll have it figured out.
Step 6: The Baking Soda Bath (Critical Step!)
This is what makes them pretzels! Using a slotted spoon or spider, carefully lower each pretzel into the simmering baking soda water. Boil for about 30 seconds, flip it over, and boil for another 30 seconds.
Remove with the slotted spoon, let excess water drip off, and place on your prepared baking sheet. Repeat with all pretzels. They can be close together but not touching.
Step 7: Top and Bake
While the pretzels are still wet from the bath, sprinkle generously with coarse salt (or your chosen topping). The moisture helps the salt stick.
Bake for 12-15 minutes until they’re deep golden brown—darker than you think! They should be a rich, dark golden color. Don’t underbake them or they’ll be pale and doughy.
Step 8: Butter and Serve
As soon as the pretzels come out of the oven, brush them generously with melted butter. This is not optional—the butter is what makes them taste like mall pretzels. Serve warm.
For cinnamon sugar pretzels, brush with butter and immediately roll in cinnamon sugar while they’re still hot.
Serving Suggestions
Classic Dipping Sauces The holy trinity of pretzel dips: warm cheese sauce (beer cheese is next level), spicy brown mustard, and honey mustard. Set out all three and let people choose their adventure.
Sweet Pretzel Style Skip the salt, brush with butter, and coat in cinnamon sugar. Serve with cream cheese frosting or vanilla icing for dipping. This is basically Auntie Anne’s cinnamon sugar pretzels at home.
Pretzel Bar for Parties Set up a DIY pretzel bar: plain warm pretzels, multiple toppings (coarse salt, everything seasoning, cinnamon sugar, parmesan), and various dipping sauces. Let guests customize their own. It’s interactive and people love it.
What to Serve Alongside These work as appetizers (serve with beer and cheese dip), snacks (game day spread), or even breakfast (cinnamon sugar version with coffee). They’re surprisingly versatile.
Make Pretzel Bites Instead of shaping into traditional pretzels, cut each rope into 1-inch pieces for pretzel bites. Perfect for parties—easier to eat and great for dipping. Baking time reduces to 10-12 minutes.
Stuffed Pretzels Get fancy and stuff them! Flatten each piece of dough, add a filling (cheese, pepperoni, jalapeños), seal it up, shape into a pretzel, and proceed with the recipe. They’re like Hot Pockets but actually good.
Storage Tips
Storing at Room Temperature
Store cooled pretzels in an airtight container or zip-top bag at room temperature for up to 2 days. They’re best eaten fresh, but they’re still pretty good on day two if you reheat them.
Reheating for Best Results
To restore that fresh-baked texture, wrap pretzels in a damp paper towel and microwave for 15-20 seconds. Or reheat in a 350°F oven for 5-7 minutes. Brush with a bit more melted butter after reheating for that just-baked taste.
Freezing Baked Pretzels
Let pretzels cool completely, then wrap individually in plastic wrap and store in a freezer bag. Freeze for up to 2 months. To reheat: thaw at room temperature, then warm in a 350°F oven for 5-10 minutes.
Freezing Unbaked Pretzels (Best Method!)
This is the pro move: after shaping and doing the baking soda bath, place pretzels on a parchment-lined baking sheet and freeze until solid (about 1 hour). Then transfer to a freezer bag.
When you want fresh pretzels, place frozen pretzels on a baking sheet, top with salt, and bake at 450°F for 15-18 minutes (no thawing needed!). This gives you fresh-baked pretzels anytime without the work.
Make-Ahead Dough
You can make the dough through step 3, then instead of letting it rise at room temperature, cover and refrigerate for up to 24 hours. This slow rise actually develops more flavor. Let it come to room temperature before shaping.
Final Thoughts
Here’s what I love about homemade soft pretzels: they’re one of those recipes that seems complicated and fancy, but once you make them, you realize they’re actually pretty simple. The ingredients are basic, the technique is straightforward, and the results are absolutely worth it.
There’s something deeply satisfying about pulling a tray of golden-brown pretzels out of your oven, brushing them with butter, and watching that salt sparkle on top. The smell alone is worth making these. And when you bite into one while it’s still warm? That’s when you understand why people get obsessed with homemade pretzels.
I make these regularly now—for movie nights, game days, or just because someone in the family requests them. They’ve become one of my signature things, and honestly, it feels pretty great when people are amazed that I made pretzels from scratch.
Give these a try and let me know what you think! Tag me on Instagram or Pinterest with your pretzel creations—especially if you come up with creative flavor combinations. And don’t worry if your first batch isn’t Instagram-perfect. Even slightly wonky pretzels taste incredible.
Now go make some warm, buttery, salty magic happen in your kitchen. Your house is about to smell amazing.
Happy baking!
— Kip
Homemade Soft Pretzels (Easy & Better Than the Mall!)
Description
These Homemade Soft Pretzels are warm, fluffy, and have that perfect chewy exterior with a soft interior that rivals Auntie Anne's or Wetzel's Pretzels. Made with simple pantry ingredients and an easy dough recipe, the secret is the quick baking soda bath that gives them that distinctive pretzel flavor and golden-brown color. Whether you make them plain with coarse salt or get creative with toppings, these pretzels are perfect for parties, game day, or satisfying that mall pretzel craving without leaving your house.
Ingredients
For the Dough:
For the Baking Soda Bath:
For Topping:
Instructions
-
In large bowl, combine warm water and sugar. Sprinkle yeast on top and let sit 5 minutes until foamy.
-
Add flour, salt, and melted butter. Mix until dough forms, then knead on floured surface 5-7 minutes until smooth and elastic (or use stand mixer with dough hook for 5-6 minutes).
-
Place dough in greased bowl, cover, and let rise in warm spot 1 hour until doubled.
-
Preheat oven to 450°F. Line 2 baking sheets with parchment paper and grease lightly.
-
In large pot, bring 10 cups water to boil, reduce to simmer, and add baking soda (it will foam).
-
Punch down dough and divide into 8 equal pieces. Roll each piece into a 20-22 inch rope. Shape into pretzel: form U-shape, cross ends twice, bring down to bottom of U and press to seal.
-
Using slotted spoon, carefully lower each pretzel into simmering baking soda water. Boil 30 seconds per side. Remove and place on prepared baking sheet.
-
Sprinkle wet pretzels with coarse salt. Bake 12-15 minutes until deep golden brown.
-
Brush hot pretzels immediately with melted butter. Serve warm.
Note
For Cinnamon Sugar Pretzels: Skip the salt. After baking, brush with butter and roll in cinnamon sugar (½ cup sugar + 2 tsp cinnamon).
