
Tacos are one of those things I genuinely refused to give up when I started eating low-carb. Not the shell, not the seasoned beef, not the sour cream situation on top — none of it. So instead of trying to find a sad substitute, I built this Cheesy Keto Taco Casserole, and it solved every single problem at once.
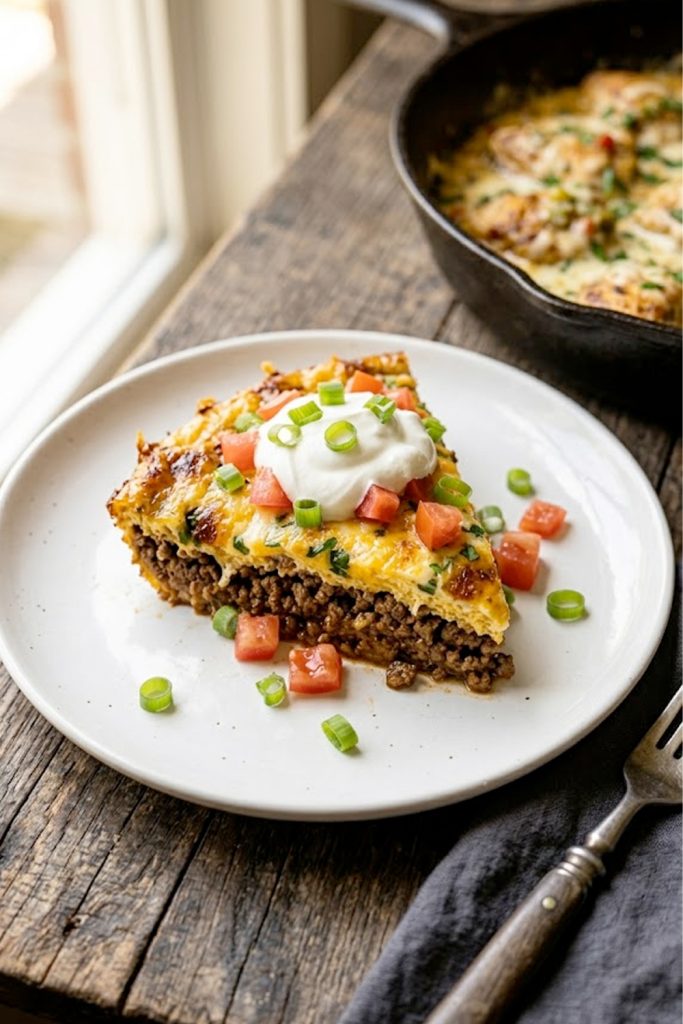
What you're looking at is a layer of boldly seasoned ground beef sitting beneath a fluffy, golden egg and cheese base that bakes up like a savory custard — firm enough to slice cleanly, soft enough to melt in your mouth.
The top gets a blanket of melted cheddar that browns beautifully in the oven, and then you finish the whole thing with cold sour cream, fresh diced tomatoes, and sliced green onions. It's taco night in casserole form, and honestly it might be better than the original.
I've made this for family dinners, I've meal prepped it for the week, and I've served it at casual gatherings where nobody knew it was keto until I told them — at which point they were already reaching for seconds. If you need a crowd-pleasing, low-carb dinner that actually delivers on flavor, this is the one. Let's get into it.
For the meat layer:
For the egg and cheese base:
For the toppings:
Key notes:
Step 1: Preheat the oven and prep the baking dish
Preheat your oven to 375°F. Lightly grease a 9x13-inch baking dish with cooking spray or butter and set aside.
Step 2: Cook the meat layer
Heat one tablespoon of olive oil in a large skillet over medium-high heat. Add the diced onion and cook for 2-3 minutes until softened. Add the minced garlic and cook for another 60 seconds. Add the ground beef and cook, breaking it up as you go, until fully browned with no pink remaining. Drain the excess fat from the pan. Add the taco seasoning and water, stir well, and let it simmer for 2-3 minutes until the water evaporates and the seasoning coats every piece of beef. Taste and adjust seasoning if needed. Remove from heat.
Step 3: Layer the meat into the baking dish
Spread the seasoned ground beef mixture in an even layer across the bottom of the prepared baking dish. Press it down gently so it forms a compact, even base. Set aside.
Step 4: Make the egg and cheese base
In a large mixing bowl, beat the eggs and heavy cream together until well combined. Add the softened cream cheese and mix until smooth with no lumps remaining. Stir in one cup of the shredded cheddar, garlic powder, onion powder, salt, and black pepper. Mix until everything is evenly incorporated.
Step 5: Pour the egg mixture over the meat
Pour the egg and cheese mixture evenly over the seasoned meat layer in the baking dish. Use a spatula to spread it to the edges so the entire meat layer is covered. Give the dish a gentle shake to help the egg mixture settle evenly.
Step 6: Add the cheese topping
Sprinkle the remaining half cup of shredded cheddar evenly over the top of the egg mixture. This is what creates that gorgeous golden, slightly browned cheese crust on top.
Step 7: Bake
Place the casserole in the preheated oven and bake uncovered for 25-30 minutes until the egg layer is fully set, the edges are pulling slightly away from the sides of the dish, and the cheese on top is melted, golden, and showing light browning at the edges. A toothpick inserted into the center of the egg layer should come out clean.
Step 8: Rest before slicing
Remove the casserole from the oven and let it rest for 5-10 minutes before slicing. This resting time is important — it allows the egg layer to firm up completely so your slices come out clean and hold their shape on the plate.
Step 9: Add toppings and serve
Slice the casserole into portions and serve each piece topped with a dollop of sour cream, a generous spoonful of diced fresh tomatoes, and a scattering of sliced green onions. Add any additional toppings you like and serve immediately.
Refrigerator: Store leftover casserole in an airtight container or tightly covered baking dish for up to 4 days. Store toppings separately so they stay fresh.
Reheating: Reheat individual slices in a 350°F oven for 10-12 minutes or in the microwave in 60-second intervals until heated through. The oven method keeps the cheese topping from getting rubbery.
Freezer: This casserole freezes well without the toppings. Let it cool completely, slice into individual portions, wrap each piece tightly in plastic wrap, and store in a freezer-safe bag for up to 2 months.
Reheating from frozen: Thaw overnight in the refrigerator then reheat in a 350°F oven for 15-18 minutes until heated through. Add fresh toppings after reheating.
One tip: Always store and reheat the casserole without the sour cream, tomatoes, and green onions. Cold fresh toppings added after reheating make the whole dish taste like it was just made.
If taco night has felt off-limits since you started eating low-carb, this Cheesy Keto Taco Casserole is your answer. Every element that makes taco night worth looking forward to is right here — the boldly seasoned beef, the melted cheese, the cool sour cream, the fresh tomatoes — just without the part that derails your macros.
This one has earned a permanent spot in my weekly rotation, and I have no doubt it will do the same for you. Make it this week, share it with your people, and let me know how it went in the comments. Seeing your results genuinely makes my day every single time :)
Happy cooking. Let's make something delicious together.
With gratitude, Kip
This Cheesy Keto Taco Casserole starts with a bold layer of taco-seasoned ground beef, topped with a rich and fluffy egg and cheddar base that bakes up golden and set, finished with a bubbling melted cheese crust. Served with cold sour cream, fresh diced tomatoes, and sliced green onions on top, it delivers every element of a great taco night without a single tortilla in sight. It's low-carb, keto-friendly, freezer-friendly, and feeds a crowd without any fuss.