

You know that feeling when a single bite of something takes you straight back to being a kid? That’s exactly what these lunch lady peanut butter bars do. One bite and I’m back in the school cafeteria, trading my apple for an extra bar because nothing else on that tray mattered.
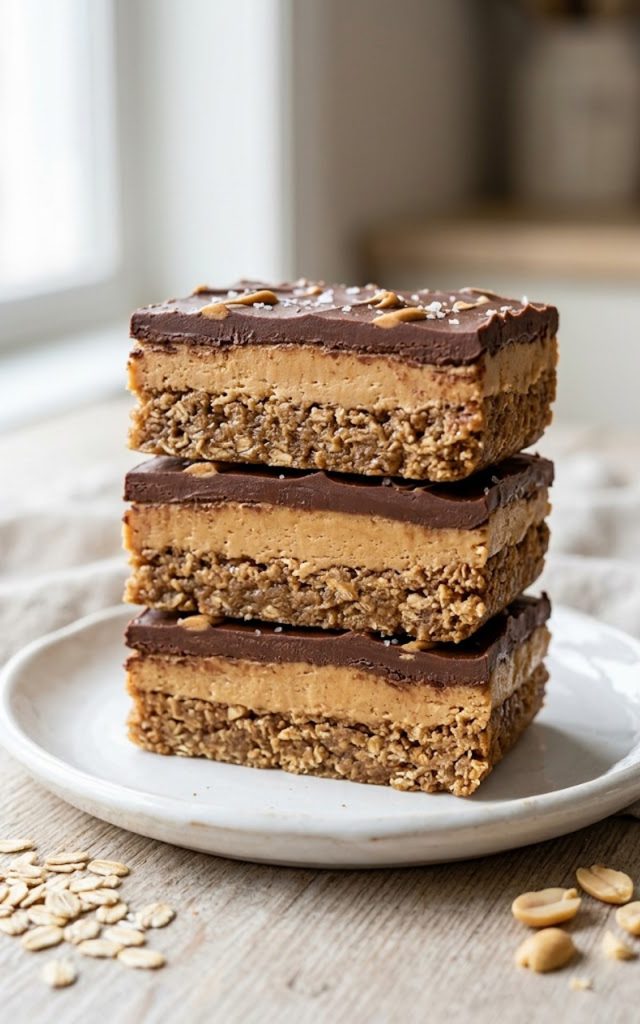
The original lunch lady version was legendary for a reason. Chewy oat base, thick peanut butter layer, smooth chocolate frosting on top. It was the kind of dessert that made the whole lunch line move faster. And honestly? The homemade version is even better.
The best part is you don’t even need to turn on your oven. These come together in about 20 minutes with pantry staples you probably already have sitting around. IMO, that’s the definition of a perfect recipe.
Why you’ll love this recipe
- No oven required — these are completely no-bake from start to finish
- Ready in about 20 minutes, plus chilling time
- Uses simple pantry ingredients you likely already have
- That chocolate peanut butter combination hits every single time
- Kids and adults both go absolutely crazy for these
- They store well, so you can make a big batch and snack all week
Ingredients and key notes
For the oat base:
- 3 cups quick oats — old-fashioned oats work too but quick oats give you a better texture here
- 2/3 cup unsalted butter, melted — this is what holds the base together
- 1/2 cup granulated sugar
- 1/2 cup packed brown sugar — the combination of both sugars gives you that chewy, rich flavor
- 1/2 cup creamy peanut butter — use a standard brand like Jif or Skippy, not natural peanut butter
- 1 teaspoon vanilla extract
- 1/4 teaspoon salt
For the peanut butter layer:
- 1 cup creamy peanut butter — again, stick with a standard brand for the best texture
- 1 cup powdered sugar — this firms up the peanut butter layer so it doesn’t slide around
For the chocolate frosting:
- 1 1/2 cups semi-sweet chocolate chips
- 4 tablespoons unsalted butter
- 2 tablespoons milk — just enough to make the frosting smooth and spreadable
Key notes:
- Do not use natural peanut butter. The oil separation in natural peanut butter will make your layers greasy and unstable. Stick with Jif, Skippy, or any standard creamy brand.
- Quick oats are strongly preferred over rolled oats here. They blend into the base better and give you that classic lunch lady texture.
- Let the chocolate frosting cool for about 5 minutes before spreading it over the peanut butter layer — if it’s too hot it will melt everything underneath.
- Line your baking pan with parchment paper before you start. It makes lifting the bars out so much easier and cleaner.
Step-by-step instructions
Step 1: Prep your pan
Line a 9×13 inch baking pan with parchment paper, leaving some overhang on the sides so you can lift the bars out easily later. Set it aside.
Step 2: Make the oat base
In a large mixing bowl, combine the melted butter, granulated sugar, brown sugar, peanut butter, vanilla, and salt. Stir until everything is well combined and smooth. Add the quick oats and mix until fully incorporated. The mixture should be thick and hold together when pressed.
Step 3: Press the base into the pan
Transfer the oat mixture into your prepared pan. Use your hands or the back of a flat spatula to press it down firmly and evenly. You want it packed tight so the bars hold their shape when cut. Pop it in the refrigerator while you work on the next layer.
Step 4: Make the peanut butter layer
In a medium bowl, mix together the peanut butter and powdered sugar until smooth and thick. It will be stiff — that’s exactly what you want. Spread this mixture evenly over the chilled oat base. Use an offset spatula or the back of a spoon to get it as even as possible.
Step 5: Make the chocolate frosting
In a small saucepan over low heat, combine the chocolate chips, butter, and milk. Stir constantly until everything is melted and smooth. Remove from heat and let it cool for about 5 minutes — this is important, so don’t skip it.
Step 6: Spread the chocolate frosting
Pour the slightly cooled chocolate frosting over the peanut butter layer and spread it evenly all the way to the edges. It should cover everything in one smooth, glossy layer.
Step 7: Chill and cut
Refrigerate the whole pan for at least 30 minutes, or until the chocolate is fully set. Once set, use the parchment overhang to lift the bars out of the pan. Place on a cutting board and slice into squares or rectangles. A sharp knife run under warm water makes cleaner cuts.
Serving suggestions
These bars are fantastic on their own, but here are a few ways to take them a little further:
- Serve them slightly chilled straight from the fridge — the chocolate layer has the best texture when it’s just a little firm
- Cut them into smaller bite-size pieces for a party platter or dessert table — they disappear fast
- Pair with a cold glass of milk for the full school cafeteria experience
- Crumble a bar over vanilla ice cream for a ridiculously good dessert
- Wrap individual bars in parchment and pack them in lunchboxes — the kids will absolutely love you for it
- Serve alongside a hot cup of coffee for an afternoon treat that hits differently than you’d expect
Storage tips
Room temperature: Store in an airtight container at room temperature for up to 3 days. Keep them in a cool spot away from direct sunlight or heat.
Refrigerator: These bars actually taste best straight from the fridge. Store in an airtight container for up to 7 days. The chocolate layer firms up beautifully when chilled.
Freezer: These freeze incredibly well. Layer the bars between sheets of parchment paper in a freezer-safe container and freeze for up to 2 months. Thaw in the refrigerator overnight before serving.
Cutting tip: If your bars have been refrigerated and the chocolate is very firm, let them sit at room temperature for 5 minutes before cutting to avoid cracking the chocolate layer.
Before you go
Some recipes are just classics for a reason. These lunch lady peanut butter bars are one of them — simple, satisfying, and the kind of thing that makes people stop mid-bite and ask for the recipe.
Whether you’re making these for a bake sale, a family gathering, or just because it’s Tuesday and you deserve something good — they deliver every single time. No oven, no stress, no complicated techniques. Just good, honest food that makes people happy.
Give them a try and let me know what you think. And if someone in your house tries to eat half the pan before they’re fully set — I get it. I’ve been there. No judgment at all.
With gratitude, Kip
Lunch Lady Peanut Butter Bars — The No-Bake Childhood Classic You’ve Been Missing
Description
These lunch lady peanut butter bars bring back the best part of the school cafeteria in the most delicious way possible. A chewy oat and peanut butter base, a thick peanut butter middle layer, and a smooth chocolate frosting on top — all made without turning on your oven. Simple, nostalgic, and dangerously good.
Ingredients
Oat base:
Peanut butter layer:
Chocolate frosting:
Instructions
-
Line a 9x13 inch pan with parchment paper and set aside.
-
Mix melted butter, both sugars, peanut butter, vanilla, and salt in a large bowl. Stir in oats until fully combined. Press firmly into the prepared pan and refrigerate.
-
Mix peanut butter and powdered sugar until thick and smooth. Spread evenly over the chilled oat base.
-
Melt chocolate chips, butter, and milk over low heat, stirring constantly until smooth. Cool for 5 minutes.
-
Spread chocolate frosting evenly over the peanut butter layer.
-
Refrigerate for at least 30 minutes until set. Lift out, slice, and serve.
