

You know those nights when you want something delicious, satisfying, and packed with flavor—but the thought of dirtying a million pans makes you want to order takeout instead? Yeah, I’ve been there. That’s exactly why I fell head over heels for these Sheet Pan Chicken Fajitas.
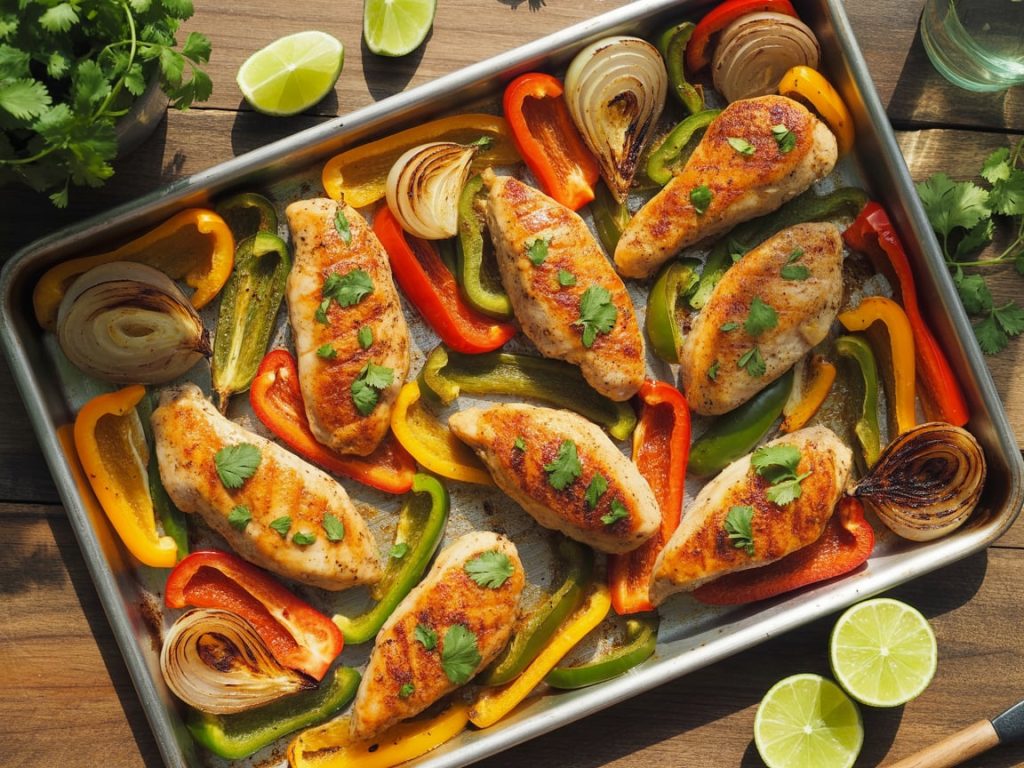
This recipe is a total game-changer. We’re talking juicy, perfectly seasoned chicken paired with vibrant bell peppers and onions, all roasted together on one single pan.
The result? Tender, caramelized veggies and chicken that’s so flavorful, you’ll wonder why you ever bothered with stovetop fajitas. And the best part? Minimal prep, minimal cleanup, and maximum taste. It’s basically the holy trinity of weeknight cooking.
I stumbled onto sheet pan fajitas during one of those chaotic weeks when life felt like it was moving at warp speed. I needed something quick, something healthy, and something that wouldn’t leave my kitchen looking like a tornado hit it.
This recipe delivered on all fronts—and then some. The oven does all the heavy lifting while you kick back (or, let’s be real, tackle the other 47 things on your to-do list).
Whether you’re feeding picky eaters, meal prepping for the week, or just craving that sizzling fajita magic without the fuss, these Sheet Pan Chicken Fajitas have got your back. Trust me, once you make these, you’ll be putting them on repeat. Ready to see how ridiculously easy this is? Let’s get into it.
Your Simple Ingredient Checklist
One of my favorite things about this recipe? You don’t need any fancy or hard-to-find ingredients. Everything on this list is probably already sitting in your kitchen right now, or you can grab it on a quick grocery store run. We’re keeping it simple, accessible, and delicious—because that’s how cooking should be.
The Ingredient Lineup:
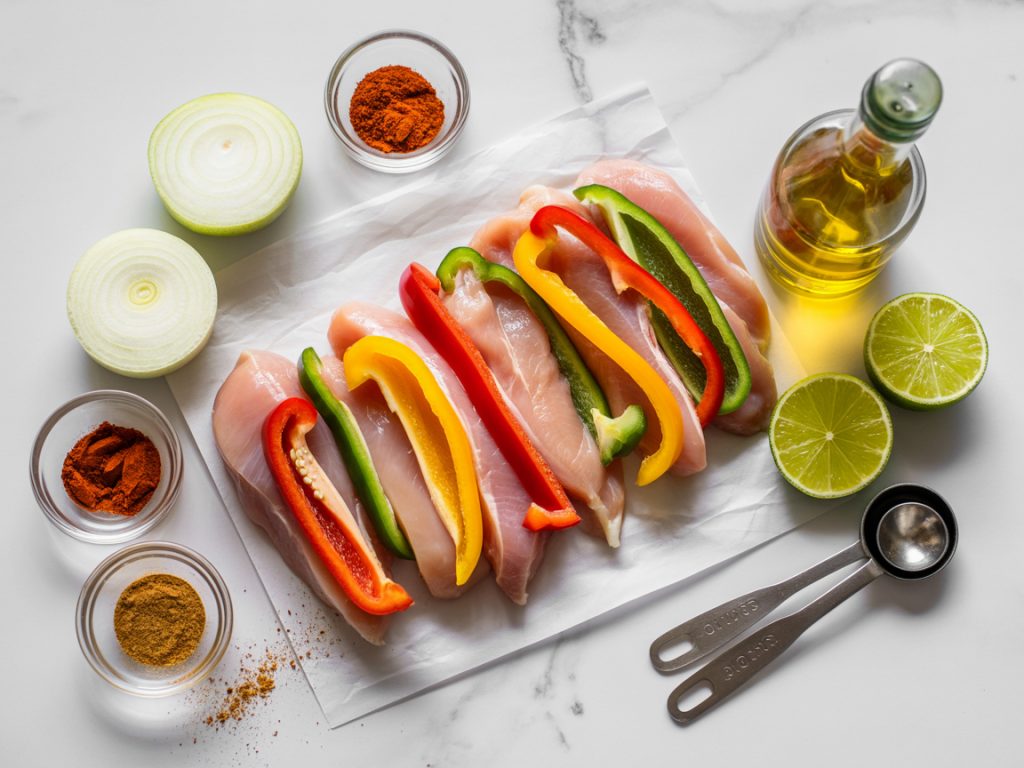
For the Chicken and Vegetables:
- 1.5 pounds boneless, skinless chicken breasts (about 3-4 breasts)
- 3 bell peppers (use a mix of red, yellow, and green for color)
- 1 large onion (red or white works great)
- 2 tablespoons olive oil
- 2 tablespoons lime juice (fresh is best, but bottled works too)
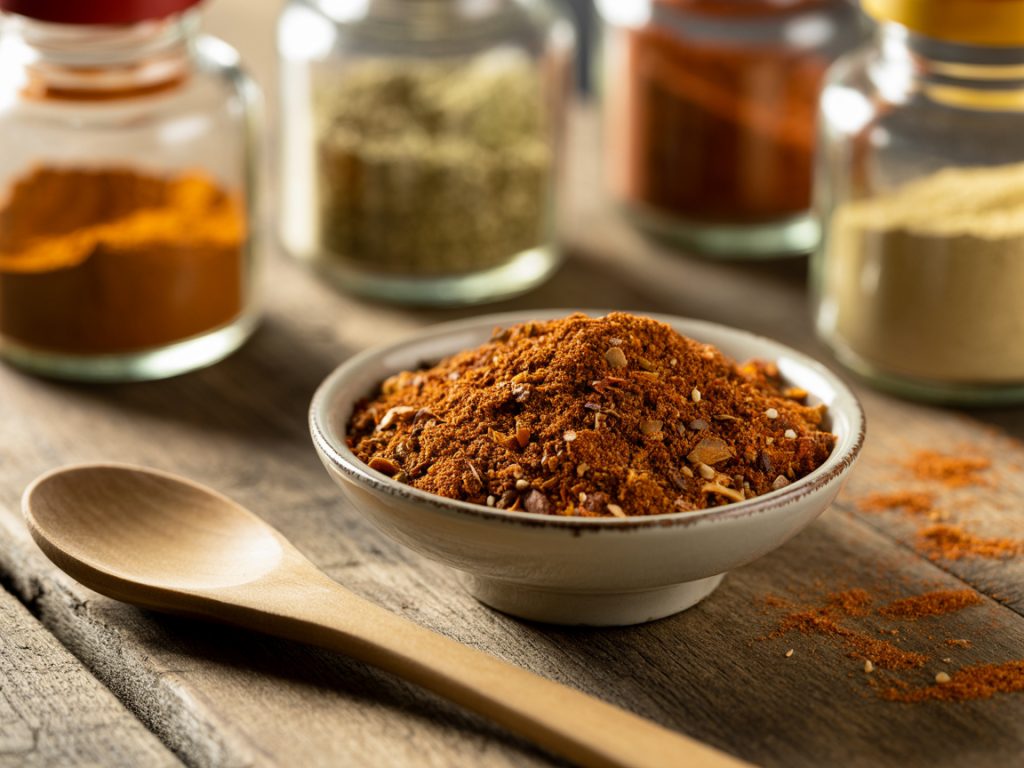
For the Fajita Seasoning:
- 1 tablespoon chili powder
- 1½ teaspoons cumin
- 1 teaspoon smoked paprika
- 1 teaspoon garlic powder
- 1 teaspoon onion powder
- ½ teaspoon oregano
- ½ teaspoon salt
- ¼ teaspoon black pepper
- ¼ teaspoon cayenne pepper (optional, for extra heat)
Optional Toppings and Serving:
- Flour or corn tortillas
- Sour cream
- Shredded cheese (cheddar or Mexican blend)
- Fresh cilantro
- Guacamole or sliced avocado
- Salsa or pico de gallo
- Lime wedges
Ingredient Tips and Substitutions:
Chicken Breasts: You can absolutely swap these for boneless, skinless chicken thighs if that’s what you prefer. Thighs have more fat, which means they stay extra juicy and tender. They might need a few extra minutes in the oven, but the cooking method stays the same. You could even use pre-sliced chicken tenders to save yourself some knife work—just reduce the cooking time slightly since they’re thinner.
Bell Peppers: The color combo of red, yellow, and green isn’t just pretty—it also gives you a nice mix of sweet and slightly bitter flavors. But honestly? Use whatever peppers you’ve got. All red peppers will be sweeter, all green will be more vegetal. Both work. If you can only find two peppers instead of three, that’s fine too. Just slice them a bit thicker so you still get that nice roasted texture.
Onion: Red onions give you a slightly sweeter, milder flavor that caramelizes beautifully. White or yellow onions work just as well and have a sharper bite that mellows out in the oven. Honestly, I’ve used whatever onion was rolling around in my pantry, and it’s always turned out great. The key is slicing them into thick strips so they don’t turn to mush.
Olive Oil: This helps everything roast evenly and get those gorgeous caramelized edges. If you’re out of olive oil, avocado oil or vegetable oil work perfectly fine. Even melted butter would do the trick if you’re feeling indulgent (though it’s not traditional for fajitas).
Lime Juice: Fresh lime juice brings a bright, zesty punch that really makes the flavors pop. If you don’t have fresh limes, bottled lime juice is a decent substitute—just use a little less since it can be more concentrated. In a pinch, lemon juice works too, though the flavor profile shifts slightly.
Fajita Seasoning: Sure, you could use a store-bought packet of fajita seasoning to save time—I won’t judge. But making your own takes about thirty seconds and tastes so much better. You control the salt, the heat, and you avoid any weird additives or preservatives. Plus, you probably already have all these spices in your cabinet. If you’re missing one or two, it’s not the end of the world. The chili powder and cumin are the real MVPs here, so those are non-negotiable.
Cayenne Pepper: This is totally optional. If you like things spicy, toss it in. If you’re cooking for kids or people who can’t handle heat, leave it out. You can also serve hot sauce on the side so everyone can customize their heat level. Problem solved.
Step-by-Step Sheet Pan Instructions
Alright, let’s get cooking. This is where the magic happens, and trust me, it’s almost embarrassingly easy. You’re going to feel like you’re cheating—but in the best possible way. This foolproof method guarantees juicy chicken, perfectly caramelized veggies, and flavors that’ll make you look like a culinary genius.
Part 1: Prep and Season
Preheat Your Oven: First things first—crank that oven up to 425°F (220°C). We need high heat to get those beautiful caramelized edges on the veggies and to cook the chicken through without drying it out. While the oven’s heating up, you’ve got time to prep everything else. See? We’re already multitasking like pros.
Prep the Chicken: Grab your chicken breasts and slice them into strips about ½-inch thick. You want them relatively uniform so they cook evenly—nobody likes overcooked rubbery chicken next to undercooked pink chicken. If your breasts are on the thicker side, you might want to pound them out a bit first or just slice them thinner. No stress though, we’re not aiming for perfection here, just reasonably similar sizes.
Slice the Vegetables: Now for the fun part—slicing those gorgeous bell peppers and onions. Cut your peppers into strips about ½-inch wide. Same deal with the onion—slice it into thick strips or wedges. Why thick? Because thin slices turn into sad, mushy bits in the oven, and we want veggies with some texture and bite. Those chunky pieces will char beautifully on the edges while staying tender in the middle.
Make the Seasoning Mix: In a small bowl, whisk together all your fajita seasonings—the chili powder, cumin, smoked paprika, garlic powder, onion powder, oregano, salt, pepper, and cayenne if you’re using it. This takes literally thirty seconds, and the aroma alone is going to make your mouth water. Seriously, I could bottle this smell and wear it as perfume. (Okay, maybe not, but you get the idea.)
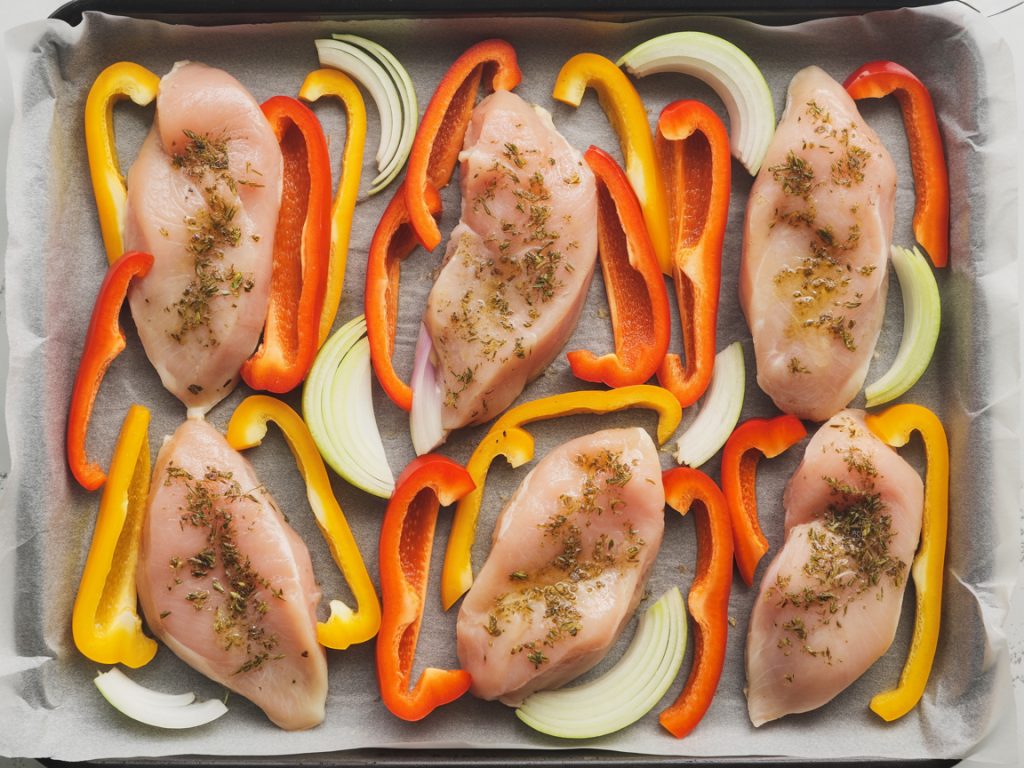
Combine Everything: Here’s where it all comes together. Toss your sliced chicken and vegetables onto a large sheet pan. Drizzle the olive oil and lime juice over everything. Sprinkle that beautiful seasoning mix on top. Now get in there with your hands (or a couple of spoons if you’re fancy) and toss everything until the chicken and veggies are completely coated. Make sure every piece gets some love—you want that seasoning distributed evenly so every bite is packed with flavor.
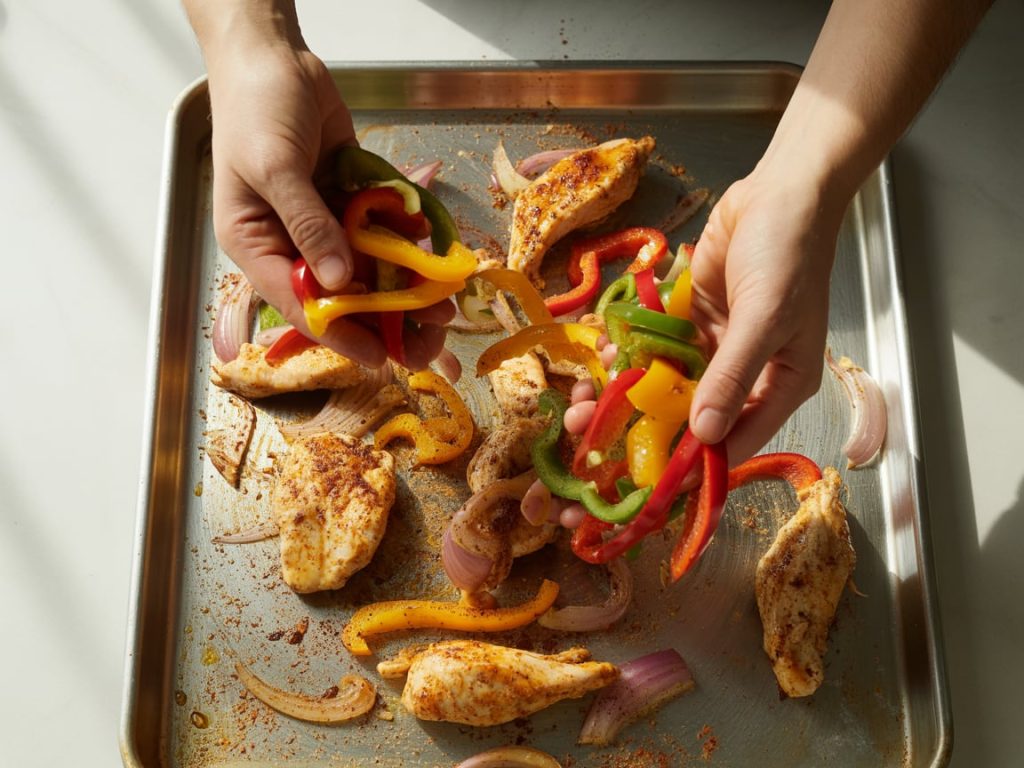
Arrange on the Pan: Spread everything out in a single layer across your sheet pan. This is important, folks. If you pile everything on top of each other, it’ll steam instead of roast, and you’ll miss out on those crispy, caramelized edges we’re after. If your pan looks crowded, use two pans. I know it defeats the “one pan” promise slightly, but trust me—it’s worth it for the texture. Space equals crispy, delicious fajitas. Crowding equals soggy sadness.
Part 2: Roast to Perfection
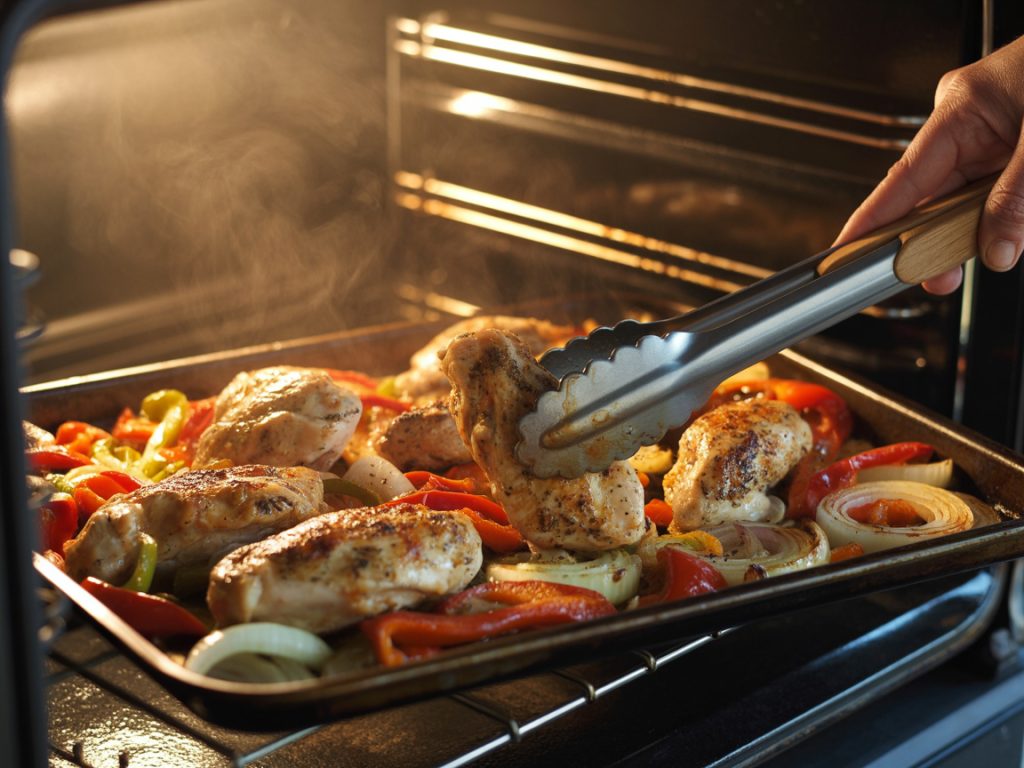
Into the Oven: Slide that sheet pan into your preheated 425°F oven and set a timer for 20 minutes. This is your moment to take a breather. Pour yourself a drink, scroll through your phone, do a little victory dance—whatever floats your boat. The oven’s doing all the work now.
Stir Halfway Through: When that timer hits the 10-minute mark, pull out the pan and give everything a good stir. This ensures even cooking and helps the veggies caramelize on multiple sides. You’ll already start seeing those gorgeous charred edges forming, and the smell? Absolutely incredible. Pop it back in the oven for the remaining time.
Check for Doneness: After the full 20-25 minutes, your chicken should be cooked through (internal temp of 165°F if you want to be precise) and your veggies should be tender with those beautiful caramelized edges. If your chicken pieces are particularly thick, they might need an extra 5 minutes. Just keep an eye on things—every oven is slightly different, and you know yours best.
Optional Broil for Extra Char: Want to take things up a notch? Switch your oven to broil for the last 2-3 minutes. This gives you those restaurant-style charred bits that add an extra layer of smoky flavor. Just watch it closely because the line between perfectly charred and burnt is thin, and broilers are aggressive. Don’t wander off to check Instagram during this part. :/
Rest and Serve: Pull that pan out and let everything rest for a couple of minutes. This lets the juices redistribute in the chicken, keeping it extra moist and tender. While it’s resting, warm up your tortillas, set out your toppings, and get ready to build the best fajitas you’ve had in a long time.
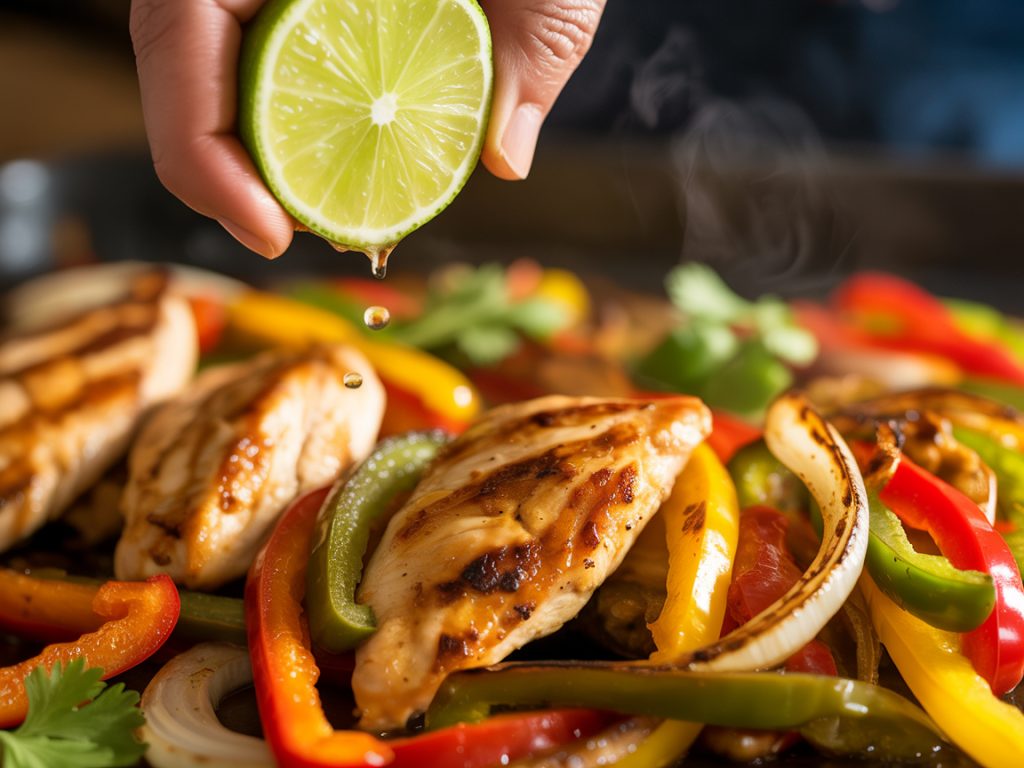
Squeeze Fresh Lime: Right before serving, hit everything with a squeeze of fresh lime juice. That bright acidity cuts through the richness and ties all the flavors together. It’s that final touch that takes these from “pretty good” to “holy wow, I’m making this every week.”
Serving Suggestions and Meal Ideas
Now comes the fun part—deciding how you want to devour these incredible sheet pan chicken fajitas. The beauty of this recipe is its versatility. You can go traditional, get creative, or completely reinvent it based on what you’re craving. Here are some of my favorite ways to serve these bad boys.
Traditional Fajita Style
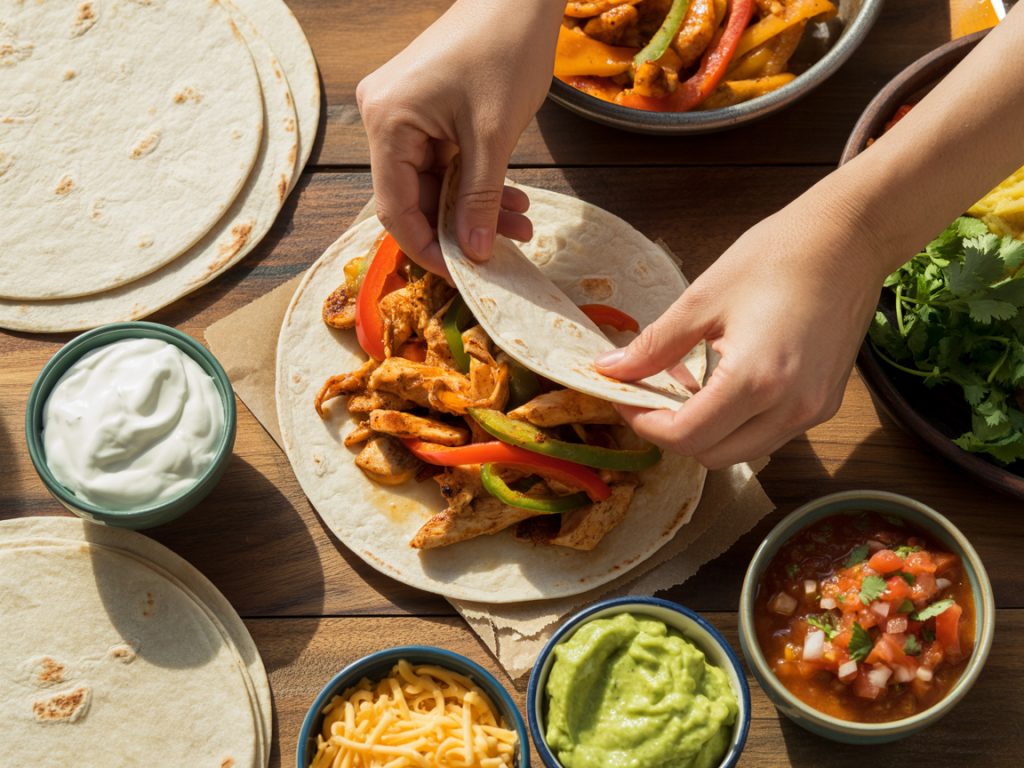
Classic Warm Tortillas: This is the OG way to enjoy fajitas, and honestly, it never gets old. Warm up some flour or corn tortillas (I like to char mine directly over a gas flame for about 10 seconds per side, but the microwave works too). Pile on that juicy chicken and those caramelized peppers and onions. Then comes the fun part—loading up your toppings. I’m talking sour cream, shredded cheese, guacamole, salsa, fresh cilantro, and an extra squeeze of lime. Roll it up and take a bite. Pure magic.
Fajita Bar for Gatherings: Want to impress guests without breaking a sweat? Set up a fajita bar. Lay out the sheet pan of chicken and veggies, warm tortillas, and bowls of all the fixings. Let everyone build their own perfect fajita. It’s interactive, it’s fun, and you look like a hosting genius. Plus, cleanup is still minimal because everyone’s basically serving themselves. Win-win.
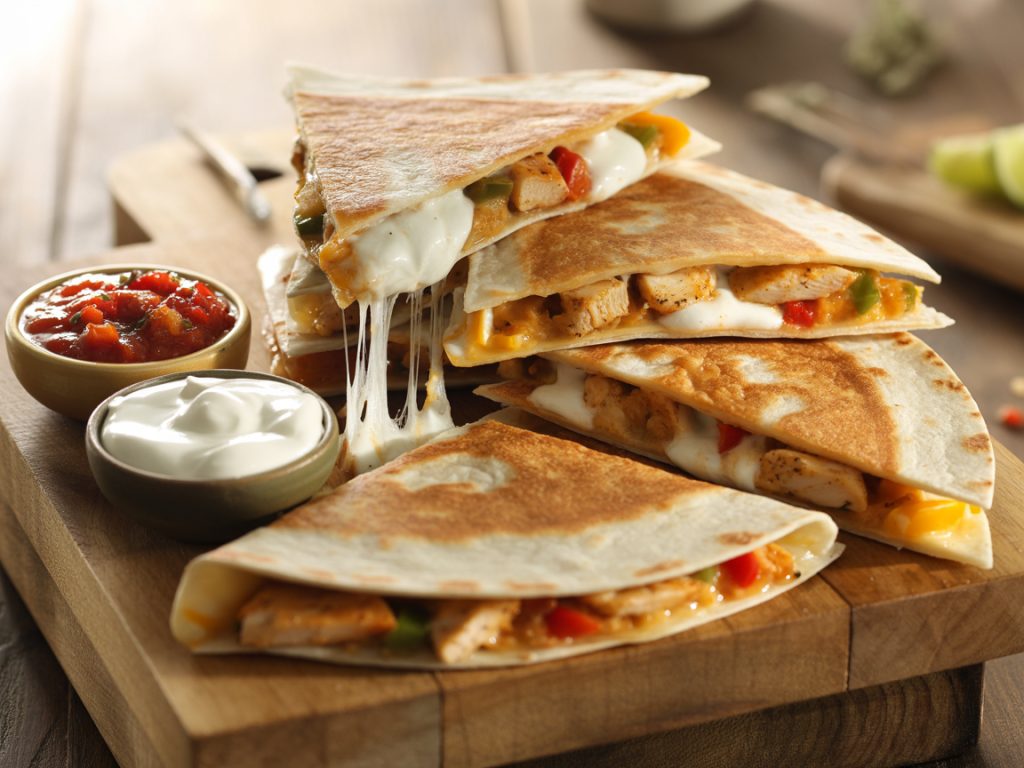
Quesadilla Transformation: Got leftovers? (Lucky you!) Turn them into quesadillas. Layer the chicken and veggies with cheese between two tortillas and cook in a skillet until golden and crispy. Slice into wedges and serve with sour cream and salsa for dipping. It’s like fajitas got a crispy, melty upgrade, and trust me, the kids will go wild for this version.
Bowl and Salad Options
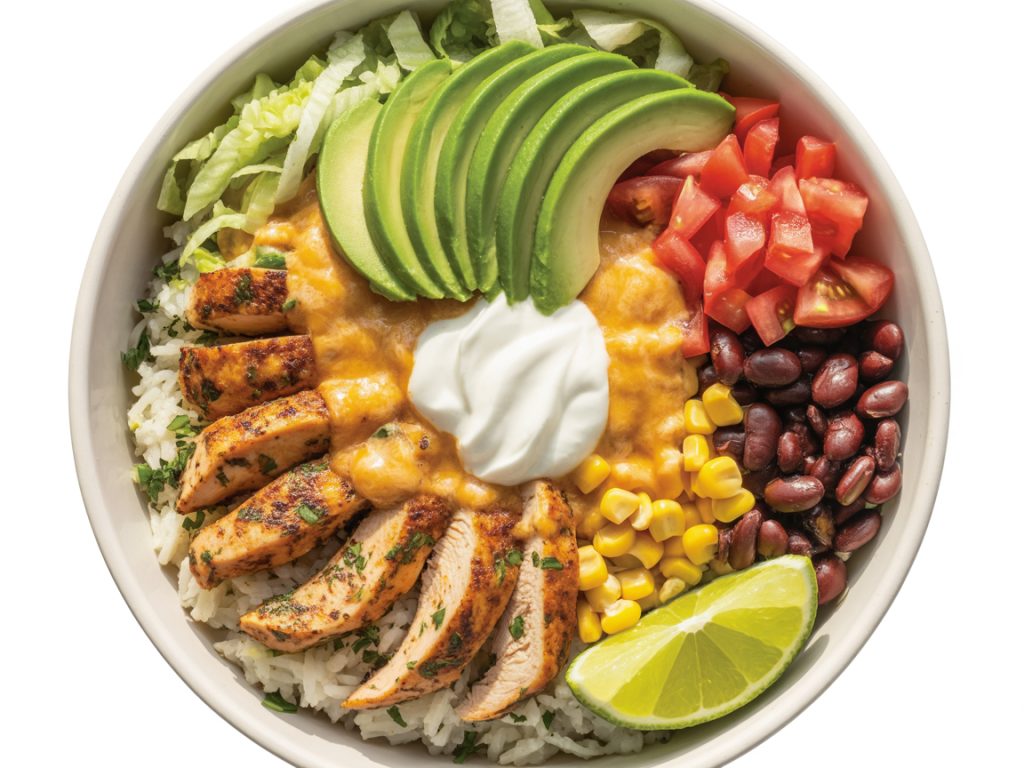
Fajita Bowls: Skip the tortillas entirely and build yourself a nourishing fajita bowl. Start with a base of cilantro-lime rice, quinoa, or cauliflower rice if you’re keeping it low-carb. Top with your chicken and veggies, then add black beans, corn, shredded lettuce, diced tomatoes, cheese, and a dollop of sour cream or Greek yogurt. Drizzle with your favorite salsa or hot sauce. This is meal prep heaven right here—just portion everything into containers and you’ve got lunch sorted for the week.
Loaded Fajita Salad: Craving something lighter? Turn these fajitas into a massive, colorful salad. Start with a bed of mixed greens or romaine lettuce. Add your warm chicken and peppers on top (the contrast of warm protein and cool, crispy lettuce is chef’s kiss). Toss in some cherry tomatoes, corn, black beans, sliced avocado, and a sprinkle of cheese. Finish with a creamy cilantro-lime dressing or just a squeeze of lime and a drizzle of olive oil. You’ve got a restaurant-worthy salad that’s actually satisfying.

Burrito Bowl Style: Go full Chipotle at home. Rice on the bottom, chicken and fajita veggies piled high, then layer on your beans, corn, pico de gallo, cheese, sour cream, and guac. It’s hearty, it’s filling, and it hits all the right flavor notes. The best part? You control the portions and the quality of ingredients. No sad, skimpy servings here.
Creative Variations
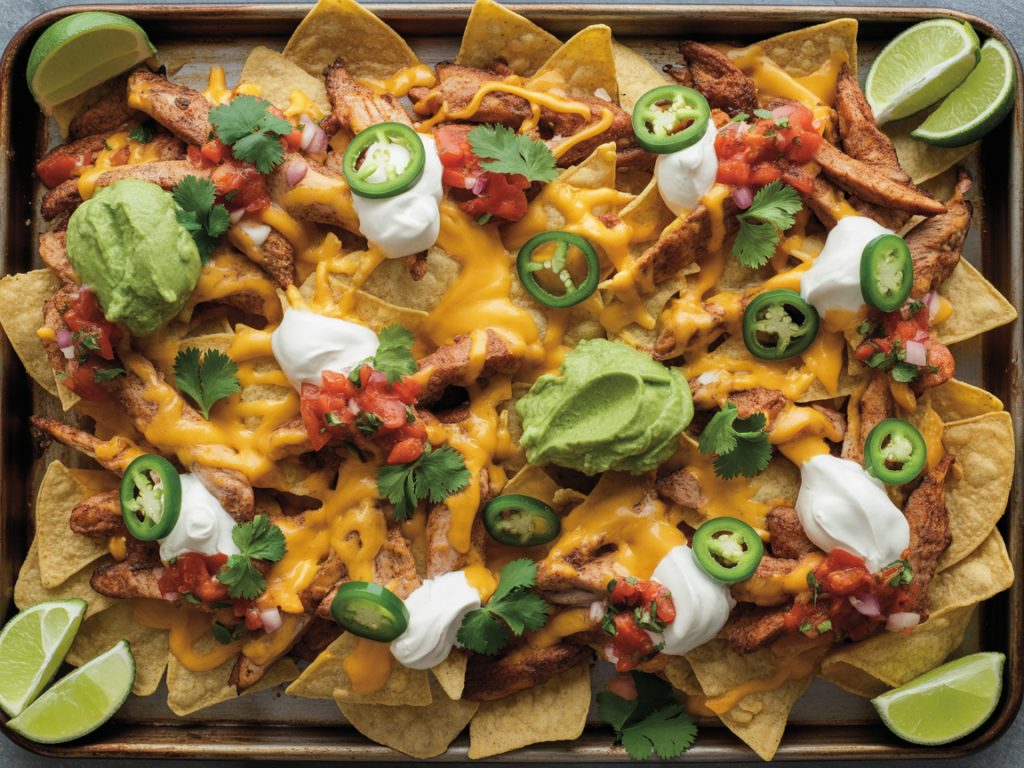
Fajita Nachos: Oh yes, we’re going there. Spread tortilla chips on a baking sheet, top with the chicken and veggies, smother everything in shredded cheese, and broil until melty and bubbly. Finish with all your favorite nacho toppings—jalapeños, sour cream, guacamole, salsa, cilantro. These are perfect for game day, movie night, or whenever you need something indulgent and shareable. Just be prepared for them to disappear fast.
Fajita Stuffed Peppers: Feeling fancy? Hollow out some bell peppers, stuff them with the fajita chicken mixture mixed with rice or quinoa and cheese, then bake until the peppers are tender. It’s like inception—fajitas inside peppers that were originally part of the fajitas. Mind blown. But seriously, this makes for a beautiful presentation if you’re trying to impress someone.
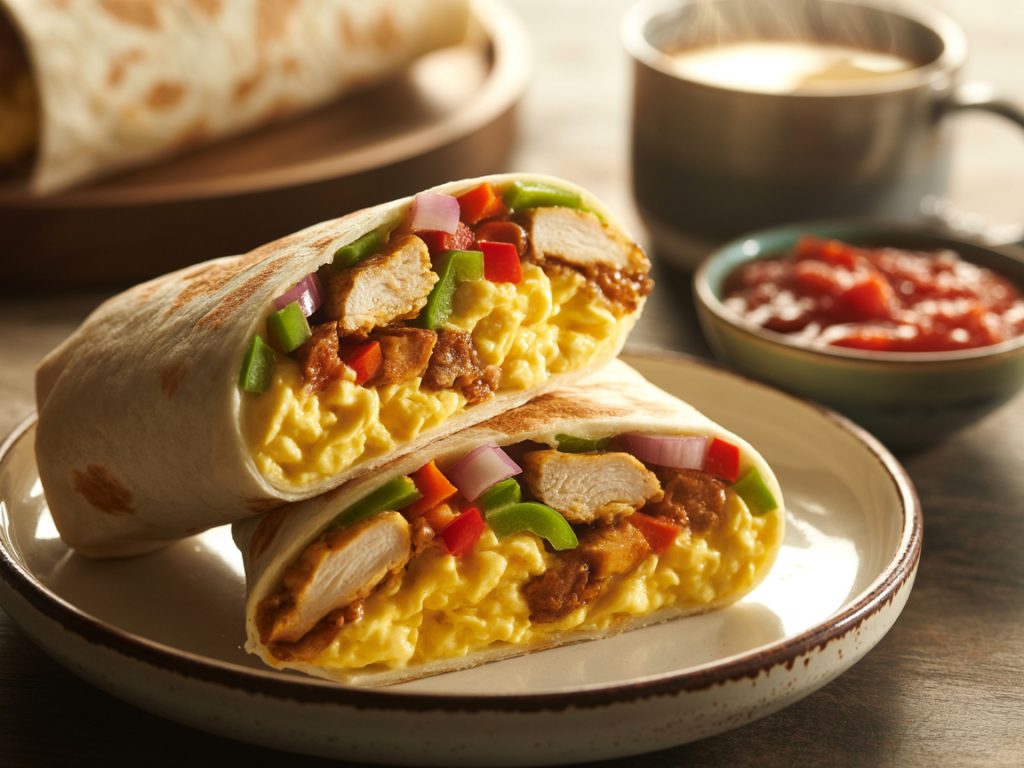
Breakfast Fajita Scramble: Leftover fajitas for breakfast? Absolutely. Chop up the chicken and veggies and toss them into a skillet with scrambled eggs. Add some cheese, wrap it all in a tortilla, and boom—breakfast burrito that’ll fuel your entire morning. You can even meal prep these, wrap them in foil, and freeze for grab-and-go breakfasts.
Fajita Pizza: Stay with me here. Use a store-bought pizza crust or naan bread as your base. Spread a thin layer of salsa or enchilada sauce instead of marinara. Top with the fajita chicken and veggies, then cover with mozzarella and cheddar cheese. Bake until the cheese is golden and bubbly. Finish with fresh cilantro and a drizzle of sour cream. It’s Tex-Mex meets Italian, and it works ridiculously well.
Meal Prep Wraps: Pack these fajitas into whole wheat or spinach wraps with some lettuce, cheese, and a bit of salsa. Wrap them tightly in foil or plastic wrap, and you’ve got portable lunches that actually taste good cold or at room temperature. They hold up way better than you’d think and make for a protein-packed midday meal that beats any sad desk lunch.
Storage and Meal Prep Tips
Let’s be real—half the battle of weeknight cooking is making sure you can actually use those leftovers without them turning into a science experiment in your fridge.
Good news: these sheet pan chicken fajitas are meal prep champions. They store beautifully, reheat like a dream, and actually taste better the next day once all those flavors have had time to mingle.
Refrigerator Storage: Let your fajitas cool completely before storing them—this prevents condensation that can make everything soggy. Transfer the chicken and veggies to an airtight container and pop them in the fridge.
They’ll stay fresh and delicious for up to 4 days. I like to keep mine in glass containers because they don’t absorb smells or stains, but any sealed container works perfectly fine. Pro tip: store your tortillas and toppings separately so nothing gets mushy or wilted.
Freezer Storage: These fajitas freeze incredibly well, which makes them perfect for those “future you” moments when you need dinner in a pinch. Portion the cooled chicken and veggies into freezer-safe containers or heavy-duty freezer bags.
Squeeze out as much air as possible to prevent freezer burn. Label with the date (trust me, you’ll forget otherwise), and they’ll keep for up to 3 months. When you’re ready to use them, thaw overnight in the fridge before reheating.
Reheating Methods: The microwave is your quickest option—just heat in 30-second intervals, stirring between each round, until everything’s warmed through. Add a splash of chicken broth or water if things look a bit dry.
For better texture, reheat in a skillet over medium heat with a tiny drizzle of oil. This brings back some of that caramelization and keeps the veggies from getting mushy. If you’ve got time, you can even reheat them in a 350°F oven for about 10-15 minutes, which really revives that fresh-from-the-oven quality.
Meal Prep Strategy: Here’s how I tackle meal prep with this recipe. On Sunday, I make a double batch using two sheet pans. Once everything’s cooked and cooled, I divide it into individual portions in meal prep containers.
Some go in the fridge for the week ahead, others go straight into the freezer for later. I keep my toppings in small containers or prep them fresh when I’m ready to eat. This way, I’ve got four to five ready-made lunches or quick dinners without any of the boring repetition.
Keeping Things Fresh: If you’re meal prepping for several days, keep your ingredients separate until you’re ready to assemble. Store the fajita mixture in one container, rice or greens in another, and toppings in small separate containers.
This prevents everything from getting soggy or mixed together in weird ways. When it’s time to eat, just warm up what needs warming and assemble. It takes an extra two minutes but makes a huge difference in texture and taste.
Batch Cooking Tip: Double or even triple this recipe without any issues. Use multiple sheet pans (they can go in the oven at the same time on different racks—just rotate them halfway through for even cooking).
The prep time barely increases, but you’ll have fajitas for days. Portion them out for different meals throughout the week, or freeze half for those nights when cooking feels impossible.
Best Uses for Leftovers: Beyond the obvious “reheat and eat,” leftover fajitas are ridiculously versatile. Toss them into scrambled eggs for breakfast. Add them to a salad for an instant protein boost.
Mix them with pasta and a creamy sauce for a Tex-Mex fusion dish. Stuff them into a baked potato with cheese and sour cream. Seriously, once you’ve got this fajita mixture in your fridge, you’re basically set for the week with minimal effort.
Sheet Pan Chicken Fajitas: A Quick & Flavorful Weeknight Winner
Description
These Sheet Pan Chicken Fajitas are the ultimate easy weeknight dinner. Juicy chicken breasts and colorful bell peppers are roasted together with bold fajita seasoning for a meal that's as effortless as it is delicious. Perfect over rice, in tortillas, on salads, or however you want to enjoy them!
Ingredients
Instructions
-
Preheat oven to 425°F (220°C). Line a large sheet pan with parchment paper or lightly grease it.
-
Slice the chicken into ½-inch thick strips. Cut bell peppers and onion into thick strips, keeping them uniform in size for even cooking.
-
Make the seasoning mix by combining chili powder, cumin, smoked paprika, garlic powder, onion powder, oregano, salt, pepper, and cayenne (if using) in a small bowl.
-
Combine everything on the sheet pan. Add sliced chicken, peppers, and onions. Drizzle with olive oil and lime juice. Sprinkle the fajita seasoning over everything and toss with your hands or tongs until evenly coated.
-
Arrange in a single layer across the sheet pan, making sure nothing is piled on top of each other. Use two pans if necessary for proper roasting.
-
Roast for 20-25 minutes, stirring halfway through at the 10-minute mark. Chicken should reach an internal temperature of 165°F and vegetables should be tender with caramelized edges.
-
Optional broil: For extra char, broil on high for 2-3 minutes at the end. Watch closely to prevent burning.
-
Squeeze fresh lime over the finished fajitas and serve immediately with warm tortillas and your favorite toppings.
Note
Chicken Options: Boneless, skinless chicken thighs work great too and stay extra juicy. Adjust cooking time as needed based on thickness.
Veggie Variations: Add sliced zucchini, mushrooms, or jalapeños for extra flavor and nutrition.
Storage: Store leftovers in an airtight container in the refrigerator for up to 4 days or freeze for up to 3 months.
Meal Prep Friendly: This recipe doubles or triples easily. Use multiple sheet pans and rotate them halfway through cooking.
Spice Level: Skip the cayenne for a milder version, or add diced jalapeños for extra heat.
