
Some recipes exist purely to make people happy. No nutritional agenda, no complicated technique, no story about how it changed my life. Just pure, unapologetic joy in bar form. These s'mores rice krispie treats are exactly that — and I say that as someone who takes food pretty seriously.
The idea came to me when I wanted that classic campfire s'mores experience without actually having to go outside and deal with a fire. Because honestly, sometimes you just want the chocolate and the marshmallow and the graham cracker situation without the smoke in your eyes and the mosquitoes. You know what I mean? So I took everything I love about s'mores and folded it into the most nostalgic no-bake treat I know, and the result was genuinely better than I expected.
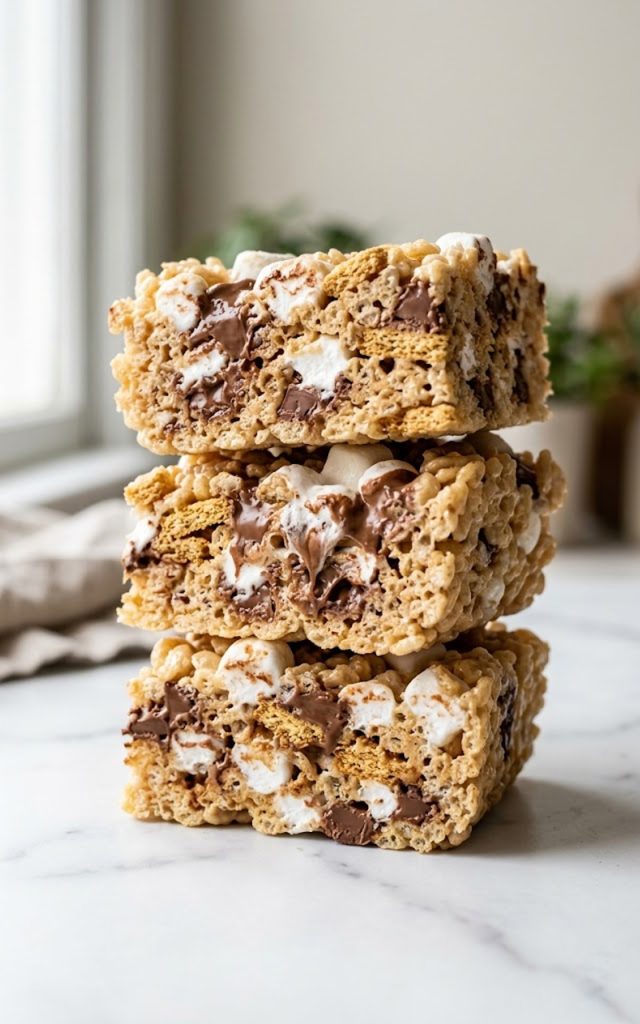
What you get is this golden, chewy, gooey bar loaded with mini marshmallows, golden graham cracker pieces, and chunks of melty chocolate in every single bite. Twenty minutes, one pot, zero oven required. Let's get into it.
For the rice krispie base:
For the mix-ins:
Key notes:
Step 1: Prepare your pan
Line a 9x13 inch baking pan with parchment paper and spray it lightly with cooking spray. The parchment overhang on the sides will make it easy to lift the whole slab out cleanly once the bars are set. Set the pan aside.
Step 2: Melt the butter
In a large heavy bottomed pot or Dutch oven, melt the butter over low heat. Let it melt slowly and swirl the pan occasionally. You want it fully melted and just starting to take on a very light golden color — this adds a subtle nutty depth to the bars that makes them taste even better.
Step 3: Melt the marshmallows
Add the large marshmallows to the melted butter and stir continuously over low heat until completely melted and smooth. This takes about 3 to 4 minutes. Keep stirring the whole time — marshmallows can scorch on the bottom if left sitting still in a hot pot. Once fully melted, remove the pot from the heat entirely.
Step 4: Add vanilla
Stir the vanilla extract into the melted marshmallow mixture. It takes about 10 seconds but it makes a real difference in the final flavor. Do not skip it.
Step 5: Add the cereals
Working quickly, add the rice krispie cereal and graham cracker cereal to the pot. Fold everything together with a rubber spatula until the cereal is fully coated in the marshmallow mixture. Move fast — the mixture starts to set as it cools.
Step 6: Add the chocolate and mini marshmallows
Once the cereal is fully coated, add the chocolate chips and mini marshmallows. Fold them in gently with just a few strokes. You want the chocolate to stay in chunks and the mini marshmallows to stay whole and visible — not fully melted into the mixture. A few gentle folds is all you need here.
Step 7: Press into the pan
Transfer the mixture into your prepared pan. Lightly grease your hands or a spatula and press the mixture down firmly and evenly. Do not press too hard — you want the bars to be compact enough to hold their shape but still light and chewy, not dense and compressed.
Step 8: Add toppings
Immediately press a handful of extra mini marshmallows and a few graham cracker pieces onto the top surface of the bars while everything is still warm and sticky. This gives them that beautiful s'mores look and makes it clear exactly what you are about to eat.
Step 9: Set and slice
Let the bars sit at room temperature for at least 15 minutes until fully set. Once set, use the parchment overhang to lift the entire slab out of the pan onto a cutting board. Slice into squares or rectangles with a sharp knife. A lightly greased knife gives you cleaner cuts.
These bars are fantastic on their own but here are a few ways to make them even more fun to serve:
Room temperature: Store in an airtight container at room temperature for up to 3 days. Place sheets of parchment paper between layers to prevent the bars from sticking together. They are at their absolute best on day one when the texture is perfectly chewy and the chocolate is still a little soft.
Refrigerator: You can store these in the fridge for up to 5 days but be aware that cold temperatures make rice krispie treats harder and less chewy. If you refrigerate them, let them come back to room temperature for about 10 minutes before eating or warm them briefly in the microwave.
Freezer: These freeze well. Wrap individual bars tightly in plastic wrap and place in a freezer safe bag or container. Freeze for up to 6 weeks. Thaw at room temperature for about 20 minutes before serving. The texture holds up surprisingly well after freezing.
Cutting tip: If the bars have set too firm by the time you go to cut them, warm your knife under hot water, wipe it dry, and slice. The warmth helps the knife glide through cleanly without dragging or cracking the bars.
There are fancy recipes and there are recipes that just make people genuinely happy the moment they take a bite. These s'mores rice krispie treats fall very firmly into the second category — and there is absolutely nothing wrong with that.
Twenty minutes, one pot, and a handful of ingredients that most people already have somewhere in their pantry. That is all it takes to put something on the table that makes everyone reach for seconds before they have even finished their first bar.
Make these for your next gathering, make them for your kids after school, or make them for yourself on a quiet evening when you just want something good and simple. However you enjoy them, I hope they bring a little of that campfire magic into your kitchen.
With gratitude, Kip
These s'mores rice krispie treats take everything you love about a classic campfire s'more — gooey marshmallow, golden graham crackers, and melty chocolate — and pack it all into a chewy, no-bake bar that comes together in just 20 minutes. One pot, simple ingredients, and a result that makes everyone in the room stop what they are doing and reach for another piece.