

Can we talk about how oven-baked chicken thighs are criminally underrated? I used to think baking chicken was boring—just dry, sad protein that needed drowning in sauce. Then I discovered boneless chicken thighs in the oven with teriyaki glaze, and everything changed.
These beauties practically cook themselves. You throw them on a sheet pan, brush on some teriyaki sauce, and let the oven do its thing. No standing over a hot stove, no oil splatter all over your cooktop, no flipping chicken pieces with tongs while trying not to burn yourself. Just pure, hands-off ease.
The result? Juicy, tender chicken with a caramelized teriyaki glaze that’s legitimately better than takeout. My family requests this weekly now, and I never complain because it’s so ridiculously simple that it barely feels like cooking.
Why You’ll Love This Recipe
Zero stovetop babysitting required. This is hands-off cooking at its finest. Prep takes ten minutes, then the oven does all the work while you catch up on that show you’ve been meaning to watch. No stirring, no flipping, no hovering.
Boneless thighs are the MVP. They’re juicier than chicken breasts, cook faster than bone-in thighs, and they’re nearly impossible to mess up. Even if you slightly overbake them, they stay tender and delicious. It’s like cooking on easy mode.
That caramelized glaze though. The oven heat creates this gorgeous sticky-sweet coating that you just can’t get from stovetop cooking. The edges get slightly crispy while the chicken stays moist inside. It’s textural perfection.
Sheet pan dinner potential. Throw some veggies on the same pan and you’ve got a complete meal with literally one dish to clean. Future you will be so grateful for this minimal cleanup situation.
Meal prep champion. Make a double batch on Sunday and you’ve got protein for the entire week. These reheat beautifully and actually taste even better the next day when the flavors have had time to develop.
Kid and picky-eater approved. Something about that glossy teriyaki coating makes even vegetable-haters happy. I’ve seen it work magic on my own kids—suddenly broccoli is acceptable when it’s sitting next to this chicken.
Ingredients
For the Chicken:
- 2 lbs boneless, skinless chicken thighs (about 8-10 thighs)
- Key note: Look for thighs that are roughly the same size for even cooking.
- Salt and black pepper to taste
- 1 tablespoon vegetable oil or sesame oil
- Key note: Just enough to help the chicken brown nicely in the oven.
For the Teriyaki Sauce:
- 1/2 cup soy sauce (low-sodium works great)
- Key note: Use tamari for gluten-free or coconut aminos for soy-free.
- 1/3 cup honey (or brown sugar)
- Key note: Honey caramelizes beautifully in the oven and adds that classic teriyaki sweetness.
- 3 tablespoons rice vinegar
- 4 cloves garlic, minced
- 1 tablespoon fresh ginger, grated
- Key note: Fresh ginger is way better here, but 1 teaspoon ground ginger works in a pinch.
- 2 tablespoons cornstarch
- 3 tablespoons water
- 1 teaspoon sesame oil (optional but recommended)
- 1/4 teaspoon red pepper flakes (optional, for heat)
For Garnish:
- Sesame seeds
- Sliced green onions
- Fresh cilantro (optional)
Step-by-Step Instructions
Step 1: Prep and Preheat
Preheat your oven to 400°F. Line a large baking sheet with parchment paper or aluminum foil for easy cleanup. This step is non-negotiable if you value your free time—trust me, the teriyaki sauce gets sticky.
Pat your chicken thighs dry with paper towels. This helps them brown better in the oven instead of steaming. Season both sides generously with salt and pepper.
Step 2: Make That Teriyaki Sauce
In a medium bowl, whisk together the soy sauce, honey, rice vinegar, minced garlic, grated ginger, sesame oil, and red pepper flakes if you’re using them.
In a small separate bowl, mix the cornstarch with the water until completely smooth—no lumps. This is your thickening agent. Pour the cornstarch slurry into the teriyaki mixture and whisk until everything is combined.
Set aside about 1/4 cup of this sauce in a small bowl for basting later. You don’t want to use the same sauce that’s been on raw chicken for your final glaze. Food safety and all that.
Step 3: Arrange and Coat
Arrange your seasoned chicken thighs on the prepared baking sheet in a single layer. Don’t crowd them—give each thigh some breathing room so they can brown properly instead of steaming.
Brush each thigh generously with the teriyaki sauce using a basting brush or spoon. Make sure they’re well coated on top. The oil helps them not stick and promotes that beautiful caramelization.
Step 4: First Bake
Pop the baking sheet into your preheated oven and bake for 15 minutes. During this time, the chicken starts cooking through and the sauce begins to set.
Step 5: Glaze and Finish
After 15 minutes, pull the baking sheet out and flip each chicken thigh over. Brush them generously with more of the reserved teriyaki sauce (the clean batch you set aside). Really coat them well—this is where that sticky glaze magic happens.
Return the pan to the oven and bake for another 12-15 minutes, until the chicken reaches an internal temperature of 165°F and the sauce is thick, glossy, and caramelized. The edges should look slightly crispy and dark.
Step 6: Final Glaze (Optional but Recommended)
For extra sticky perfection, turn your broiler to high for the last 2-3 minutes. Watch it like a hawk though—that sugar can go from perfectly caramelized to burnt really fast. You want bubbly, glossy, slightly charred edges, not blackened chicken.
Step 7: Rest and Serve
Let the chicken rest on the baking sheet for about 5 minutes. The sauce will thicken up even more as it cools slightly, getting to that perfect sticky consistency.
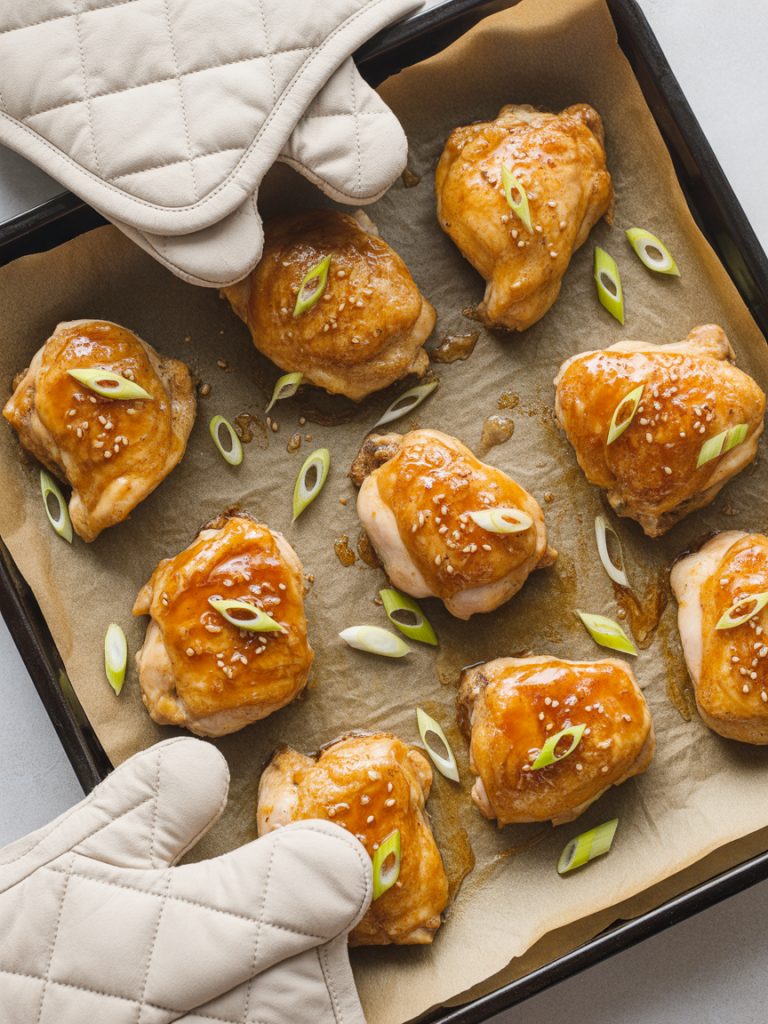
Transfer to a serving platter, spoon any extra sauce from the pan over the top, and garnish with sesame seeds and sliced green onions. Serve hot and watch everyone’s faces light up.
Serving Suggestions
These Oven-Baked Teriyaki Chicken Thighs are versatile and pair beautifully with tons of sides:
Classic steamed rice is always a winner. White rice, brown rice, jasmine rice—they all work. The rice soaks up that extra teriyaki sauce like a dream, and honestly, that’s half the appeal.
Make it a sheet pan dinner. During the last 20 minutes of baking, add broccoli florets, bell pepper chunks, snap peas, or baby bok choy to the same pan. Everything cooks together and gets coated in that teriyaki goodness. One pan, complete meal, minimal dishes. 🙂
Stir-fried vegetables on the side keep things light and colorful. Sauté some mushrooms, zucchini, carrots, and bell peppers with garlic and a splash of soy sauce.
Cauliflower rice if you’re watching carbs. It’s lighter than regular rice but still gives you something to soak up all that delicious sauce.
Asian noodles like udon, soba, or ramen. Toss them with a bit of sesame oil and soy sauce, pile the chicken on top, and you’ve got yourself a legit noodle bowl situation.
A fresh cucumber salad with rice vinegar dressing cuts through the richness perfectly. It’s crisp, refreshing, and balances the sweet-savory chicken beautifully.
Storage Tips
Refrigerator: Store leftover chicken in an airtight container in the fridge for up to 4 days. The sauce will thicken and intensify as it sits, which makes the leftovers even more flavorful, IMO.
Reheating: Warm it up in the microwave for 1-2 minutes, or reheat in a 350°F oven for about 10 minutes. If the sauce seems too thick, add a tiny splash of water or soy sauce to loosen it up.
Freezing: These freeze beautifully! Let the chicken cool completely, then store in freezer-safe containers or bags with the sauce for up to 3 months. The texture holds up great.
Thawing and Reheating from Frozen: Thaw overnight in the fridge, then reheat using the methods above. You can also reheat straight from frozen in a 350°F oven for about 25 minutes, covered with foil.
Meal Prep Tip: I portion these into individual containers with rice and veggies for grab-and-go lunches. Pack everything together and you’ve got a complete, delicious meal ready whenever you need it. They taste just as good on day four as they do fresh.
Final Thoughts
Look, I know oven-baked chicken doesn’t sound revolutionary. But when you pair boneless thighs with this sticky teriyaki glaze and let the oven work its caramelizing magic? That’s when dinner goes from “fine” to “why don’t we make this every week?”
This recipe has become one of my most reliable weeknight dinners because it’s genuinely hard to mess up. The chicken stays juicy, the sauce gets sticky and delicious, and the cleanup is minimal. Those three things together? That’s the holy trinity of practical home cooking.
So preheat that oven, line that pan, and let’s make something that’ll have everyone asking when you’re making it again. Because you will be. Trust me.
Now get cooking!
— Kip
Teriyaki Chicken Thighs Boneless (Oven-Baked Perfection!)
Description
These Oven-Baked Teriyaki Chicken Thighs are the ultimate set-it-and-forget-it dinner. Boneless, skinless chicken thighs bake to juicy perfection while getting coated in a thick, sticky homemade teriyaki glaze. No babysitting the stove, no flipping, just pop them in the oven and let the magic happen.
Ingredients
Chicken:
Teriyaki Sauce:
Garnish:
Instructions
-
Preheat oven to 400°F. Line baking sheet with parchment paper.
-
Pat chicken thighs dry and season both sides with salt and pepper.
-
Whisk together soy sauce, honey, rice vinegar, garlic, ginger, sesame oil, and red pepper flakes. In separate small bowl, mix cornstarch with water until smooth, then add to sauce mixture. Reserve 1/4 cup sauce for later basting.
-
Arrange chicken thighs on prepared baking sheet in single layer. Brush generously with teriyaki sauce.
-
Bake 15 minutes.
-
Flip chicken thighs, brush with reserved sauce, and bake another 12-15 minutes until internal temperature reaches 165°F and sauce is caramelized.
-
Optional: Broil on high for 2-3 minutes for extra caramelization. Watch carefully.
-
Let rest 5 minutes. Garnish with sesame seeds and green onions. Serve hot.
Note
- Use tamari for gluten-free version
- Can substitute ground ginger (1 tsp) for fresh
- Add vegetables to sheet pan during last 20 minutes for complete meal
- Sauce thickens as it cools
- Can use crockpot: cook on low 4-5 hours with sauce, thicken sauce on stovetop before serving
- Don't skip the broiling step for best caramelization
- Line pan with foil for easiest cleanup
