


I have a complicated relationship with baking cookies. I love eating them. I love the smell of them in the oven. What I do not love is the part where you have to scoop individual balls of dough, chill them for an hour, rotate the trays halfway through, and somehow end up with twelve cookies when you needed twenty-four. It always felt like more work than the result deserved.
Then I discovered cookie bars. Same dough, same flavor, same soft and chewy texture — but you press it all into one pan, bake it once, and cut it into however many pieces you need. No chilling, no scooping, no rotating trays. Just one bowl, one pan, and thirty minutes standing between you and a chocolate chip cookie that genuinely delivers.
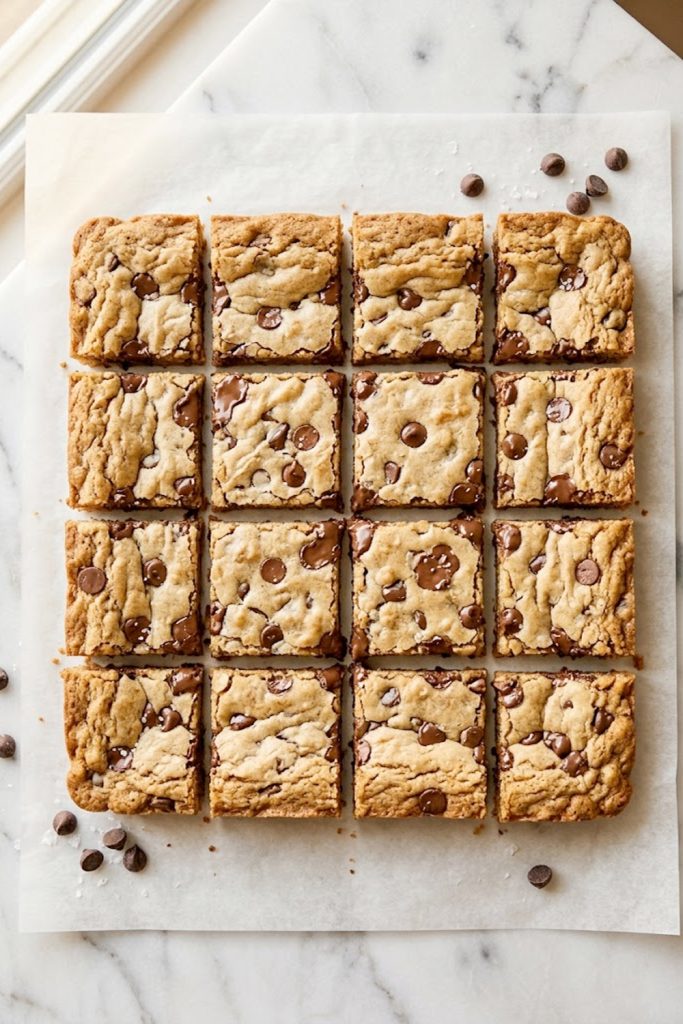
These bars have crispy golden edges, a soft chewy center packed with melted chocolate chips, and that slightly crinkled top that tells you something good just happened in your oven. If you have been sleeping on cookie bars, today is the day that changes.
Why you’ll love this recipe
- No chilling required. This is not a recipe that asks you to wait an hour before you even get to the oven. You mix the dough, press it into the pan, and bake immediately. Instant gratification is fully supported here.
- One bowl, one pan. The entire dough comes together in a single mixing bowl. It goes into one pan. You wash one bowl and one pan. That is the whole cleanup situation and it is very manageable.
- Perfect texture every single time. Crispy golden edges that give way to a soft, chewy, slightly gooey center. Every bar delivers the same result because you are working with one even layer of dough rather than individual cookies that bake differently depending on where they sit on the tray.
- Feeds a crowd. One batch makes 16 to 20 bars depending on how you cut them. Try getting that many consistent cookies out of a standard cookie recipe without spending an hour at the oven. Cookie bars win every time for large batches.
- Completely customizable. Swap the chocolate chips for white chocolate chips, peanut butter chips, or a mix of both. Add a sprinkle of sea salt on top before baking. Press some M&Ms into the surface. This base dough welcomes every variation you throw at it.
- Kids absolutely love making these. The dough is easy to handle, there is no complicated technique, and pressing dough into a pan is genuinely fun for little hands. This is a great first baking project for kids and the results taste like something from a proper bakery.
Ingredients and key notes
For the cookie bars:
- 2 and 1/4 cups all-purpose flour
- 1 teaspoon baking soda
- 1 teaspoon fine sea salt
- 1 cup unsalted butter, melted and slightly cooled
- 3/4 cup granulated white sugar
- 3/4 cup packed light brown sugar
- 2 large eggs, room temperature
- 2 teaspoons pure vanilla extract
- 2 cups semi-sweet chocolate chips, divided
Note: Melted butter is the key to that chewy, dense texture that makes cookie bars different from regular cookies. Creamed butter gives you a lighter, cakier result. Melted butter gives you chew. Do not substitute.
Note: Room temperature eggs matter more than people think. Cold eggs straight from the fridge can cause the melted butter to seize up and solidify, which affects the texture of the final bar. Pull your eggs out 20 minutes before you start.
Note: Brown sugar is what gives these bars their soft, moist texture and that subtle caramel undertone. The combination of brown and white sugar is intentional — white sugar helps the edges crisp up while brown sugar keeps the center soft. Do not swap all of one for the other.
Note: Reserve about a third of the chocolate chips to press into the top of the dough before baking. It means every bar gets visible chocolate chips on the surface, which looks better and gives you chocolate in every single bite.
Note: Semi-sweet chocolate chips are the standard here but dark chocolate chips, milk chocolate chips, or a combination work beautifully. Use whatever chocolate you love most.
Step-by-step instructions
Step 1: Preheat and prep the pan
Preheat your oven to 350°F / 175°C. Line a 9×13 inch baking pan with parchment paper, leaving some overhang on the sides. This overhang is important — it is how you lift the entire slab out of the pan cleanly before cutting. Lightly grease the parchment with butter or cooking spray. Set aside.
Step 2: Whisk the dry ingredients
In a medium bowl, whisk together the flour, baking soda, and salt until combined. Set aside. This takes about 30 seconds and ensures everything is evenly distributed through the dough so you do not end up with a pocket of baking soda in one corner of your bars.
Step 3: Mix the wet ingredients
In a large mixing bowl, whisk the melted butter with both sugars until the mixture is smooth and slightly glossy — about 90 seconds of whisking. Add the eggs one at a time, whisking well after each addition. Add the vanilla extract and whisk until the mixture looks thick, smooth, and slightly pale. This step builds the structure of your bars so do not rush it.
Step 4: Combine wet and dry
Add the flour mixture to the wet ingredients all at once. Switch to a rubber spatula and fold until just combined — stop as soon as you no longer see streaks of flour. Overmixing develops the gluten and makes your bars tough rather than tender. A few small flour streaks are fine — they will sort themselves out in the oven.
Step 5: Fold in the chocolate chips
Fold in about two thirds of the chocolate chips, distributing them evenly through the dough. Reserve the remaining third for the top.
Step 6: Press into the pan and top with chocolate chips
Transfer the dough to the prepared baking pan. Use your hands or the back of a lightly greased spatula to press the dough into an even layer all the way to the corners and edges. Scatter the reserved chocolate chips over the top and press them lightly into the surface so they stay put during baking.
Step 7: Bake
Bake at 350°F / 175°C for 22–25 minutes until the edges are golden brown and the center looks just set — it should not look wet or glossy but it will still look slightly soft. That is exactly right. The bars continue cooking from residual heat after you pull them out of the oven. If you wait until the center looks fully done in the oven, you will overbake them and lose that soft chewy center that makes these worth making.
Step 8: Cool and cut
Let the bars cool in the pan on a wire rack for at least 20 minutes before lifting them out using the parchment overhang. Transfer to a cutting board and cut into bars with a sharp knife. For clean cuts, wipe the knife blade between each cut. Resist eating them straight from the pan for at least those 20 minutes — they need that time to set properly. It is hard. You can do it.
Serving suggestions
- Serve warm with a scoop of vanilla ice cream on top for a dessert that looks like it came off a restaurant menu. The contrast between the warm chewy bar and cold creamy ice cream is genuinely one of the best things in the world.
- Drizzle with melted dark chocolate or a little caramel sauce before serving if you want to take them to the next level for a dinner party or special occasion.
- Sprinkle flaky sea salt over the top right as they come out of the oven for that sweet-salty combination that makes everything taste more sophisticated. This one small step changes the whole experience.
- Cut into smaller bite-sized pieces for a party dessert table or a bake sale — they hold together beautifully and look great stacked on a platter.
- Pack them into lunch boxes as a treat — they travel well, hold their shape, and do not crumble the way individual cookies can.
- Warm individual bars in the microwave for 10–15 seconds before serving for that fresh-out-of-the-oven experience even on day three.
Storage tips
Room temperature: Store cut bars in an airtight container at room temperature for up to 5 days. Place a piece of parchment paper between layers to prevent sticking. They stay soft and chewy throughout — sometimes even better on day two once the flavors have settled.
Refrigerator: These can be refrigerated in an airtight container for up to a week. Bring to room temperature before serving or warm briefly in the microwave. Cold cookie bars straight from the fridge are a bit dense — they are best at room temperature or slightly warm.
Freezer: These freeze exceptionally well for up to 3 months. Wrap individual bars in plastic wrap and store in a freezer-safe bag or container. Thaw at room temperature for about an hour or warm in the microwave for 20–30 seconds straight from frozen. Having a stash of these in the freezer is one of the better decisions you can make.
Make-ahead tip: You can make the dough, press it into the lined pan, cover it tightly with plastic wrap, and refrigerate for up to 24 hours before baking. Pull it out of the fridge 20 minutes before you want to bake and proceed with the recipe as normal. Great for prepping ahead of a gathering.
Let’s wrap this up
Some recipes make you work for the result. This is not one of them. These cookie bars are the definition of low effort, high reward — the kind of bake that makes people think you have some special skill in the kitchen when really you just melted some butter, mixed a bowl of dough, and let the oven do its thing.
That is the kind of baking I want to share here at Recipes by Kip. Nothing that requires a stand mixer, a pastry degree, or three hours on a Sunday. Just honest, delicious food made simply and eaten joyfully.
Bake these. Share them. Watch them disappear. And if you manage to get them to room temperature before eating one straight from the pan — genuinely impressive. I have never managed it myself.
Until next time — keep it simple, keep it delicious.
With love, Kip.
Soft and chewy chocolate chip cookie bars — one pan, no chilling, done in 30 minutes
Description
These soft and chewy chocolate chip cookie bars give you everything you love about a classic chocolate chip cookie — golden edges, gooey chocolate pockets, that perfect slightly underbaked center — without the fuss of rolling individual cookies. Made in one bowl, pressed into one pan, and ready in 30 minutes flat. They cut into clean bars, store beautifully, and disappear embarrassingly fast at any gathering.
Ingredients
Instructions
-
Preheat oven to 350°F / 175°C. Line a 9x13 inch pan with parchment paper and lightly grease.
-
Whisk flour, baking soda, and salt together in a medium bowl. Set aside.
-
Whisk melted butter with both sugars until smooth and glossy. Add eggs one at a time, then vanilla. Whisk until thick and slightly pale.
-
Fold the flour mixture into the wet ingredients until just combined. Do not overmix.
-
Fold in two thirds of the chocolate chips.
-
Press dough evenly into the prepared pan. Scatter remaining chocolate chips on top and press lightly into the surface.
-
Bake for 22–25 minutes until edges are golden and center is just set but still looks slightly soft.
-
Cool in the pan for 20 minutes. Lift out using the parchment overhang, transfer to a cutting board, and cut into bars.