

Here is something nobody tells you when you go keto — the hardest part is not the meals. You figure out the meals. The hard part is the moments when everyone around you is eating cookies and you are standing there pretending you do not want one. Those moments are genuinely rough, and any keto dessert that actually solves that problem is worth its weight in gold.
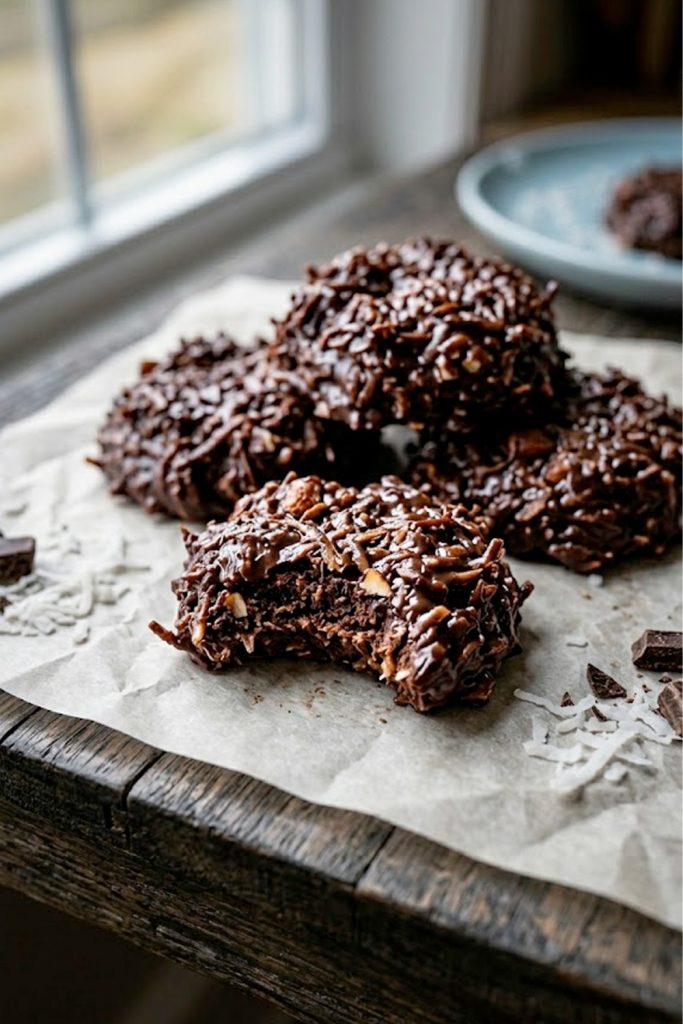
These keto no-bake cookies solve that problem completely. They are rich, chewy, deeply chocolatey, and have that satisfying coconut texture that makes them feel like a proper treat rather than a consolation prize.
I made a batch the first time mostly out of desperation on a Sunday afternoon when my sweet tooth was winning the argument, and I have been making them on repeat ever since. My non-keto family members eat them just as enthusiastically as I do, which tells you everything you need to know.
The best part is how little effort these require. You melt a few things together on the stovetop, stir in the coconut, scoop onto parchment, and wait 20 minutes for them to set.
That is the whole recipe. No oven preheating, no dough chilling, no complicated techniques. Just a pot, a spoon, and a little patience while they firm up. Sound too good to be true? It is not — and you are about to find out for yourself.
Why you’ll love this recipe
- They are legitimately keto friendly. No hidden sugars, no sneaky high-carb ingredients. Just clean, low carb components that keep you firmly in ketosis while still tasting like a real dessert.
- Zero oven time required. Everything happens on the stovetop in one pot. Perfect for warm days when turning on the oven feels like a personal attack.
- The texture is incredible. Chewy toasted coconut coated in rich chocolate — it is satisfying in a way that most keto desserts honestly are not. These actually feel like cookies.
- They come together in 30 minutes start to finish. Ten minutes of active work and twenty minutes of setting time. Faster than driving to a store and significantly more rewarding.
- Nobody will know they are keto. This is not a backhanded compliment — it is the highest praise a low carb recipe can receive. These taste like something you would find at a bake sale, not a health food store.
- They freeze beautifully. Make a big batch and keep them in the freezer for whenever a craving hits. Having a stash of these on hand is genuinely life changing when you are eating low carb.
Ingredients and key notes
For the cookies:
- 2 cups unsweetened shredded coconut
- 1/2 cup sugar-free chocolate chips (such as Lily’s or ChocZero)
- 1/4 cup unsalted butter (or coconut oil for dairy free)
- 1/4 cup powdered erythritol or monk fruit sweetener
- 3 tablespoons unsweetened cocoa powder
- 2 tablespoons heavy cream (or full fat coconut cream for dairy free)
- 1 teaspoon vanilla extract
- Pinch of salt
Key notes:
- Unsweetened shredded coconut — Make sure you are buying unsweetened coconut, not sweetened. Sweetened coconut adds unnecessary carbs and makes the cookies far too sweet. The unsweetened variety gives you that chewy, slightly toasty texture that makes these cookies so satisfying. Fine shredded works best here — desiccated coconut can be too dry.
- Sugar-free chocolate chips — Lily’s and ChocZero are the two most reliable brands for keto baking. They melt smoothly and taste genuinely good without any bitter aftertaste. Avoid generic sugar-free chocolate chips as the quality varies wildly and some leave an unpleasant cooling sensation from the sugar alcohols.
- Erythritol or monk fruit sweetener — Use powdered rather than granulated for a smoother texture in the finished cookie. Granulated erythritol can leave a slightly gritty texture that is noticeable once the cookies set. If you only have granulated, pulse it in a blender for 30 seconds to make your own powdered version.
- Cocoa powder — Use unsweetened natural cocoa powder for the deepest chocolate flavor. Dutch-processed cocoa also works and gives a slightly smoother, less acidic chocolate note. Either is fine — just make sure it is unsweetened.
- Butter vs coconut oil — Butter gives a richer flavor and a slightly firmer set. Coconut oil makes the recipe dairy free and adds a subtle coconut flavor that works beautifully with the shredded coconut. Both produce excellent results — choose based on your dietary needs.
- Heavy cream — This adds richness and helps the chocolate sauce come together smoothly. Full fat coconut cream is a perfect dairy free substitute and adds a natural sweetness that complements the chocolate really well.
Step-by-step instructions
Step 1: Toast the coconut (optional but recommended)
Spread the shredded coconut in a dry skillet over medium heat and stir constantly for 3 to 4 minutes until it turns light golden and fragrant. Watch it carefully — coconut goes from perfectly toasted to burnt very quickly. Remove from heat immediately and set aside. This step is technically optional but toasting the coconut adds a depth of flavor that takes these cookies from good to genuinely great.
Step 2: Melt the chocolate base
In a medium saucepan over medium-low heat, combine the sugar-free chocolate chips, butter, powdered sweetener, cocoa powder, and heavy cream. Stir continuously until everything melts together into a smooth, glossy chocolate sauce. Do not rush this step by turning the heat up — low and slow prevents the chocolate from scorching and gives you a silky smooth base. Remove from heat as soon as everything is fully melted and combined.
Step 3: Add the vanilla and coconut
Stir the vanilla extract and pinch of salt into the chocolate mixture. Then add the toasted shredded coconut and stir until every strand is fully coated in the chocolate mixture. The mixture should look thick, glossy, and well combined with no dry coconut visible. If the mixture seems too loose, let it sit for 2 minutes to thicken slightly before scooping.
Step 4: Scoop onto parchment
Line a baking sheet or large plate with parchment paper. Working quickly before the mixture cools and stiffens, scoop heaping tablespoon-sized portions of the mixture onto the parchment paper. Use the back of the spoon or your fingers to gently shape each mound into a round cookie shape. Space them about an inch apart — they will not spread, but you want air circulation around each one to help them set evenly.
Step 5: Set and serve
Let the cookies set at room temperature for 20 minutes, or speed up the process by placing the tray in the refrigerator for 10 minutes. They are ready when they feel firm and hold their shape cleanly when lifted from the parchment. Once set, transfer to a plate and serve immediately or store for later.
Serving suggestions
- Serve these straight from the fridge on a clean white plate — they look genuinely impressive for something that took almost no effort to make.
- Pair with a cup of unsweetened black coffee or bulletproof coffee for the ultimate keto afternoon treat. The bitterness of the coffee against the sweetness of the cookies is a combination that works remarkably well.
- Crumble one or two over a bowl of full fat Greek yogurt for a keto-friendly dessert parfait that feels far more indulgent than it actually is.
- Serve alongside a small scoop of keto vanilla ice cream for a proper dessert moment that satisfies even the most serious sweet tooth.
- Pack two into a small container for an on-the-go snack that travels well and keeps you on track when you are away from home and temptation is everywhere.
Storage tips
Refrigerator: Store the cookies in an airtight container in the fridge for up to 10 days. They firm up even more when cold, which gives them an almost fudge-like texture that is honestly better than at room temperature. Layer them between sheets of parchment paper to prevent sticking.
Freezer: These cookies freeze exceptionally well — arguably better than most keto desserts. Freeze them in a single layer on a parchment-lined tray until solid, then transfer to a freezer-safe bag or container. They keep for up to 3 months. Eat them straight from frozen for a cold fudgy treat or thaw for 10 minutes at room temperature first.
Room temperature: They can sit at room temperature for up to 2 hours without any issues. Beyond that, the butter or coconut oil base can start to soften and the cookies may lose their shape, especially in a warm kitchen. Fridge storage is always the better call.
Make ahead: This recipe is ideal for batch cooking. Double or triple the recipe and freeze in portions so you always have a keto-friendly treat on hand. Having these in the freezer has saved more than a few moments of low carb desperation in my house.
Final Closing
These keto no-bake cookies have genuinely changed the way I handle sweet cravings on a low carb diet. Having a batch of these in the fridge means I am never caught off guard by a craving, never tempted to reach for something that will set me back, and never stuck pretending I do not want dessert when everyone else is having it.
If you make these, drop a comment below and let me know how it went. Did you toast the coconut? Did you add almond butter or sea salt on top? Did you eat half the batch before they even finished setting? No judgment here — these things happen to the best of us.
Happy cooking, friends. — Kip
Keto no-bake cookies — the chocolate coconut treat you can actually eat on a low carb diet
Description
These keto no-bake cookies deliver everything you love about a classic chocolate coconut cookie — the rich chocolate flavor, the chewy toasted coconut texture, the satisfying sweetness — without a gram of refined sugar or a single minute of oven time. They come together fast, set up beautifully, and taste so good that nobody at the table will ever guess they are keto. Whether you are deep into a low carb lifestyle or just looking for a lighter dessert option, these cookies belong in your regular rotation.
Ingredients
Instructions
-
Toast the shredded coconut in a dry skillet over medium heat for 3 to 4 minutes until light golden and fragrant. Set aside.
-
In a medium saucepan over medium-low heat, melt together the chocolate chips, butter, sweetener, cocoa powder, and heavy cream. Stir continuously until smooth and glossy. Remove from heat.
-
Stir in vanilla extract and salt. Add the toasted coconut and stir until every strand is fully coated.
-
Scoop heaping tablespoon portions onto a parchment-lined tray and shape into rounds.
-
Let set at room temperature for 20 minutes or refrigerate for 10 minutes until firm. Serve and enjoy.
