
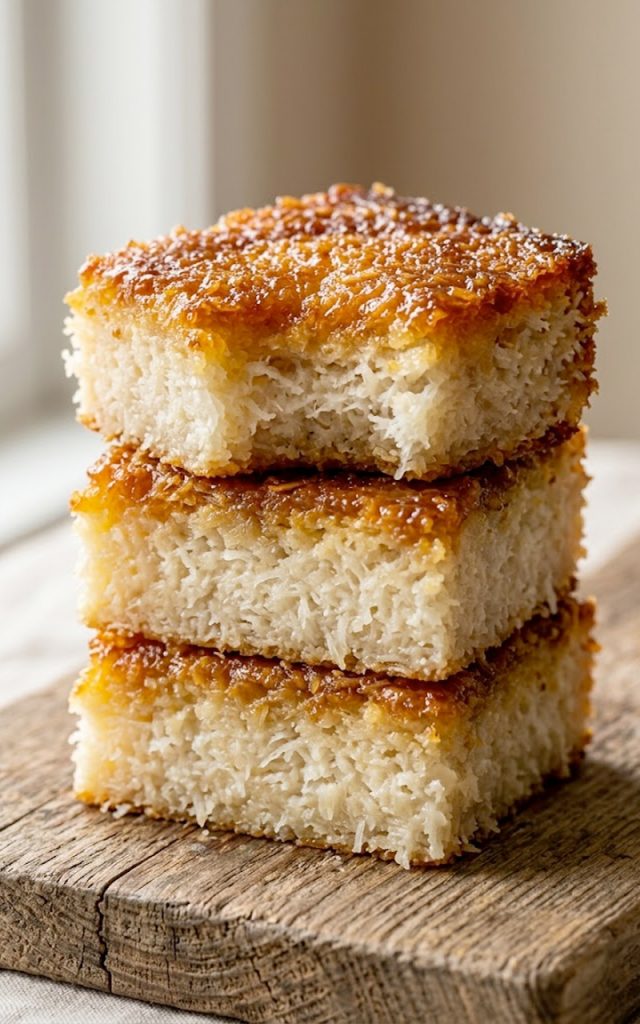

You know those recipes that look way more impressive than the effort they actually require? This sticky coconut cake is exactly that. Three layers of pure coconut goodness — dense, chewy, golden on top — and the whole thing comes together in under an hour with ingredients you probably already have sitting in your pantry.
I first made this on a lazy Sunday afternoon when I wanted something sweet but couldn’t be bothered with anything complicated. One bowl, a few simple ingredients, and about 45 minutes in the oven later — I had something that tasted like it came straight from a tropical bakery. My family devoured it before it even had a chance to fully cool down.
If you love coconut — and I mean really love coconut — this cake is going to be your new obsession. Fair warning though: making a single batch might be a mistake. You’ll wish you had more.
Why you’ll love this recipe
- One bowl, minimal cleanup — this recipe is as simple as it gets
- That golden caramelized top is everything — crispy on the outside, chewy inside
- Made with pantry staples you already have at home
- Naturally gluten free adaptable with a simple flour swap
- It’s a crowd pleaser — kids and adults both go absolutely wild for it
- Works as a dessert, a snack, or honestly even a breakfast treat
Ingredients
For the cake:
- 2 cups desiccated coconut (unsweetened works best — sweetened makes it overly sweet)
- 1 cup coconut milk (full fat, from a can — not the carton kind)
- 3/4 cup granulated sugar
- 3 large eggs
- 1/4 cup butter, melted (unsalted)
- 1 teaspoon vanilla extract
- 1/2 cup all-purpose flour (or rice flour for a gluten free version)
- 1 teaspoon baking powder
- A pinch of salt
For the golden top layer:
- 2 egg yolks
- 3 tablespoons coconut milk
- 2 tablespoons sugar
Key ingredient notes:
- Desiccated coconut vs shredded coconut: Desiccated coconut is finer and drier, which gives this cake its signature dense and chewy texture. Shredded coconut has more moisture and will change the texture slightly — still works, but desiccated is the way to go.
- Full fat coconut milk: This is non-negotiable. Low fat coconut milk doesn’t have enough richness to carry the flavor of this cake. Always go full fat.
- The egg yolk topping: This is what gives the cake that gorgeous golden caramelized top you see in the photos. Don’t skip it — it’s the best part.
- Rice flour swap: If you want to make this gluten free, swap the all-purpose flour for rice flour 1:1. The texture actually gets even chewier, which a lot of people prefer.
Step-by-step instructions
Step 1: Preheat and prep your pan
Preheat your oven to 350 degrees F (175 degrees C). Grease an 8×8 inch baking pan with butter or cooking spray and line it with parchment paper. Leave a little overhang on the sides — this makes it so much easier to lift the cake out cleanly once it’s done.
Step 2: Mix the batter
In a large mixing bowl, combine the desiccated coconut, sugar, flour, baking powder, and salt. Give it a quick stir to combine. Add the eggs, melted butter, coconut milk, and vanilla extract. Mix everything together until you have a thick, well-combined batter. It will look dense — that’s exactly what you want.
Step 3: Pour and spread
Pour the batter into your prepared pan and spread it out evenly with a spatula. Make sure it reaches all the corners and sits level. The batter is thick so take a moment to really smooth it out.
Step 4: Make the golden top layer
In a small bowl, whisk together the egg yolks, coconut milk, and sugar until smooth and slightly pale. Pour this mixture evenly over the top of the batter. This layer is going to bake into that beautiful golden caramelized crust that makes this cake so iconic.
Step 5: Bake
Place the pan in the preheated oven and bake for 40-45 minutes. The top should be deeply golden — almost amber — and the edges should be pulling away slightly from the sides of the pan. A toothpick inserted in the center should come out clean or with just a few moist crumbs.
Step 6: Cool and slice
Here is the hard part — you need to let this cake cool completely before slicing. I know. It smells incredible and the wait feels impossible, but cutting it too early means the inside won’t hold together properly. Give it at least 30 minutes to cool in the pan before lifting it out and slicing into squares.
Serving suggestions
- Serve at room temperature for the best chewy texture — straight from the fridge makes it a little too firm
- Dust lightly with powdered sugar for a simple and elegant presentation
- Pair with a scoop of vanilla ice cream for a warm dessert moment that honestly slaps
- Serve alongside fresh tropical fruits like mango or pineapple to lean into the coconut flavor
- A cup of hot tea or coffee alongside a slice of this is a genuinely great afternoon snack situation
- Cut into smaller bite-sized squares and serve on a platter for a party or gathering — they disappear fast
Storage tips
Room temperature: Store in an airtight container at room temperature for up to 2 days. The texture stays chewy and perfect during this window.
Refrigerator: Store in an airtight container in the fridge for up to 5 days. Before eating, let it come to room temperature for about 15 minutes or give it a quick 10-second warm in the microwave to bring back that soft chewy texture.
Freezer: This cake freezes really well. Slice it into individual squares, wrap each piece in plastic wrap, and store in a freezer-safe bag for up to 2 months. Thaw at room temperature for a couple of hours before serving.
Closing
Simple ingredients, minimal effort, maximum reward — that’s what this sticky coconut cake is all about. It’s the kind of recipe that makes people think you worked a lot harder than you actually did, and honestly, you don’t have to correct them.
Make it once and you’ll understand why it’s already earned a permanent spot in my recipe rotation. Drop a comment below and let me know how yours turned out — and if you managed to wait for it to cool before slicing, you’re a stronger person than I am.
Happy baking. — Kip
Sticky Coconut Cake (Easy, Chewy & Absolutely Irresistible)
Description
A golden-topped, chewy coconut cake made with simple pantry staples that delivers big tropical flavor without any of the fuss. This is the kind of dessert that disappears fast — so you might want to make two.
Ingredients
For the cake:
For the golden top layer:
Instructions
-
Preheat oven to 350 degrees F. Grease and line an 8x8 inch baking pan with parchment paper.
-
In a large bowl, combine coconut, sugar, flour, baking powder, and salt.
-
Add eggs, melted butter, coconut milk, and vanilla. Mix until a thick batter forms.
-
Pour batter into prepared pan and spread evenly.
-
Whisk together egg yolks, coconut milk, and sugar. Pour evenly over the batter.
-
Bake for 40-45 minutes until the top is deeply golden and a toothpick comes out clean.
-
Cool completely in the pan before slicing into squares.
