

Let’s be real for a second. Every time someone says “healthy brownies,” a little part of you dies inside. You’ve been down that road before — dry, chalky, somehow both tasteless and bitter at the same time. You take one bite, smile politely, and then spend the rest of the evening thinking about real brownies.
These are not those brownies. These zero sugar brownies with Greek yogurt are genuinely fudgy, deeply chocolatey, and moist in all the right ways. The Greek yogurt does the heavy lifting here — it adds moisture, a little protein, and a subtle tang that actually makes the chocolate flavor pop even more.
I tested these on my family without telling them what was in them. They went back for seconds. That’s all the review I need — and all the review you should need too.
Why you’ll love this recipe
- No sugar, no guilt. These brownies use a sugar substitute instead of refined sugar, which means you get all the sweetness without the crash that follows a regular brownie binge.
- Greek yogurt is the secret weapon. It replaces a lot of the fat you’d normally get from butter or oil, keeping the brownies moist and adding a protein boost in the process.
- One bowl, minimal cleanup. Everything comes together in a single mixing bowl. Less mess, less stress — you’re welcome.
- Ready in 40 minutes. From pulling out the mixing bowl to cutting the first square, you’re looking at under 40 minutes total. That’s faster than most dessert cravings last.
- Kid-approved. Even picky eaters love these. The word “healthy” never has to leave your mouth.
- Customizable. Add sugar-free chocolate chips, a pinch of espresso powder, or a swirl of peanut butter on top. The base recipe is a canvas — make it yours.
Ingredients with key notes
- 1/2 cup plain Greek yogurt — Full-fat Greek yogurt gives you the best texture and moisture. Low-fat works too, but the brownies may be slightly less fudgy. Avoid flavored yogurt — vanilla or strawberry brownies sound fun until they’re not.
- 2 large eggs — Room temperature eggs blend more evenly into the batter. Pull them out of the fridge about 15 minutes before you start.
- 1/3 cup unsweetened cocoa powder — Go for a good quality cocoa powder here. This is your primary chocolate flavor, so it matters. Dutch-processed cocoa gives a richer, darker result if you can find it.
- 1/2 cup sugar substitute — Erythritol, monk fruit sweetener, or a blend like Swerve all work well here. Use whatever you’re most comfortable with. Just make sure it measures 1:1 like sugar.
- 1/4 cup almond flour or all-purpose flour — Almond flour keeps it lower carb and gluten free. All-purpose flour works fine if you don’t have dietary restrictions. Either way, don’t overmeasure — spoon it into the measuring cup and level it off.
- 1/4 cup sugar-free chocolate chips — Optional but highly recommended. They melt into little pockets of chocolate throughout the brownie and make every bite feel indulgent.
- 1 teaspoon vanilla extract — Don’t skip this. Vanilla rounds out the chocolate flavor and adds depth.
- 1/2 teaspoon baking powder — Just enough to give the brownies a little lift without making them cakey.
- 1/4 teaspoon salt — Salt in brownies is non-negotiable. It balances the sweetness and intensifies the chocolate. Trust the process.
Step-by-step instructions
Step 1: Preheat your oven Set your oven to 350°F (175°C). Grease an 8×8 inch baking pan or line it with parchment paper, leaving a little overhang on the sides so you can lift the brownies out cleanly later. Future you will appreciate that detail.
Step 2: Mix the wet ingredients In a large mixing bowl, whisk together the Greek yogurt, eggs, and vanilla extract until smooth and well combined. This should take about a minute — you want everything fully incorporated before adding the dry ingredients.
Step 3: Add the dry ingredients Add the cocoa powder, sugar substitute, flour, baking powder, and salt directly into the bowl with the wet ingredients. Stir everything together until just combined. Do not overmix — overmixing develops the gluten (or in the case of almond flour, toughens the texture) and leads to dense, tough brownies. A few streaks are fine; they’ll sort themselves out in the oven.
Step 4: Fold in the chocolate chips If you’re using sugar-free chocolate chips, fold them in now with a spatula. Reserve a small handful to scatter on top of the batter before baking. Because chocolate on top of chocolate is always the right call.
Step 5: Pour and spread Pour the batter into your prepared baking pan and spread it out evenly with a spatula. The batter will be thick — that’s exactly what you want. Thin, runny brownie batter is a red flag. Thick batter means fudgy brownies.
Step 6: Bake Bake at 350°F for 25–30 minutes. Start checking at the 25-minute mark. You’re looking for set edges with a center that still has a very slight jiggle when you gently shake the pan. A toothpick inserted in the center should come out with a few moist crumbs — not wet batter, but not completely clean either. Clean toothpick equals overbaked brownies, and nobody wants that.
Step 7: Cool completely before cutting This is the hardest part — let the brownies cool in the pan for at least 20 minutes before cutting. I know. It’s painful. But cutting into them too early means they’ll fall apart because they haven’t finished setting up. Patience is the final ingredient in every great brownie recipe.
Serving suggestions
These brownies are incredibly versatile when it comes to serving. Here are a few ideas:
- Straight from the pan — Cut into squares and serve as-is. Sometimes simple is perfect.
- With a dollop of Greek yogurt on top — A little ironic, but a spoonful of vanilla Greek yogurt on the side adds a creamy contrast that works really well.
- Warmed up with sugar-free ice cream — Pop a brownie square in the microwave for 15 seconds and serve it under a scoop of your favorite sugar-free vanilla ice cream. You’re welcome.
- Dusted with cocoa powder — A light dusting of unsweetened cocoa powder on top makes these look like they came from a bakery. Minimal effort, maximum impression.
- As a post-workout treat — With the Greek yogurt and eggs, these actually have a decent protein profile. Pair with a protein shake and call it a recovery meal. :/
- Cut into mini squares for kids — Smaller portions make these a great lunchbox treat or after-school snack that you can feel good about.
Storage tips
- Room temperature: Store in an airtight container at room temperature for up to 2 days. Keep them in a single layer or separate layers with parchment paper between them so they don’t stick together.
- Refrigerator: These actually taste even better cold from the fridge — the texture gets slightly denser and more fudge-like. Store in an airtight container for up to 5 days.
- Freezer: These freeze beautifully. Wrap individual squares in plastic wrap, place them in a zip-lock freezer bag, and freeze for up to 2 months. Thaw at room temperature for about 30 minutes or microwave for 20–30 seconds when the craving hits.
- Meal prep tip: Bake a batch on Sunday and you’ve got a healthy dessert or snack ready for the entire week. These are genuinely one of the best things you can have in your fridge on a busy weekday.
A quick closing thought
Healthy desserts get a bad reputation — and honestly, most of the time it’s deserved. But these zero sugar brownies with Greek yogurt are genuinely different. They’re the kind of recipe that makes you feel like you found a loophole in the system — rich, fudgy, chocolatey, and made with ingredients you can actually feel good about.
Make a batch this week, share them with someone you care about, and watch their face when you tell them there’s no sugar in there. That reaction never gets old.
Drop a comment below and let me know how yours turned out. And as always — tag me on Pinterest or Instagram so I can see your creation. Let’s keep making good food together.
With gratitude, Kip
Zero Sugar Brownies with Greek Yogurt (Fudgy, Guilt-Free, and Dangerously Good)
Description
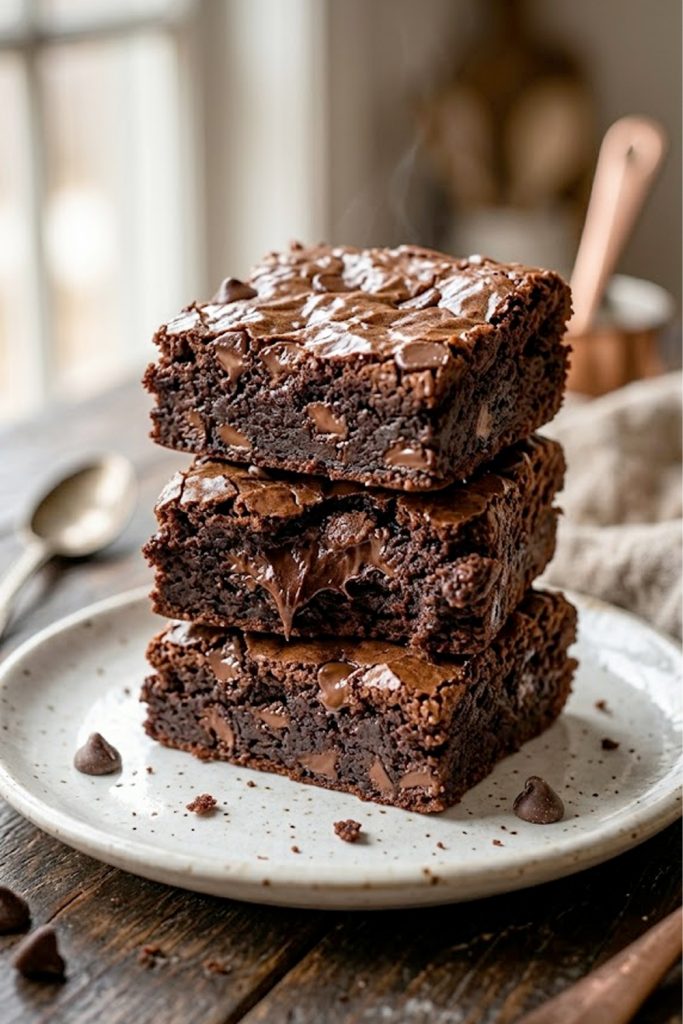
These zero sugar brownies with Greek yogurt are everything you love about a classic brownie — deep chocolate flavor, fudgy center, slightly crinkly top — without the sugar crash that follows. Greek yogurt keeps them moist, a good sugar substitute handles the sweetness, and honestly? You'd never guess they're guilt-free.
Ingredients
Instructions
-
Preheat oven to 350°F (175°C). Grease or line an 8x8 inch baking pan with parchment paper.
-
Whisk together Greek yogurt, eggs, and vanilla extract in a large bowl until smooth.
-
Add cocoa powder, sugar substitute, flour, baking powder, and salt. Stir until just combined — do not overmix.
-
Fold in sugar-free chocolate chips, reserving a small handful for the top.
-
Pour batter into prepared pan, spread evenly, and scatter reserved chocolate chips on top.
-
Bake for 25–30 minutes until edges are set and a toothpick comes out with moist crumbs.
-
Cool in the pan for at least 20 minutes before cutting and serving.
